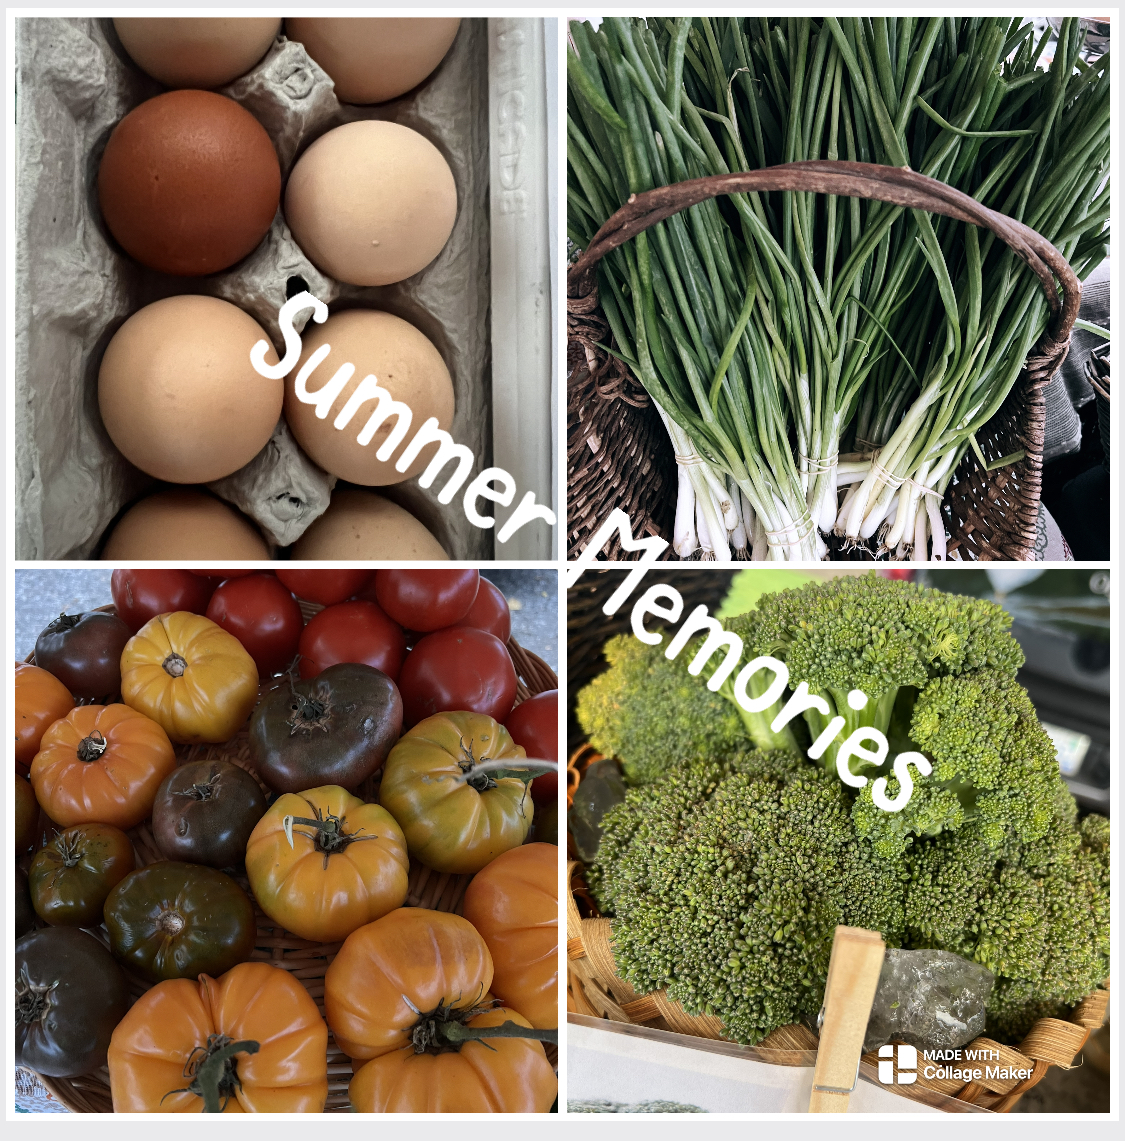
If you are looking for some great gardening, cooking, & organizational content, then check out my Instagram Page! Be sure to Follow me so you don’t miss a beat!

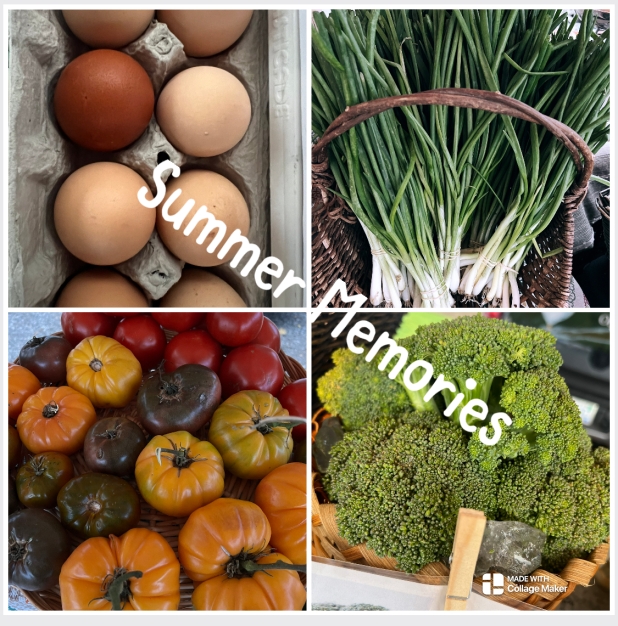
If you are looking for some great gardening, cooking, & organizational content, then check out my Instagram Page! Be sure to Follow me so you don’t miss a beat!
“Cooking is one of the greatest gifts you can give to those you love.” – Ina Garten

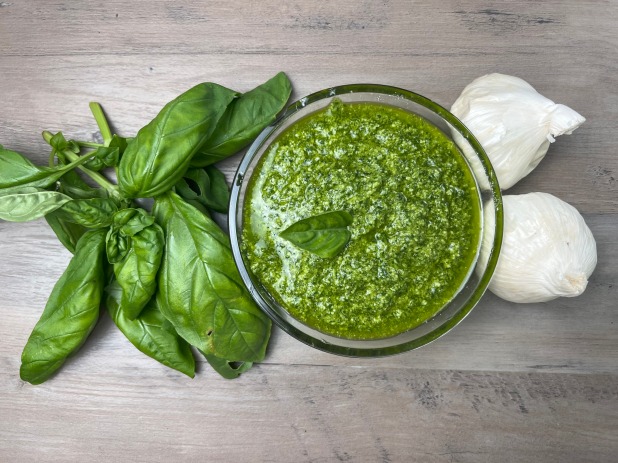
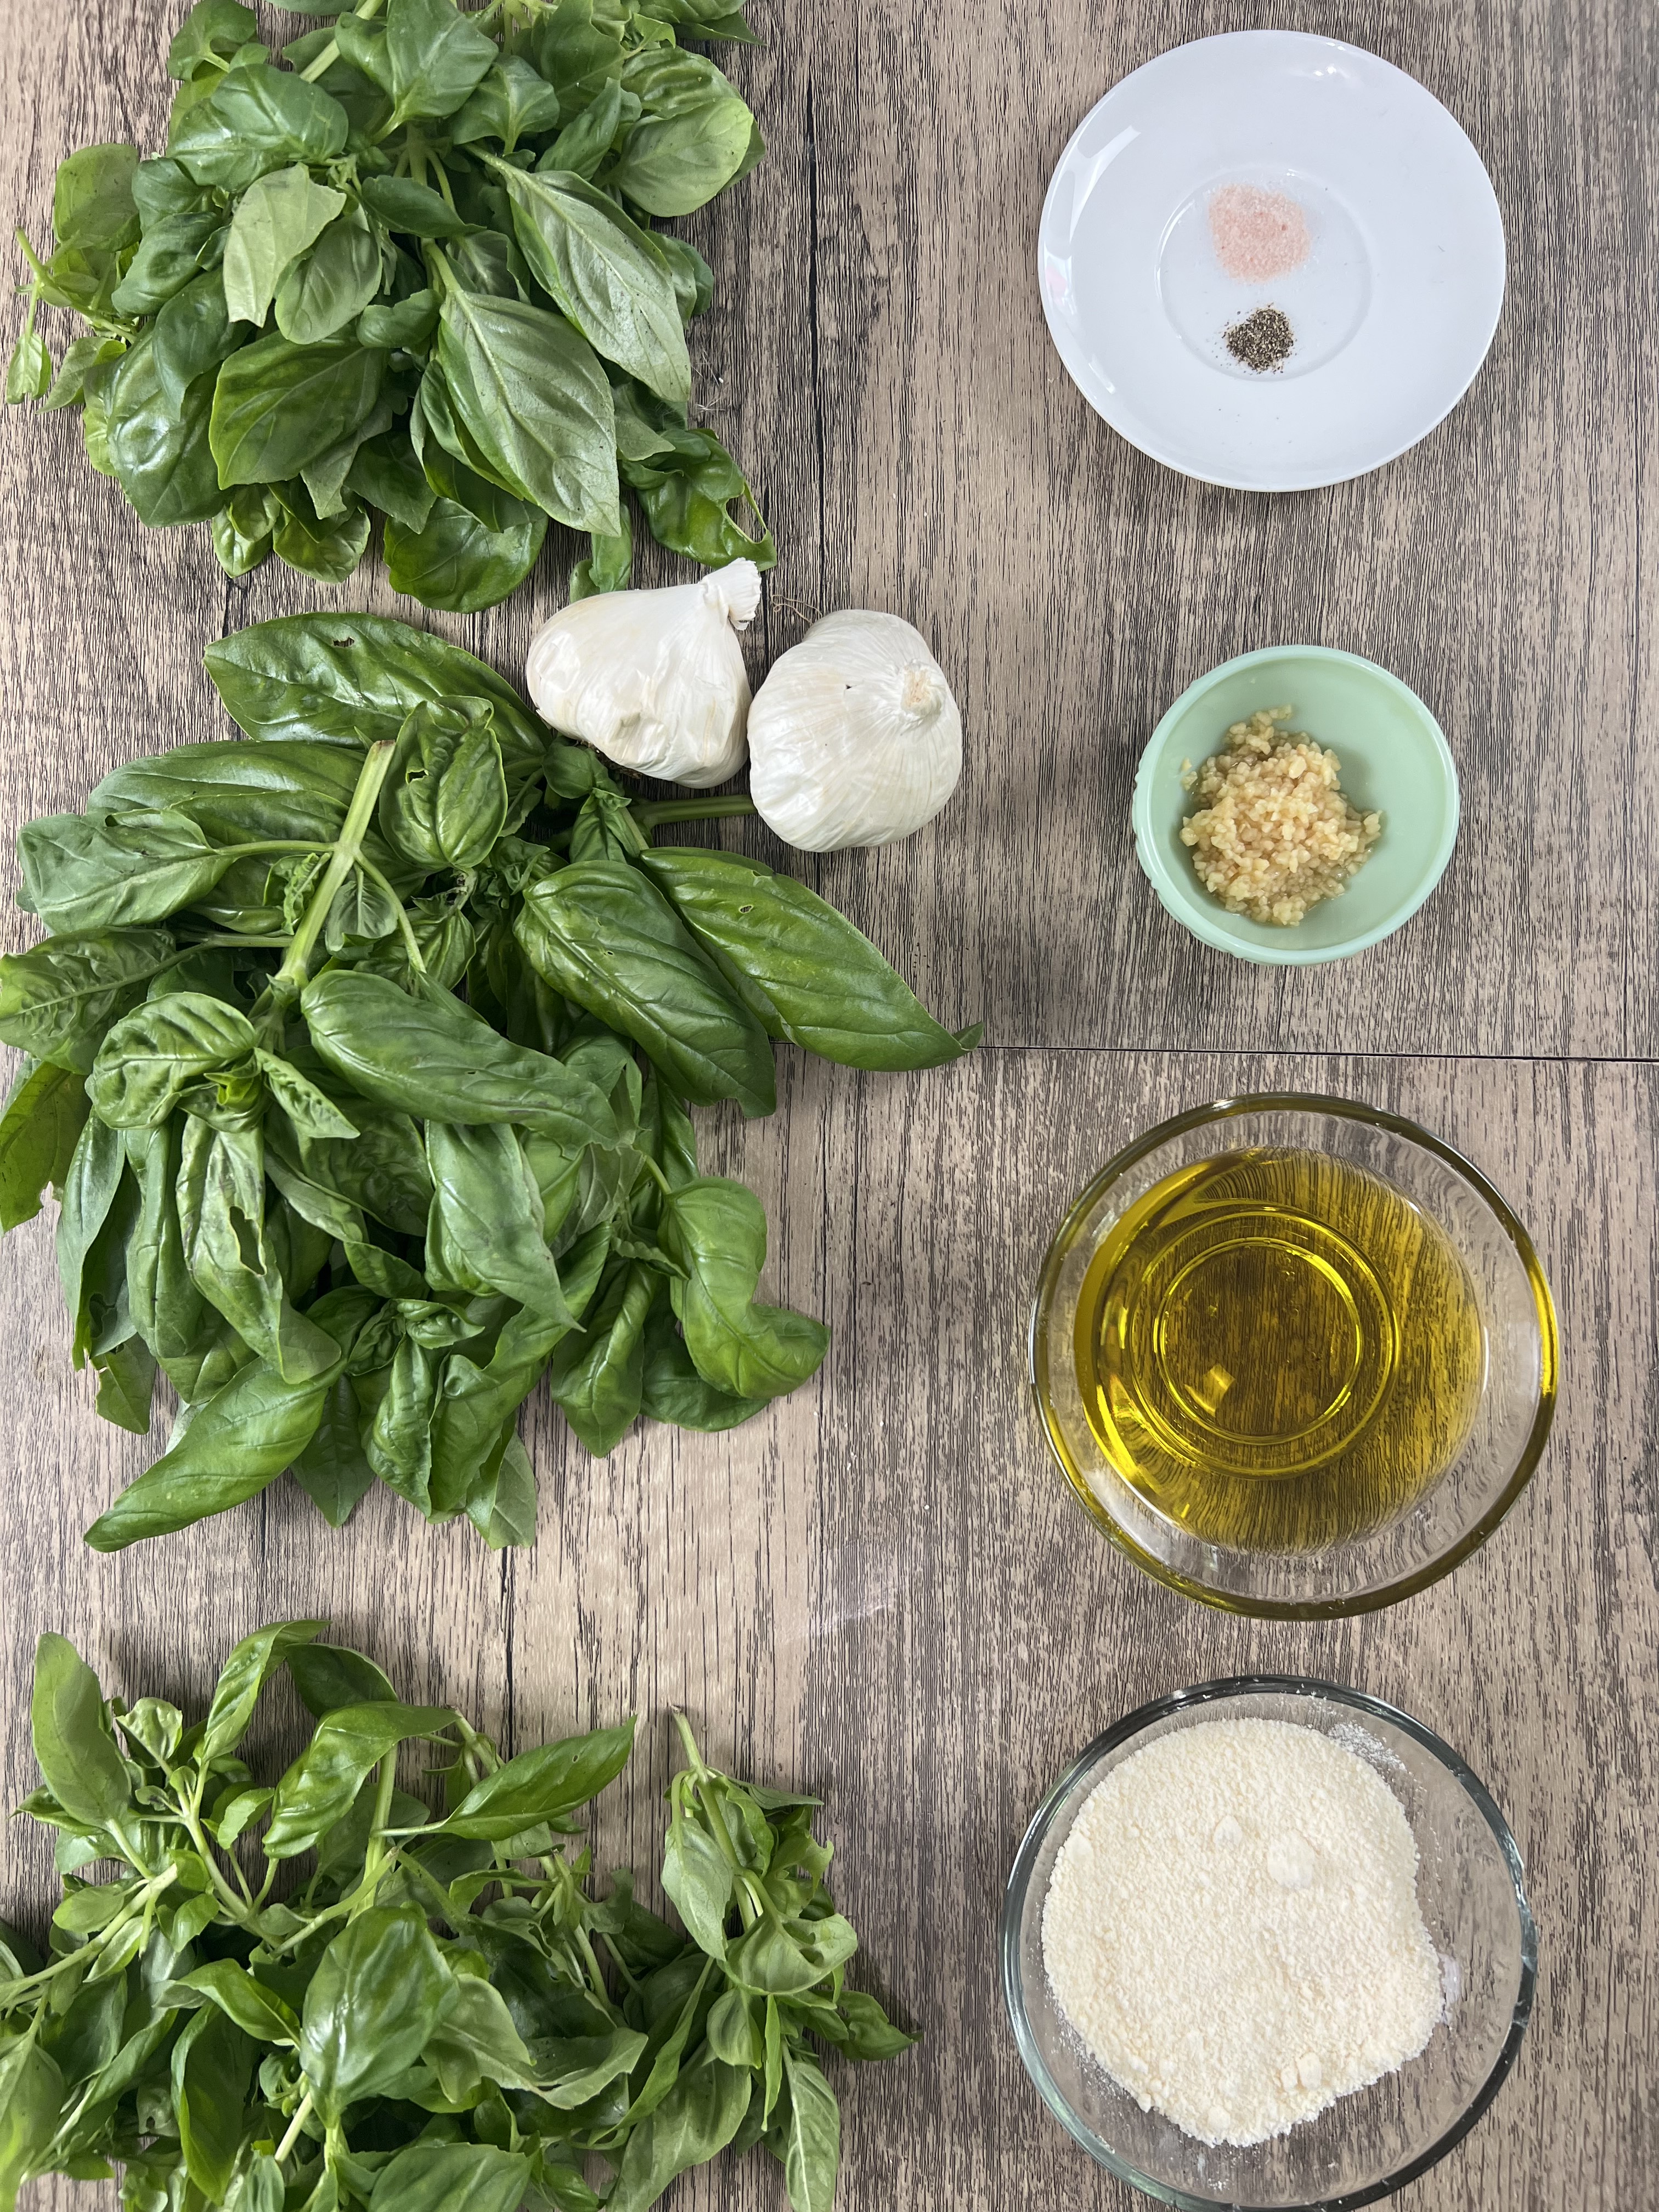
Pesto is one of our family favorites! Fresh basil from the garden is one of summer’s more wonderful gifts! Here is a very simple recipe for my homemade pesto without pine nuts!
Check out my YouTube Video on how and scroll down to see the complete list of ingredients and directions with a few additional Pro Tips!
To see more homemade pesto recipes check them out below!
Yields: 1 cup finished product
2 cups packed fresh basil leaves, with stems removed
½ cup extra virgin olive oil
½ cup grated parmesan cheese
3 to 5 fresh garlic cloves with outer skin and root end removed or 3 to 5 tsp minced
¼ tsp pink Himalayan salt
¼ tsp fresh ground black pepper
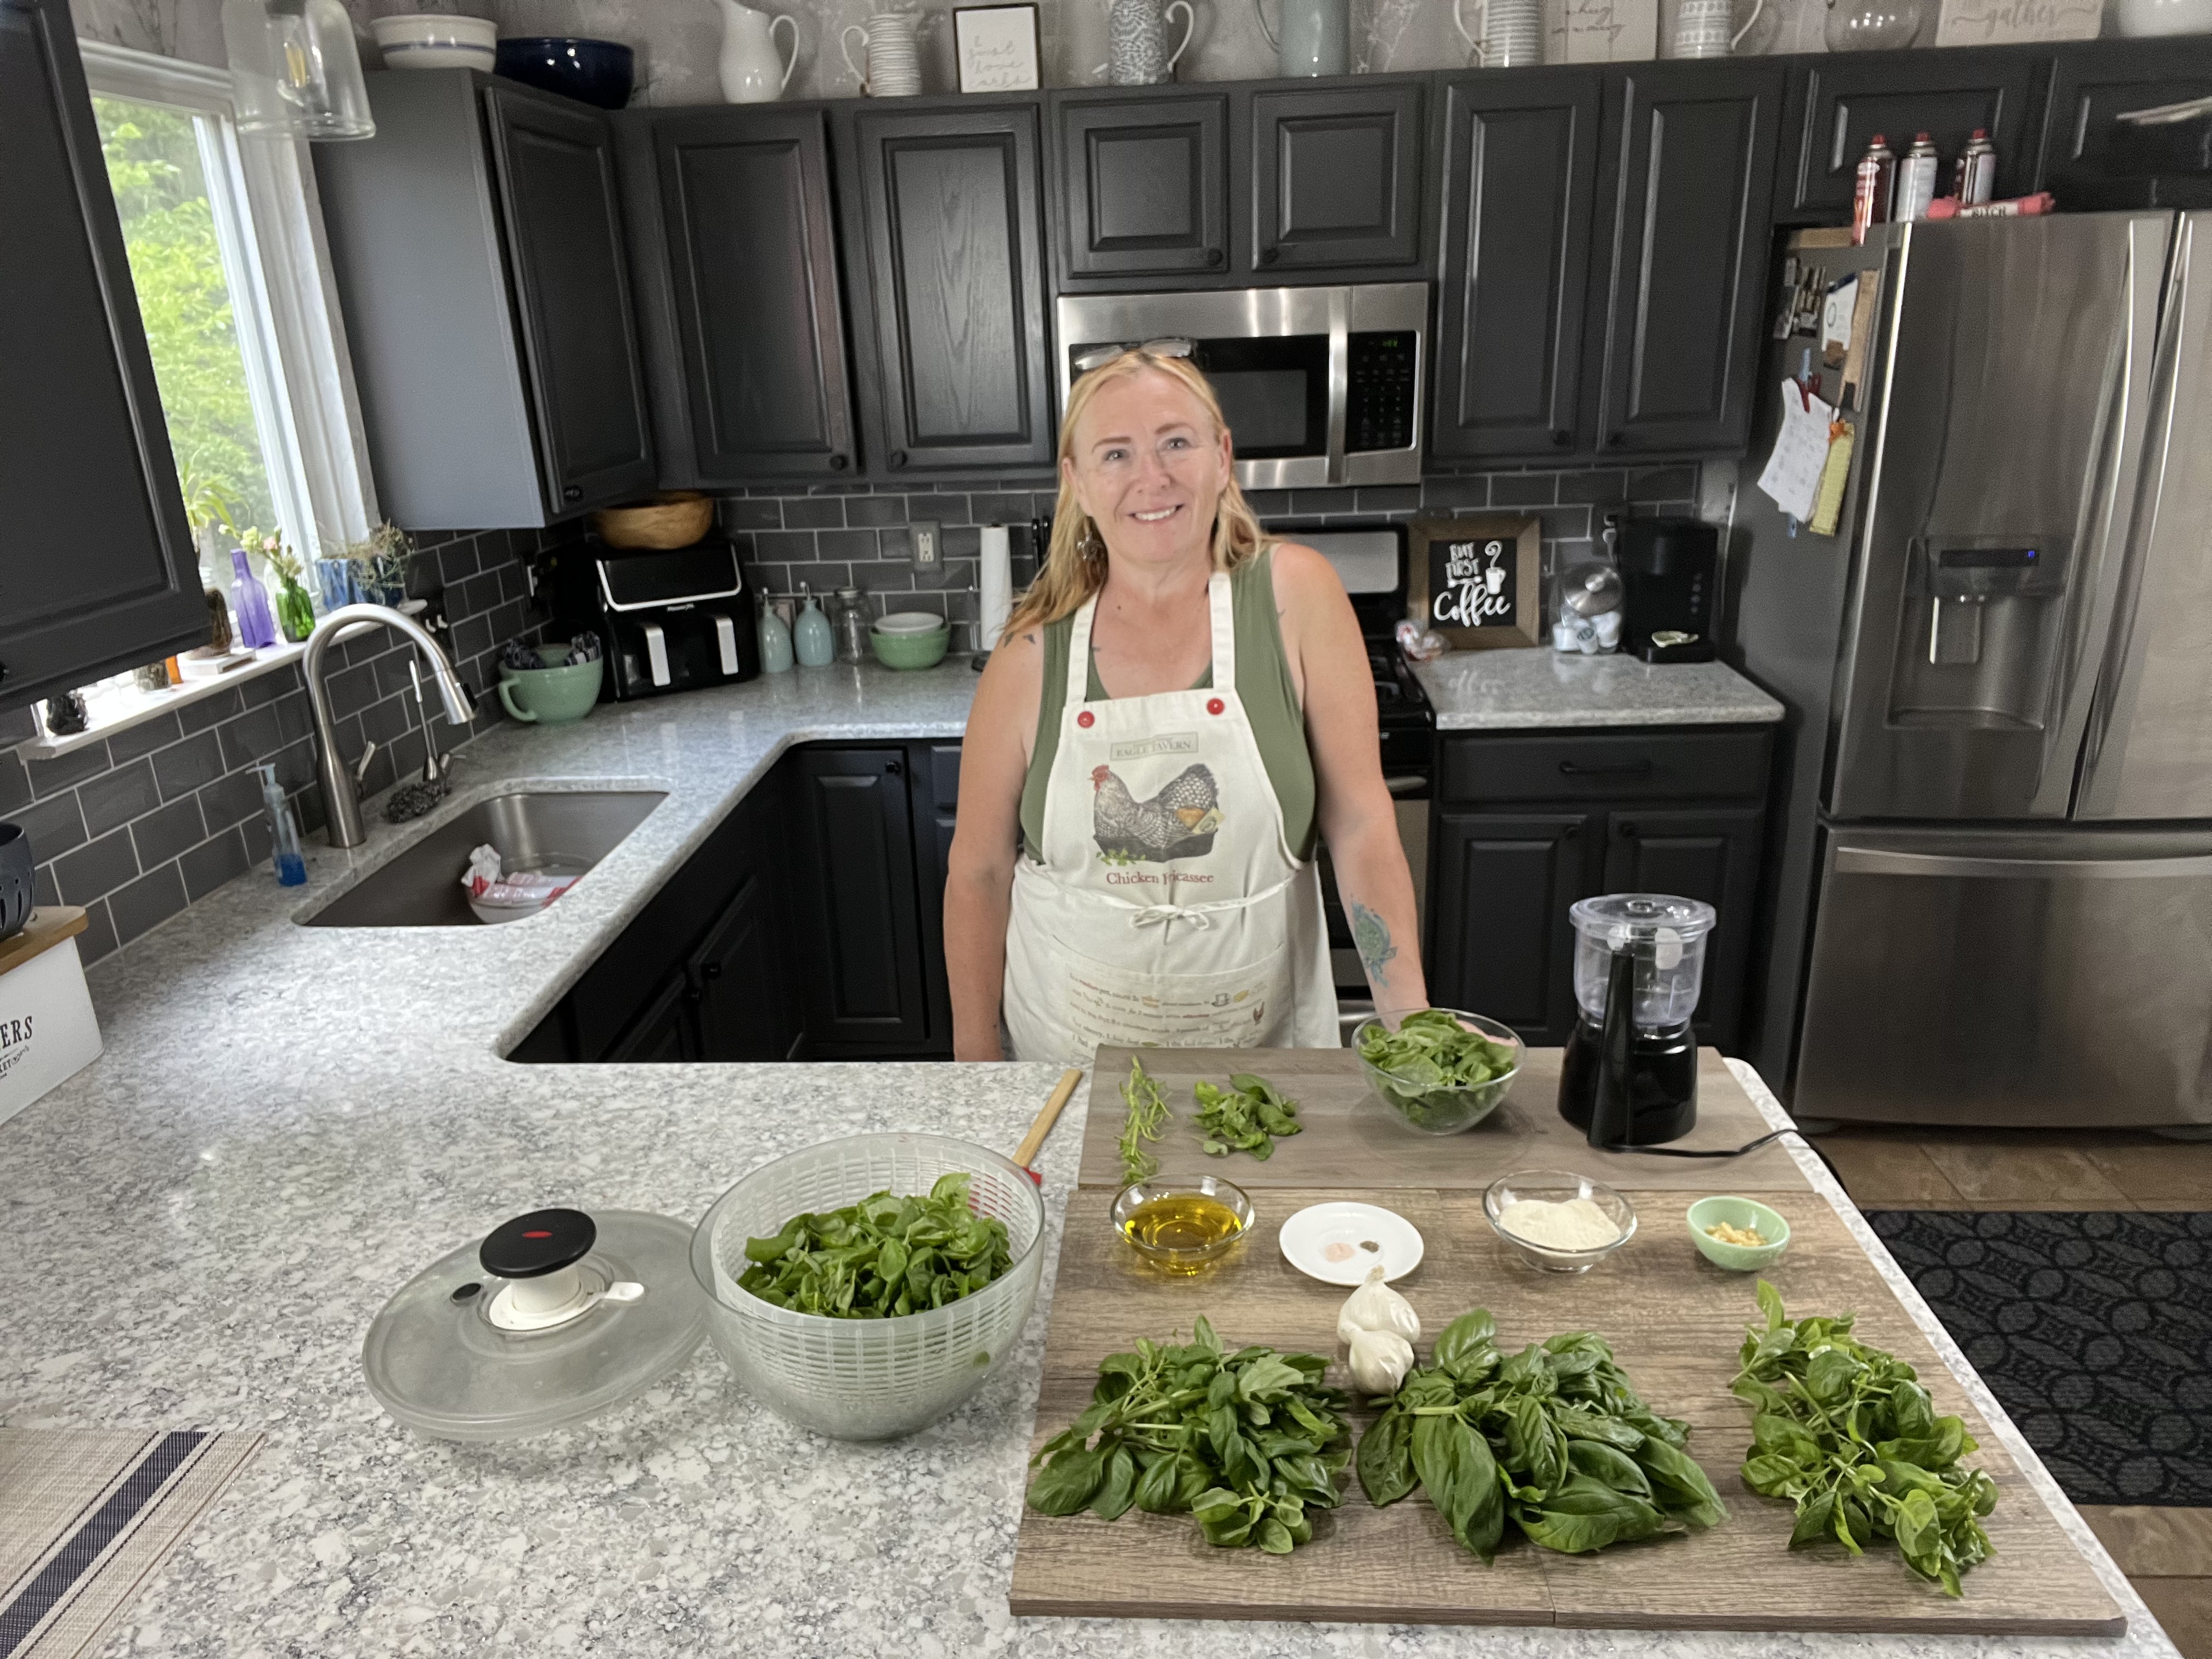
1. In a food process pulse basil and garlic. If you are using fresh cloves, no need to mince first~ just toss in the whole cloves with the skin and hard root end removed: pulse on high until completely shredded and is like a paste.
2. Add parmesan cheese, salt and pepper; pulse on high until completely blended. It will be a paste.
3. Add 2 TBSP of the oil at a time pulsing on high until smooth and all oil is added.
4. Remove to a bowl, cover and refrigerate for at least an hour before use to allow flavors to blend.
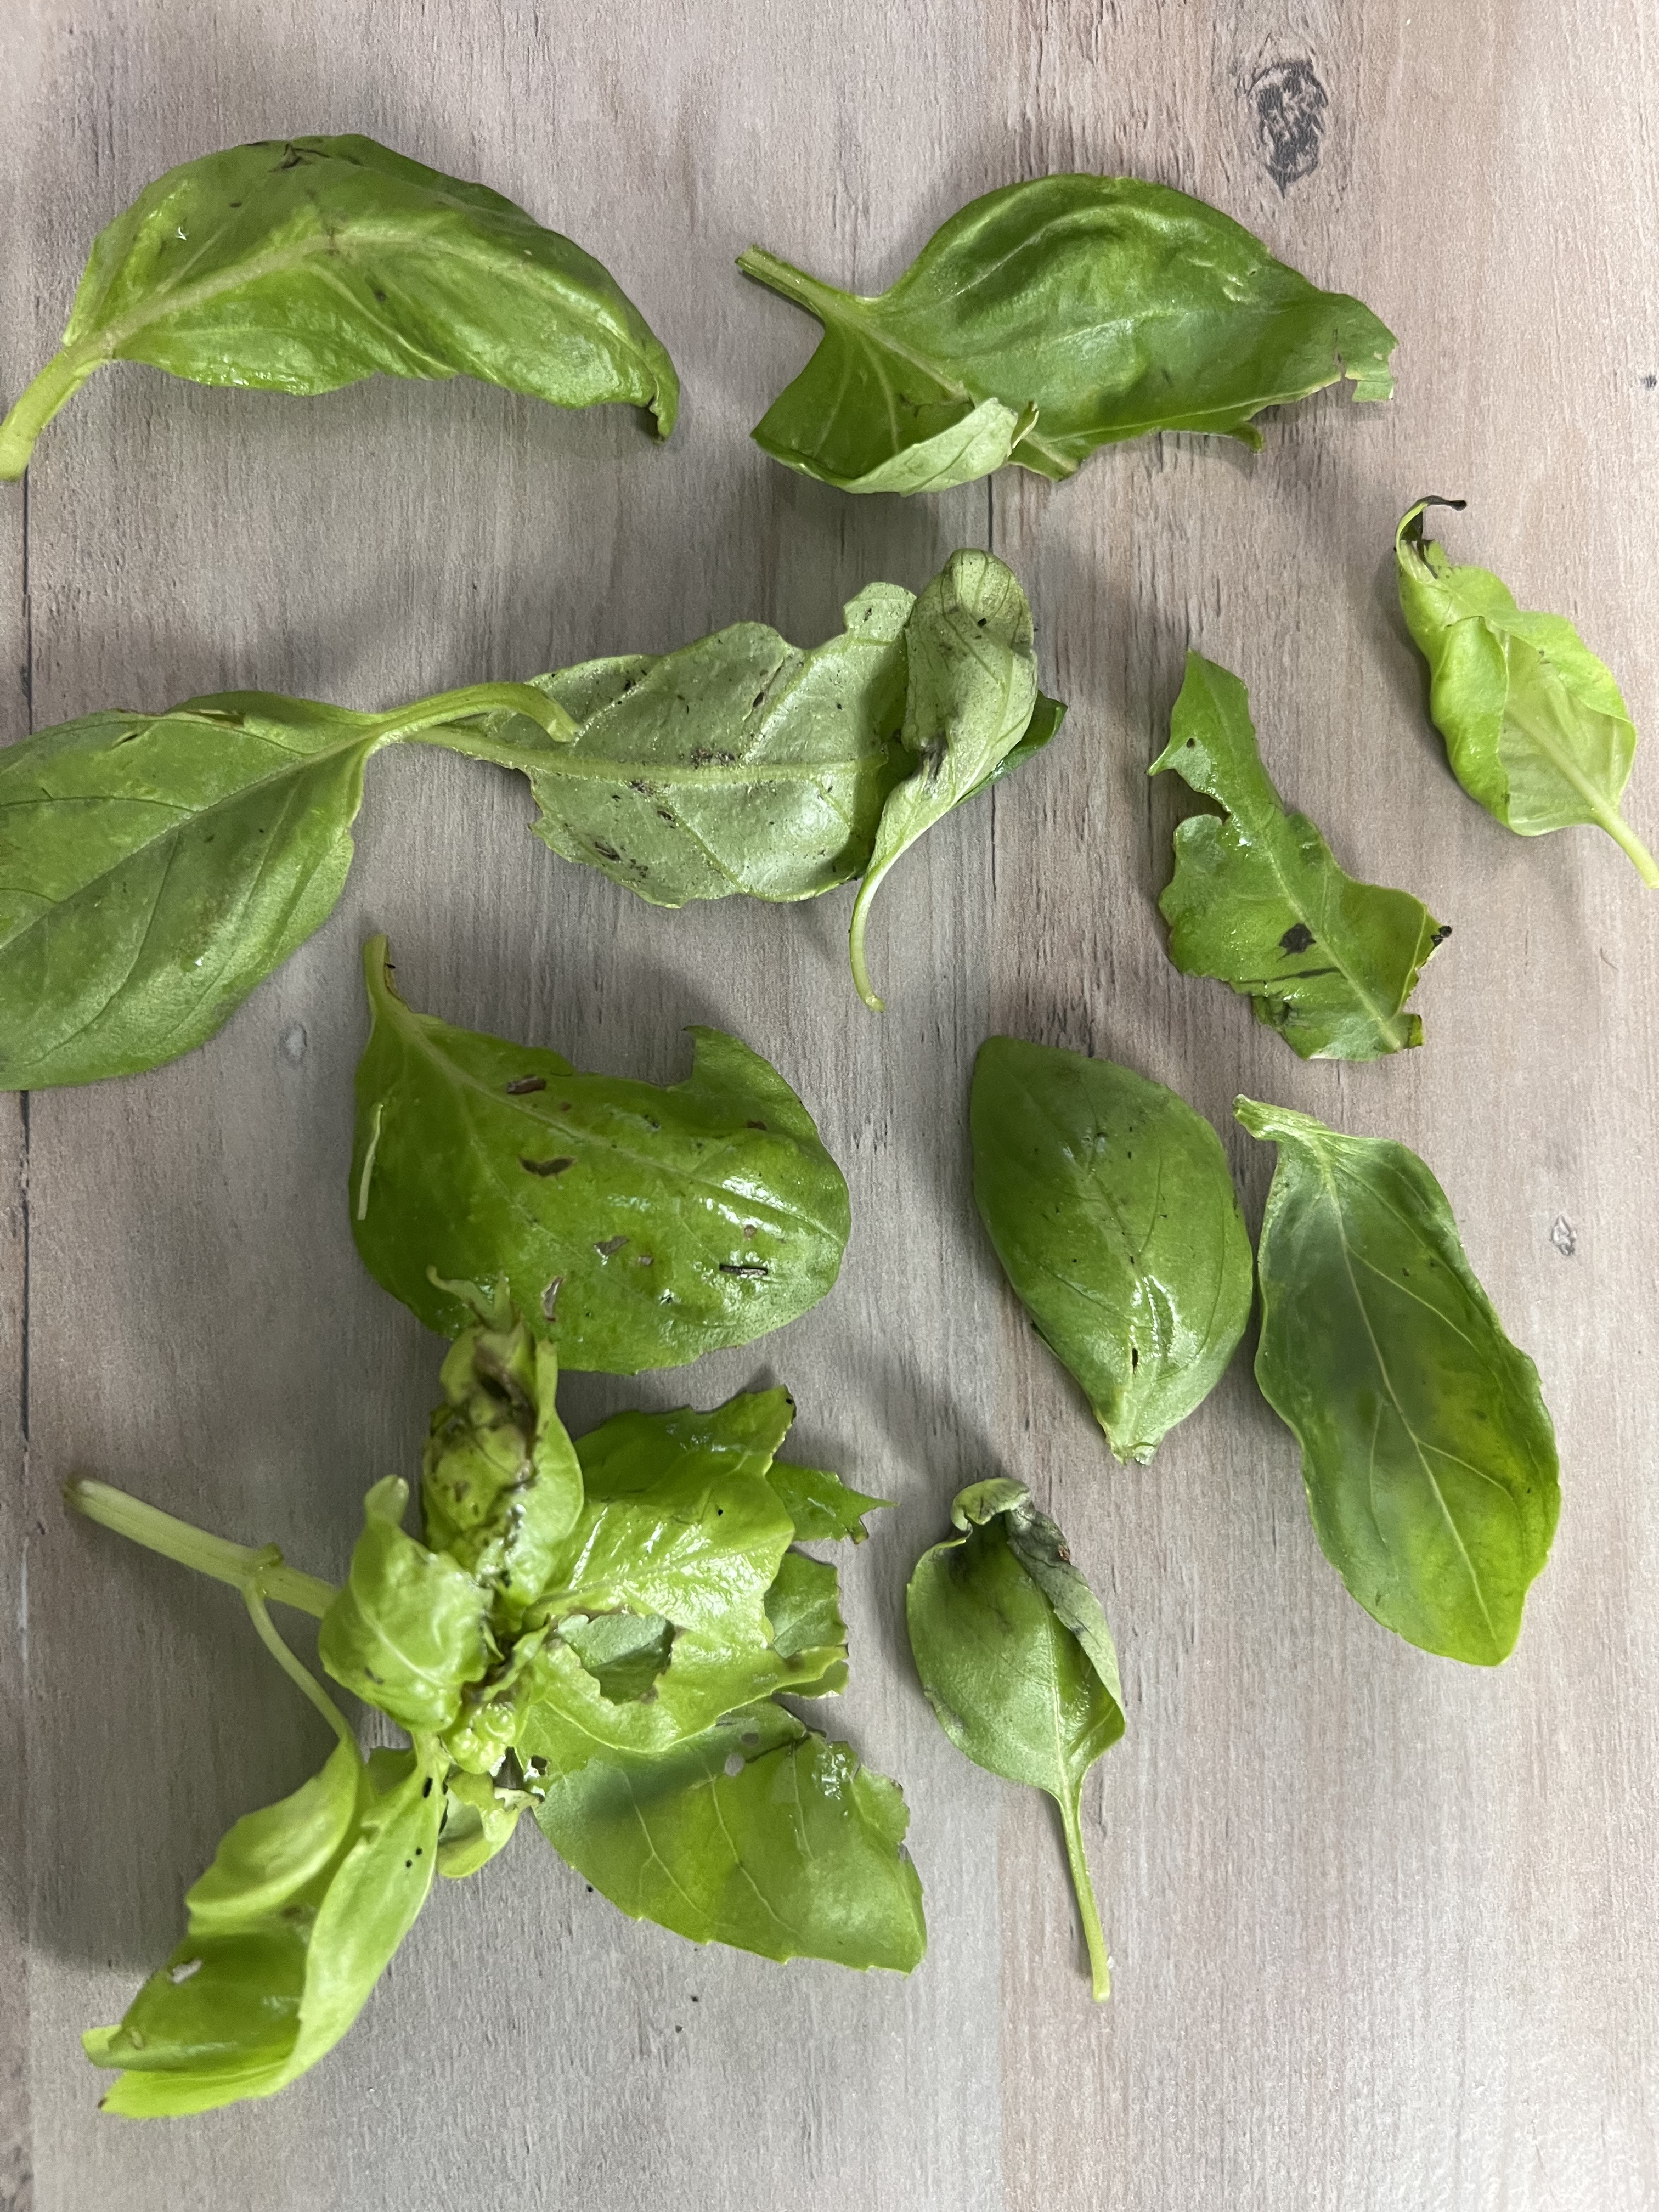
PRO TIP: When harvesting your basil leaves, you want to make sure you only use the best leaves. Avoid using any leaves which have black spots on them or if they have been damaged by an insect eating it. See above leaves for examples of insect damage.
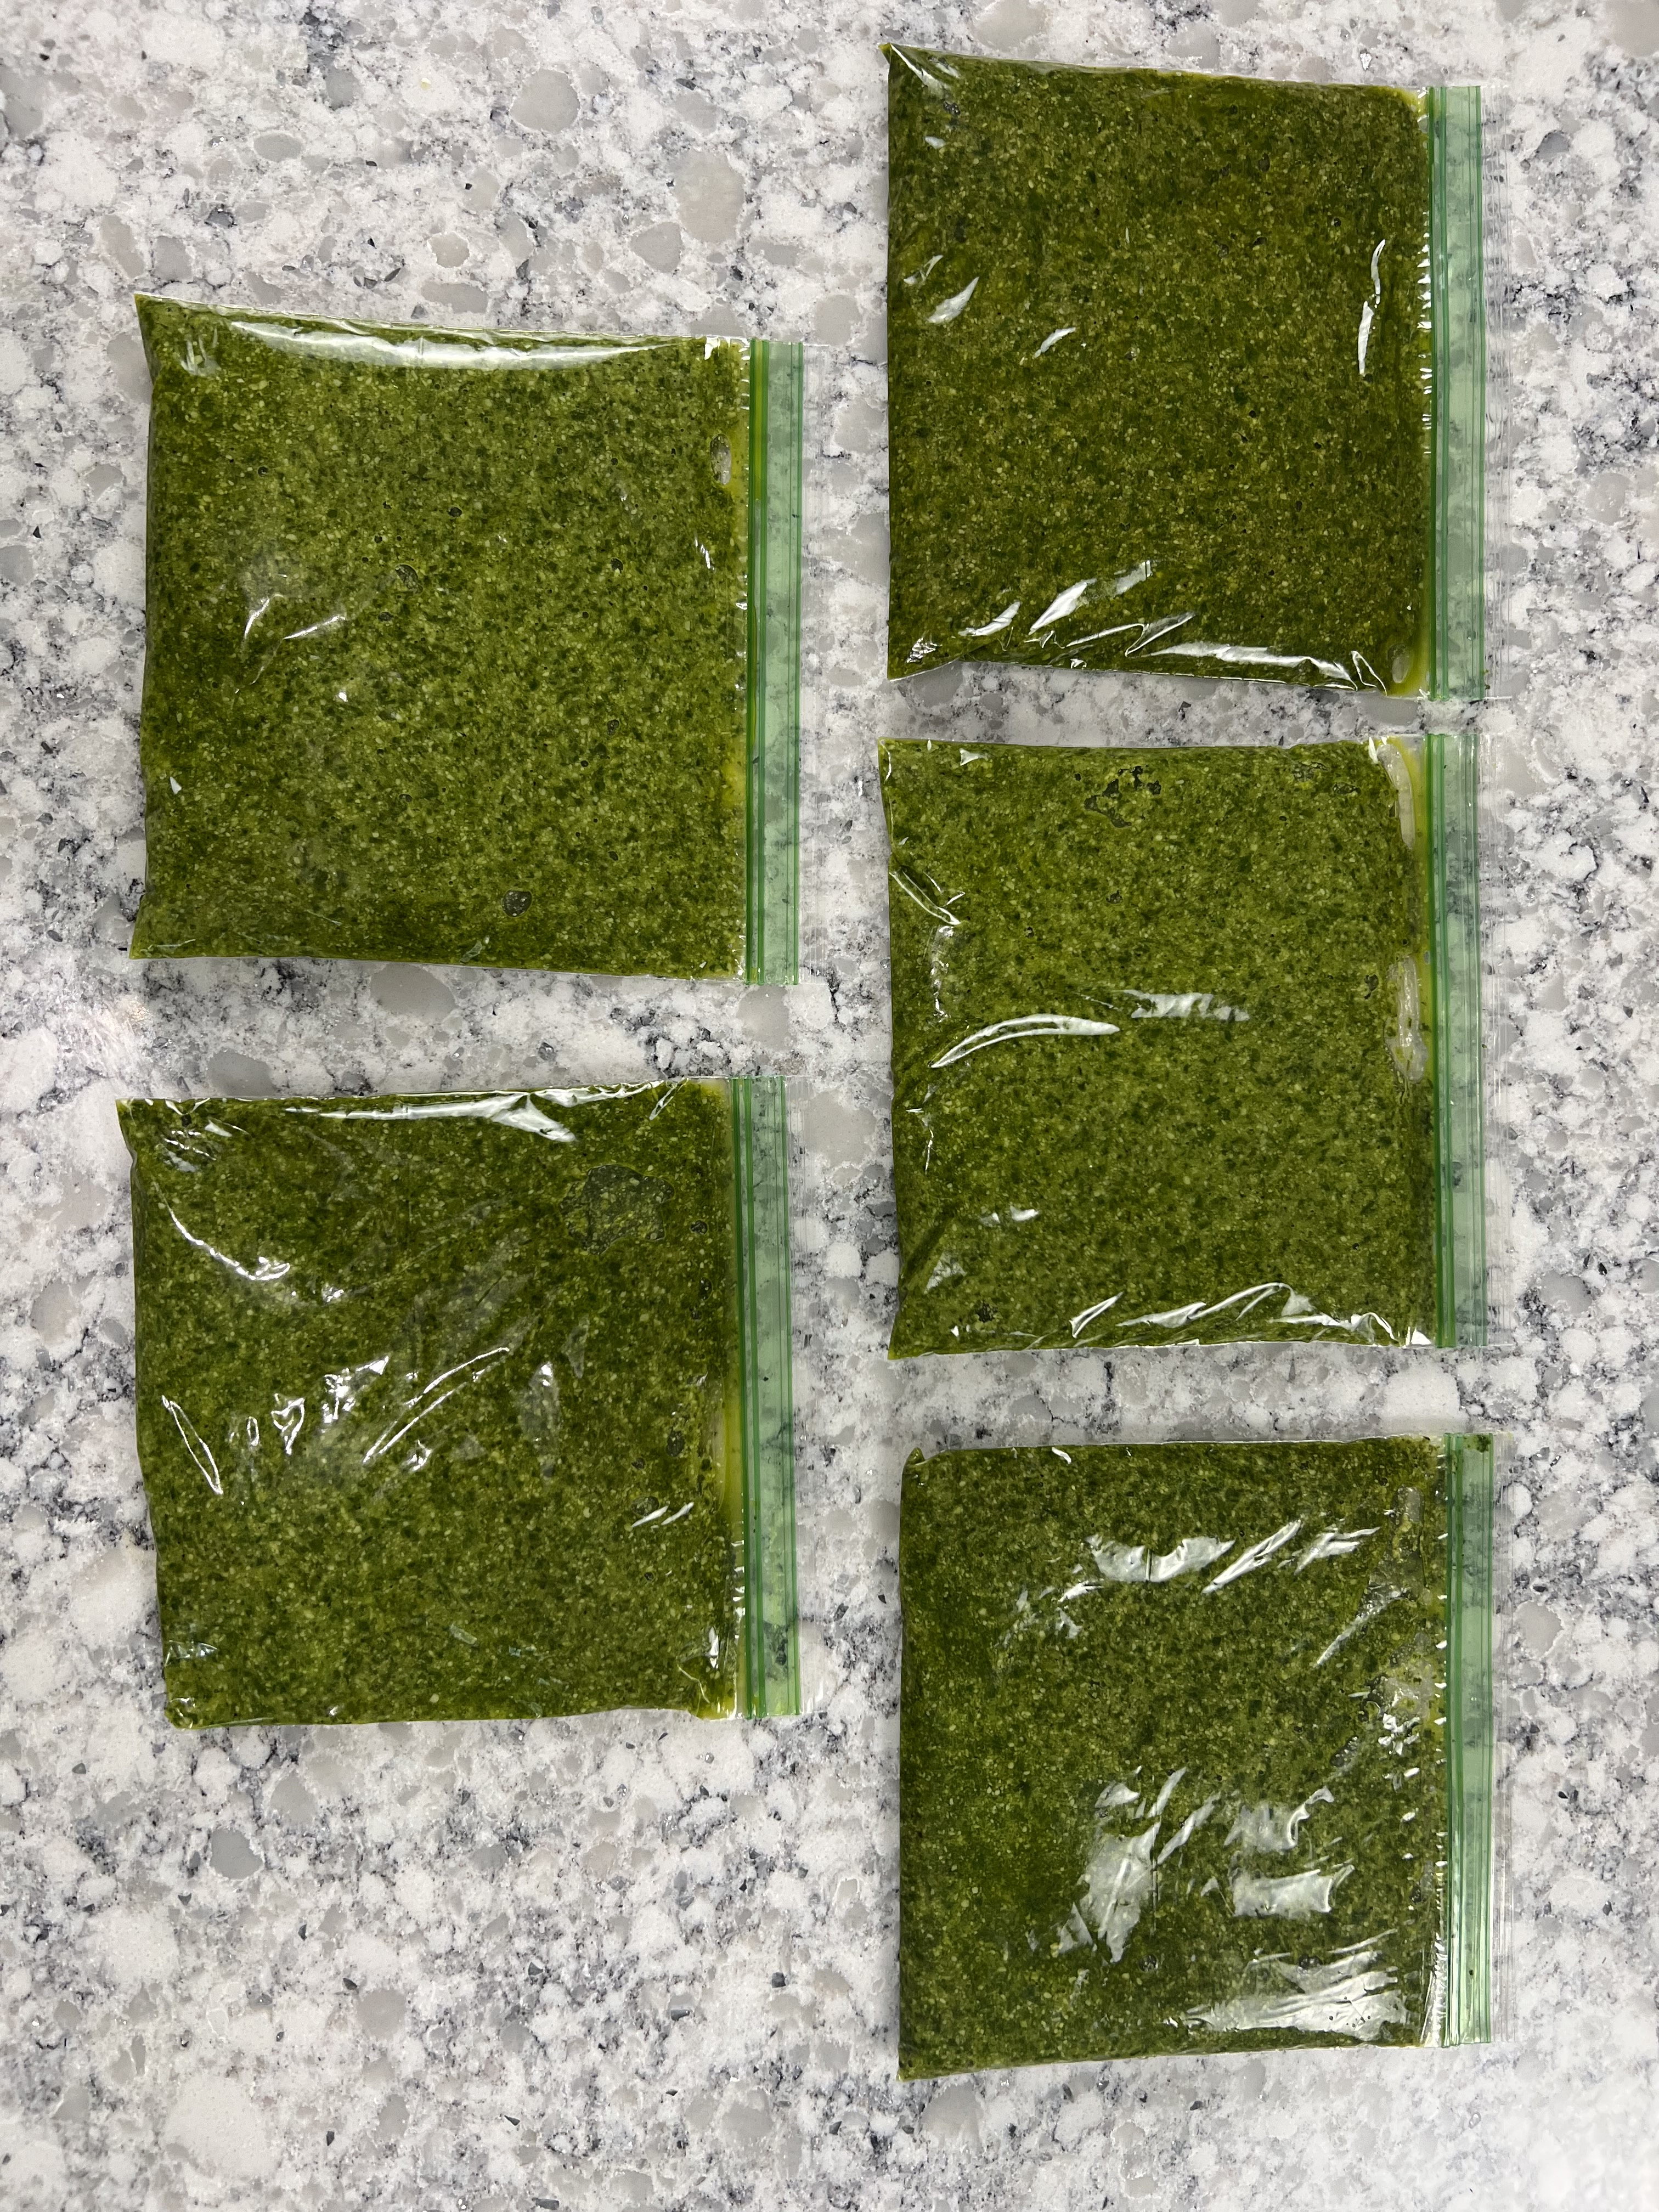
From 10 cups of fresh packed basil leaves I was able to make 5~ 1 cup bags of finished product.
These will be stored in the freezer.
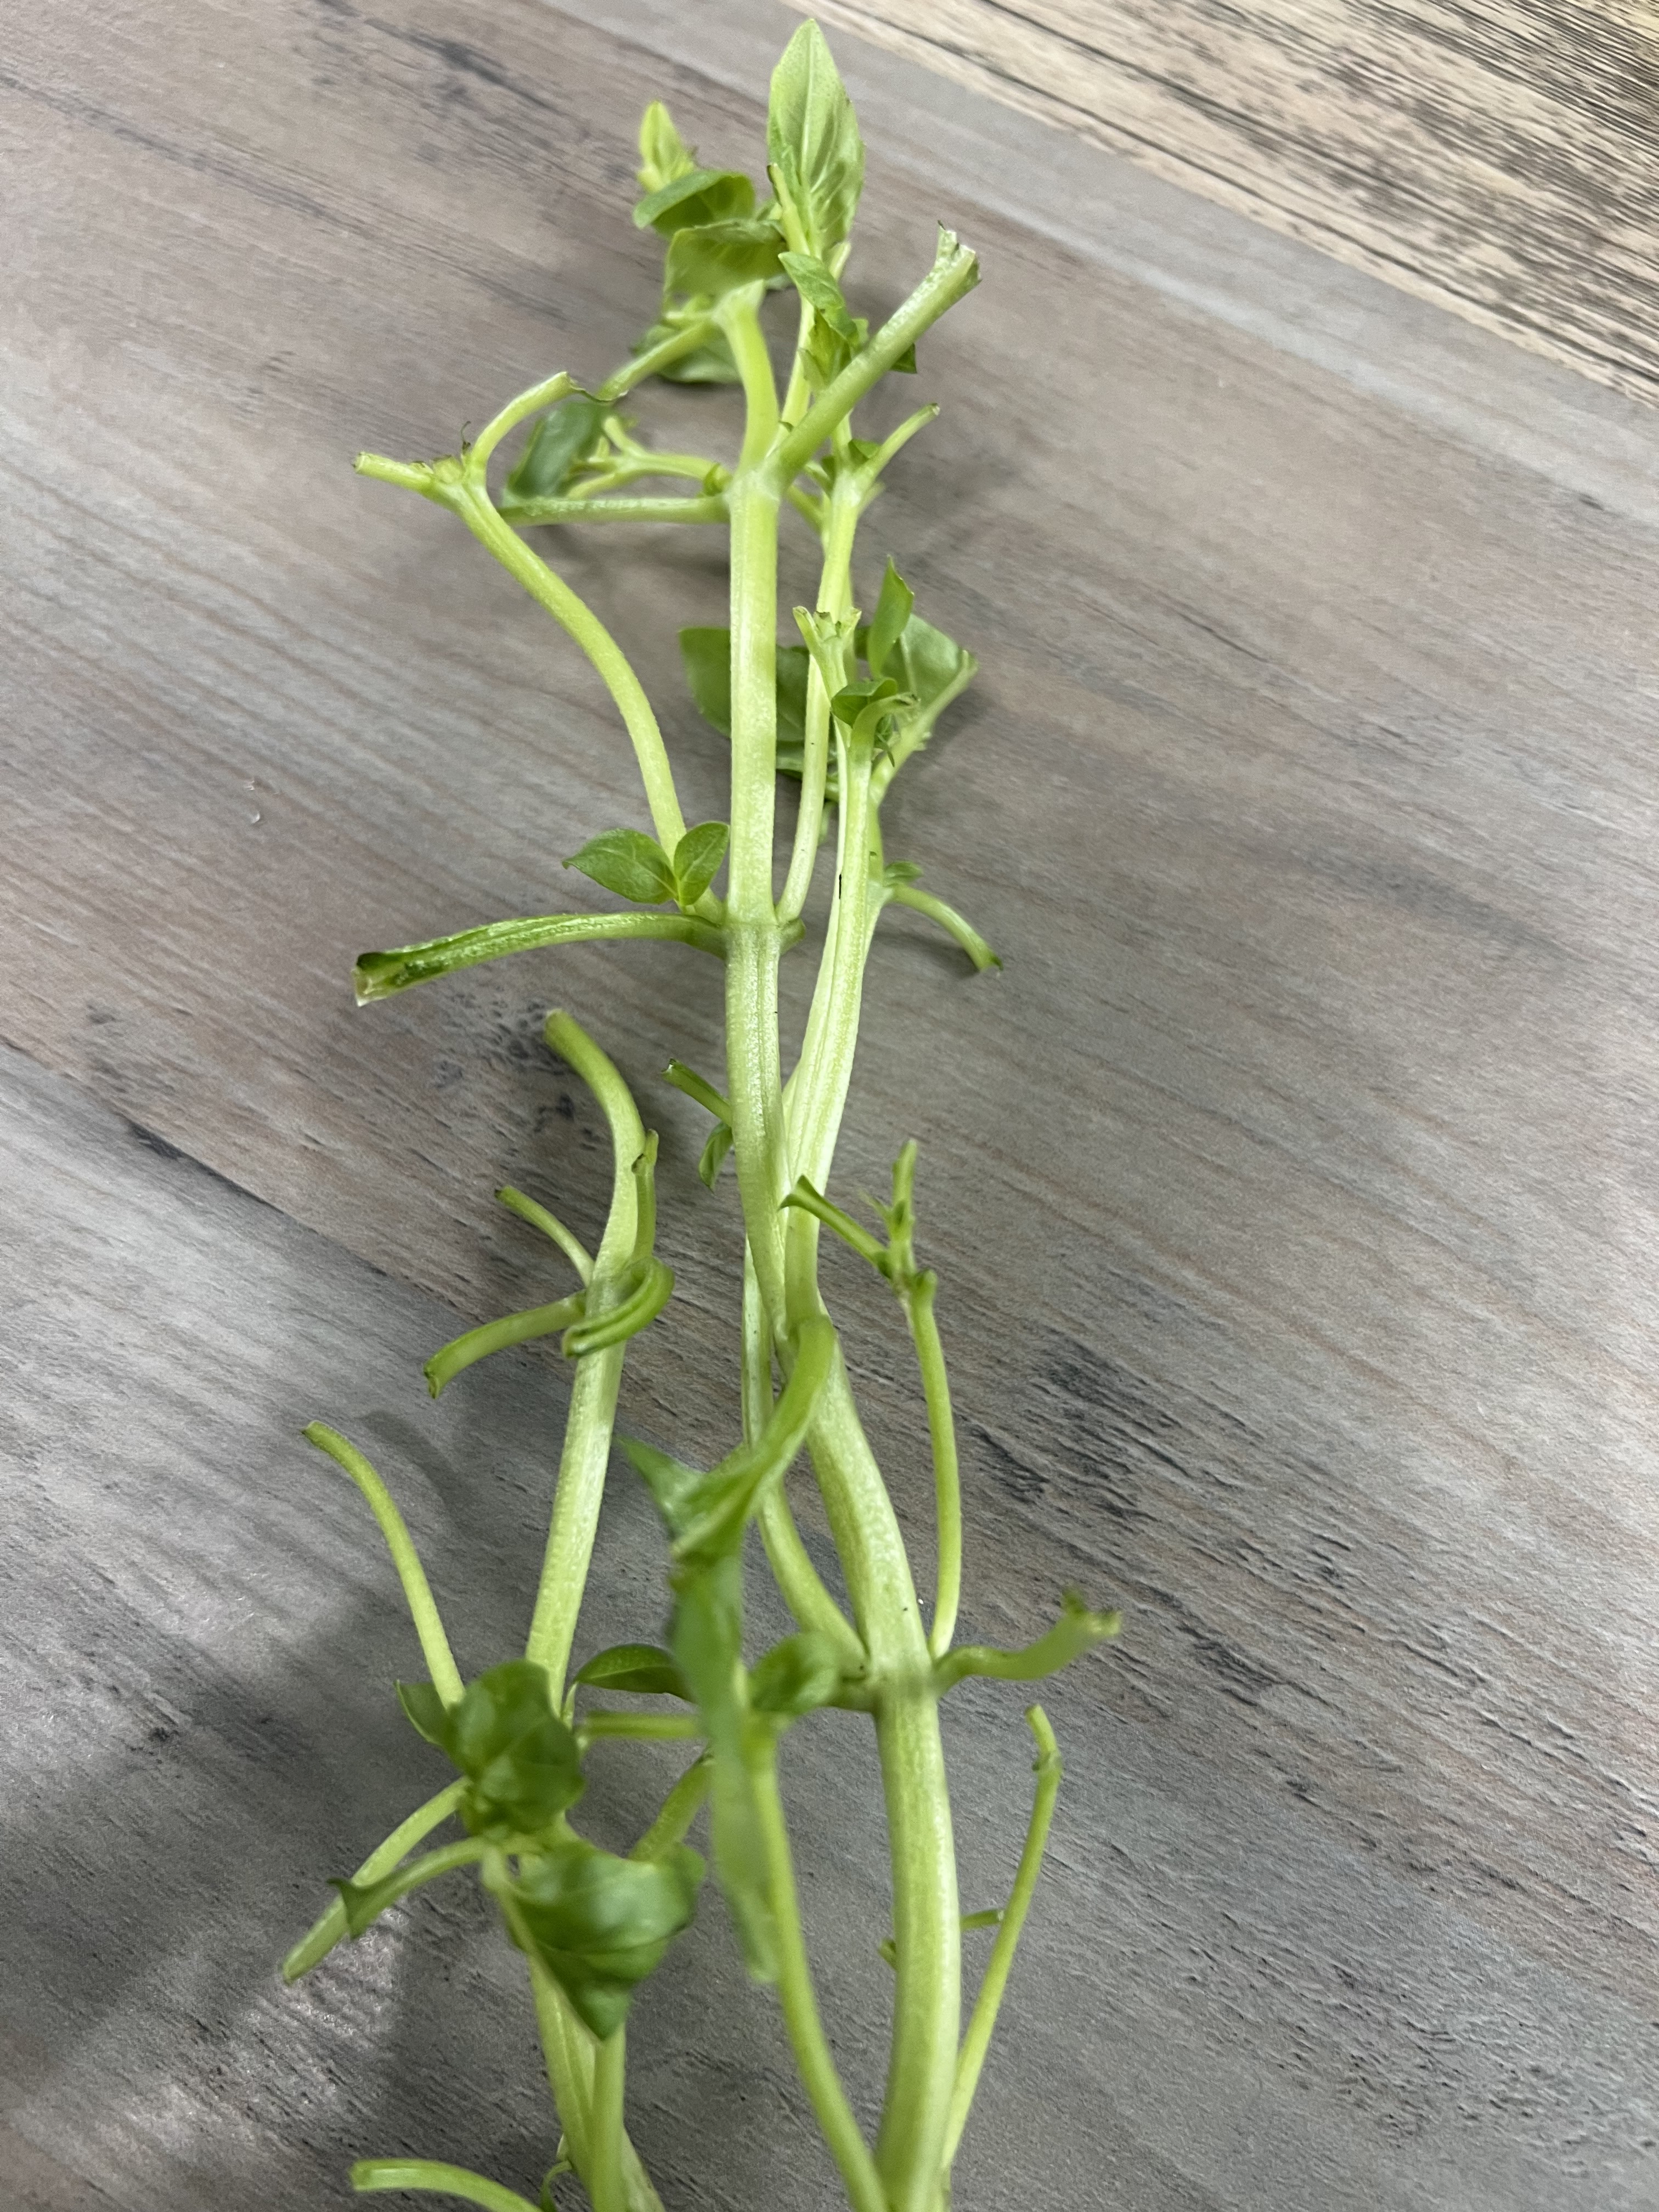
PRO TIP: This is what your stems should look like after you’ve harvested the leaves.
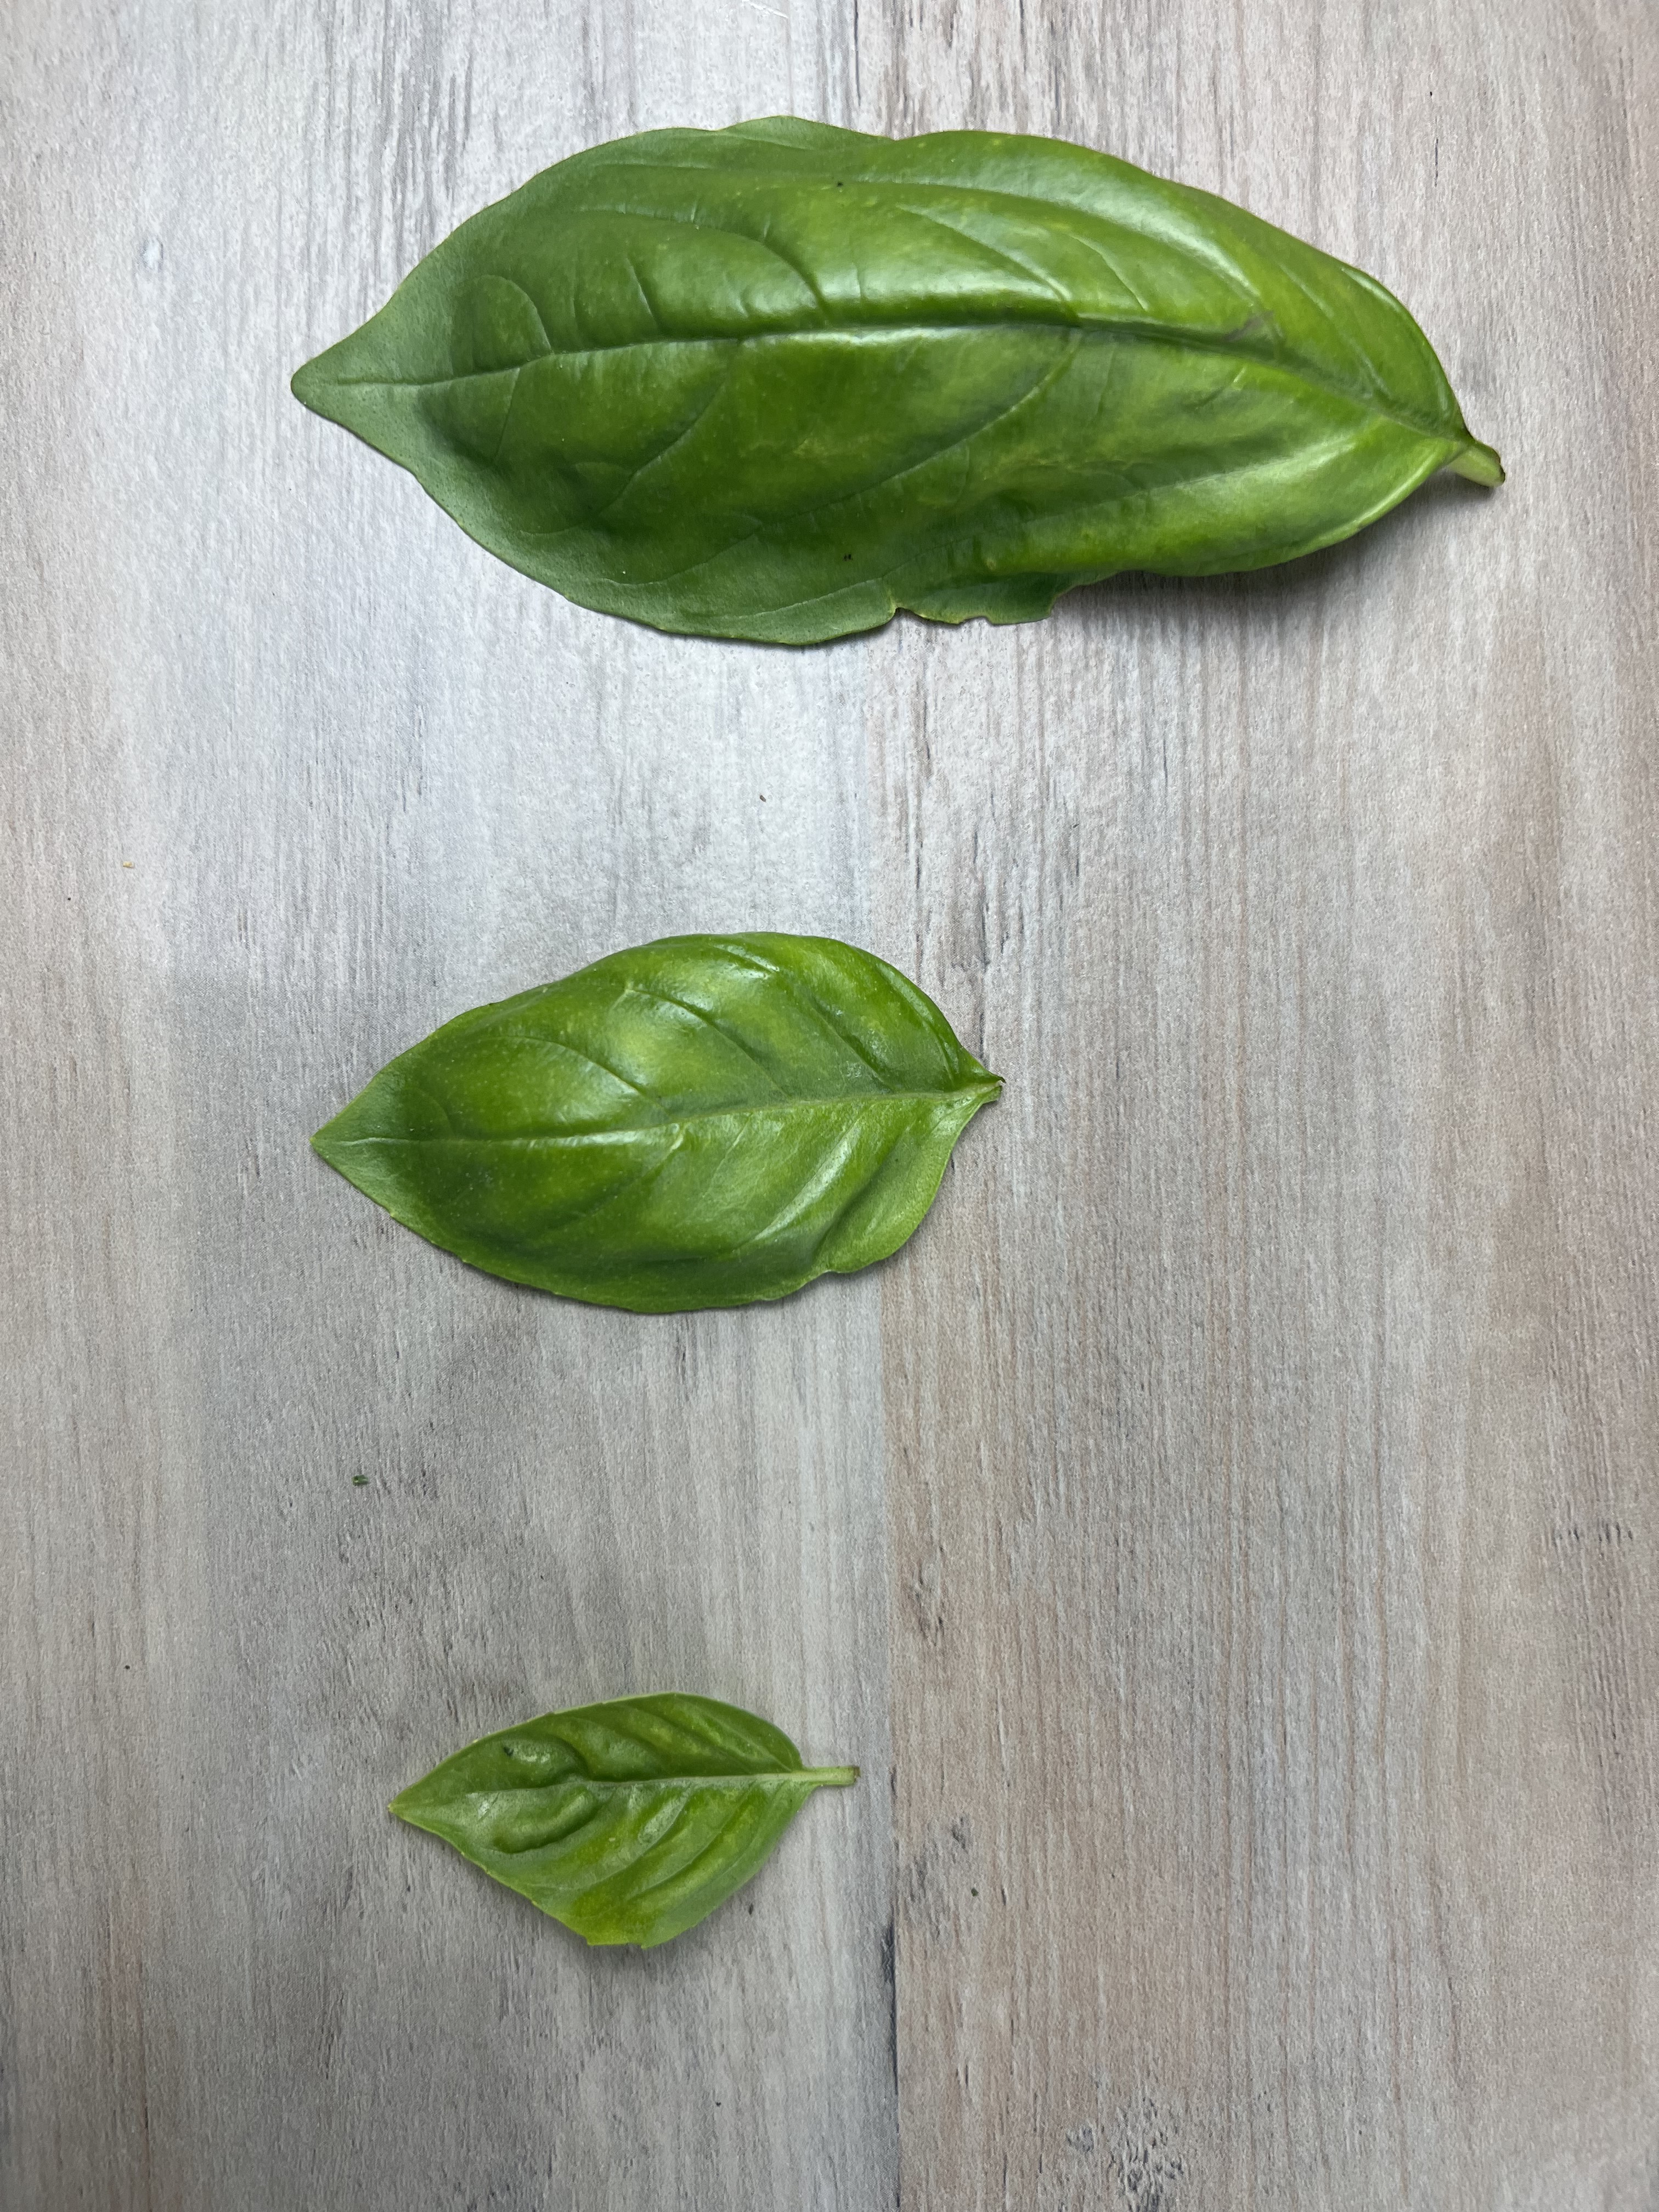
Did you know there are dozens of varieties of basil? Just a few are Thai which has a spicy hint to it, purple basil is very similar to Genovese.
The 3 types of basil in the photo above are in order from left to right: Sweet, Genovese, and my personal favorite Mammoth.
If you aren’t following me on Facebook & Instagram go on over & give a LIKE & Follow me for daily tips & tricks for your home & garden!
For more Pesto recipes check out my previous blogs here:
Jean’s Kale and Toasted Walnut Pesto Recipe!

Added bonus: You can go to my blog at http://www.fordragonfliesandme.com to purchase my original cookbook, Lovingly Seasoned Eats and Treats in either a spiral bound soft cover OR NEW, a Downloadable PDF version. The cookbook has almost 1000 recipes on almost 500 pages! Check out the Cookbook Testimonials while you’re there!
Until next time remember to,
Eat fresh, shop local & have a happy day,
Jean
All text and images on this site are copyright of For Dragonflies And Me. Unless otherwise noted, you may not use this content.
This post may contain affiliate links. If you choose to purchase through an affiliate link, I may receive a small commission at no additional cost to you. You can see my full disclaimer here.

“Cooking is about creating something delicious for someone else.” – Ayumi Komura

As you all should know by now, we love Italian food! We are always looking for new variations of old classics, and today’s recipe fits that bill. We of course put our own spin on this favorite, and I’m confident you are going to love it!
Watch me make it here at my YouTube Video!
NOTE~ Unfortunately there was a glitch in the ending of the video, so to the end watch the second video below with the recipe! Thanks for understanding friends!
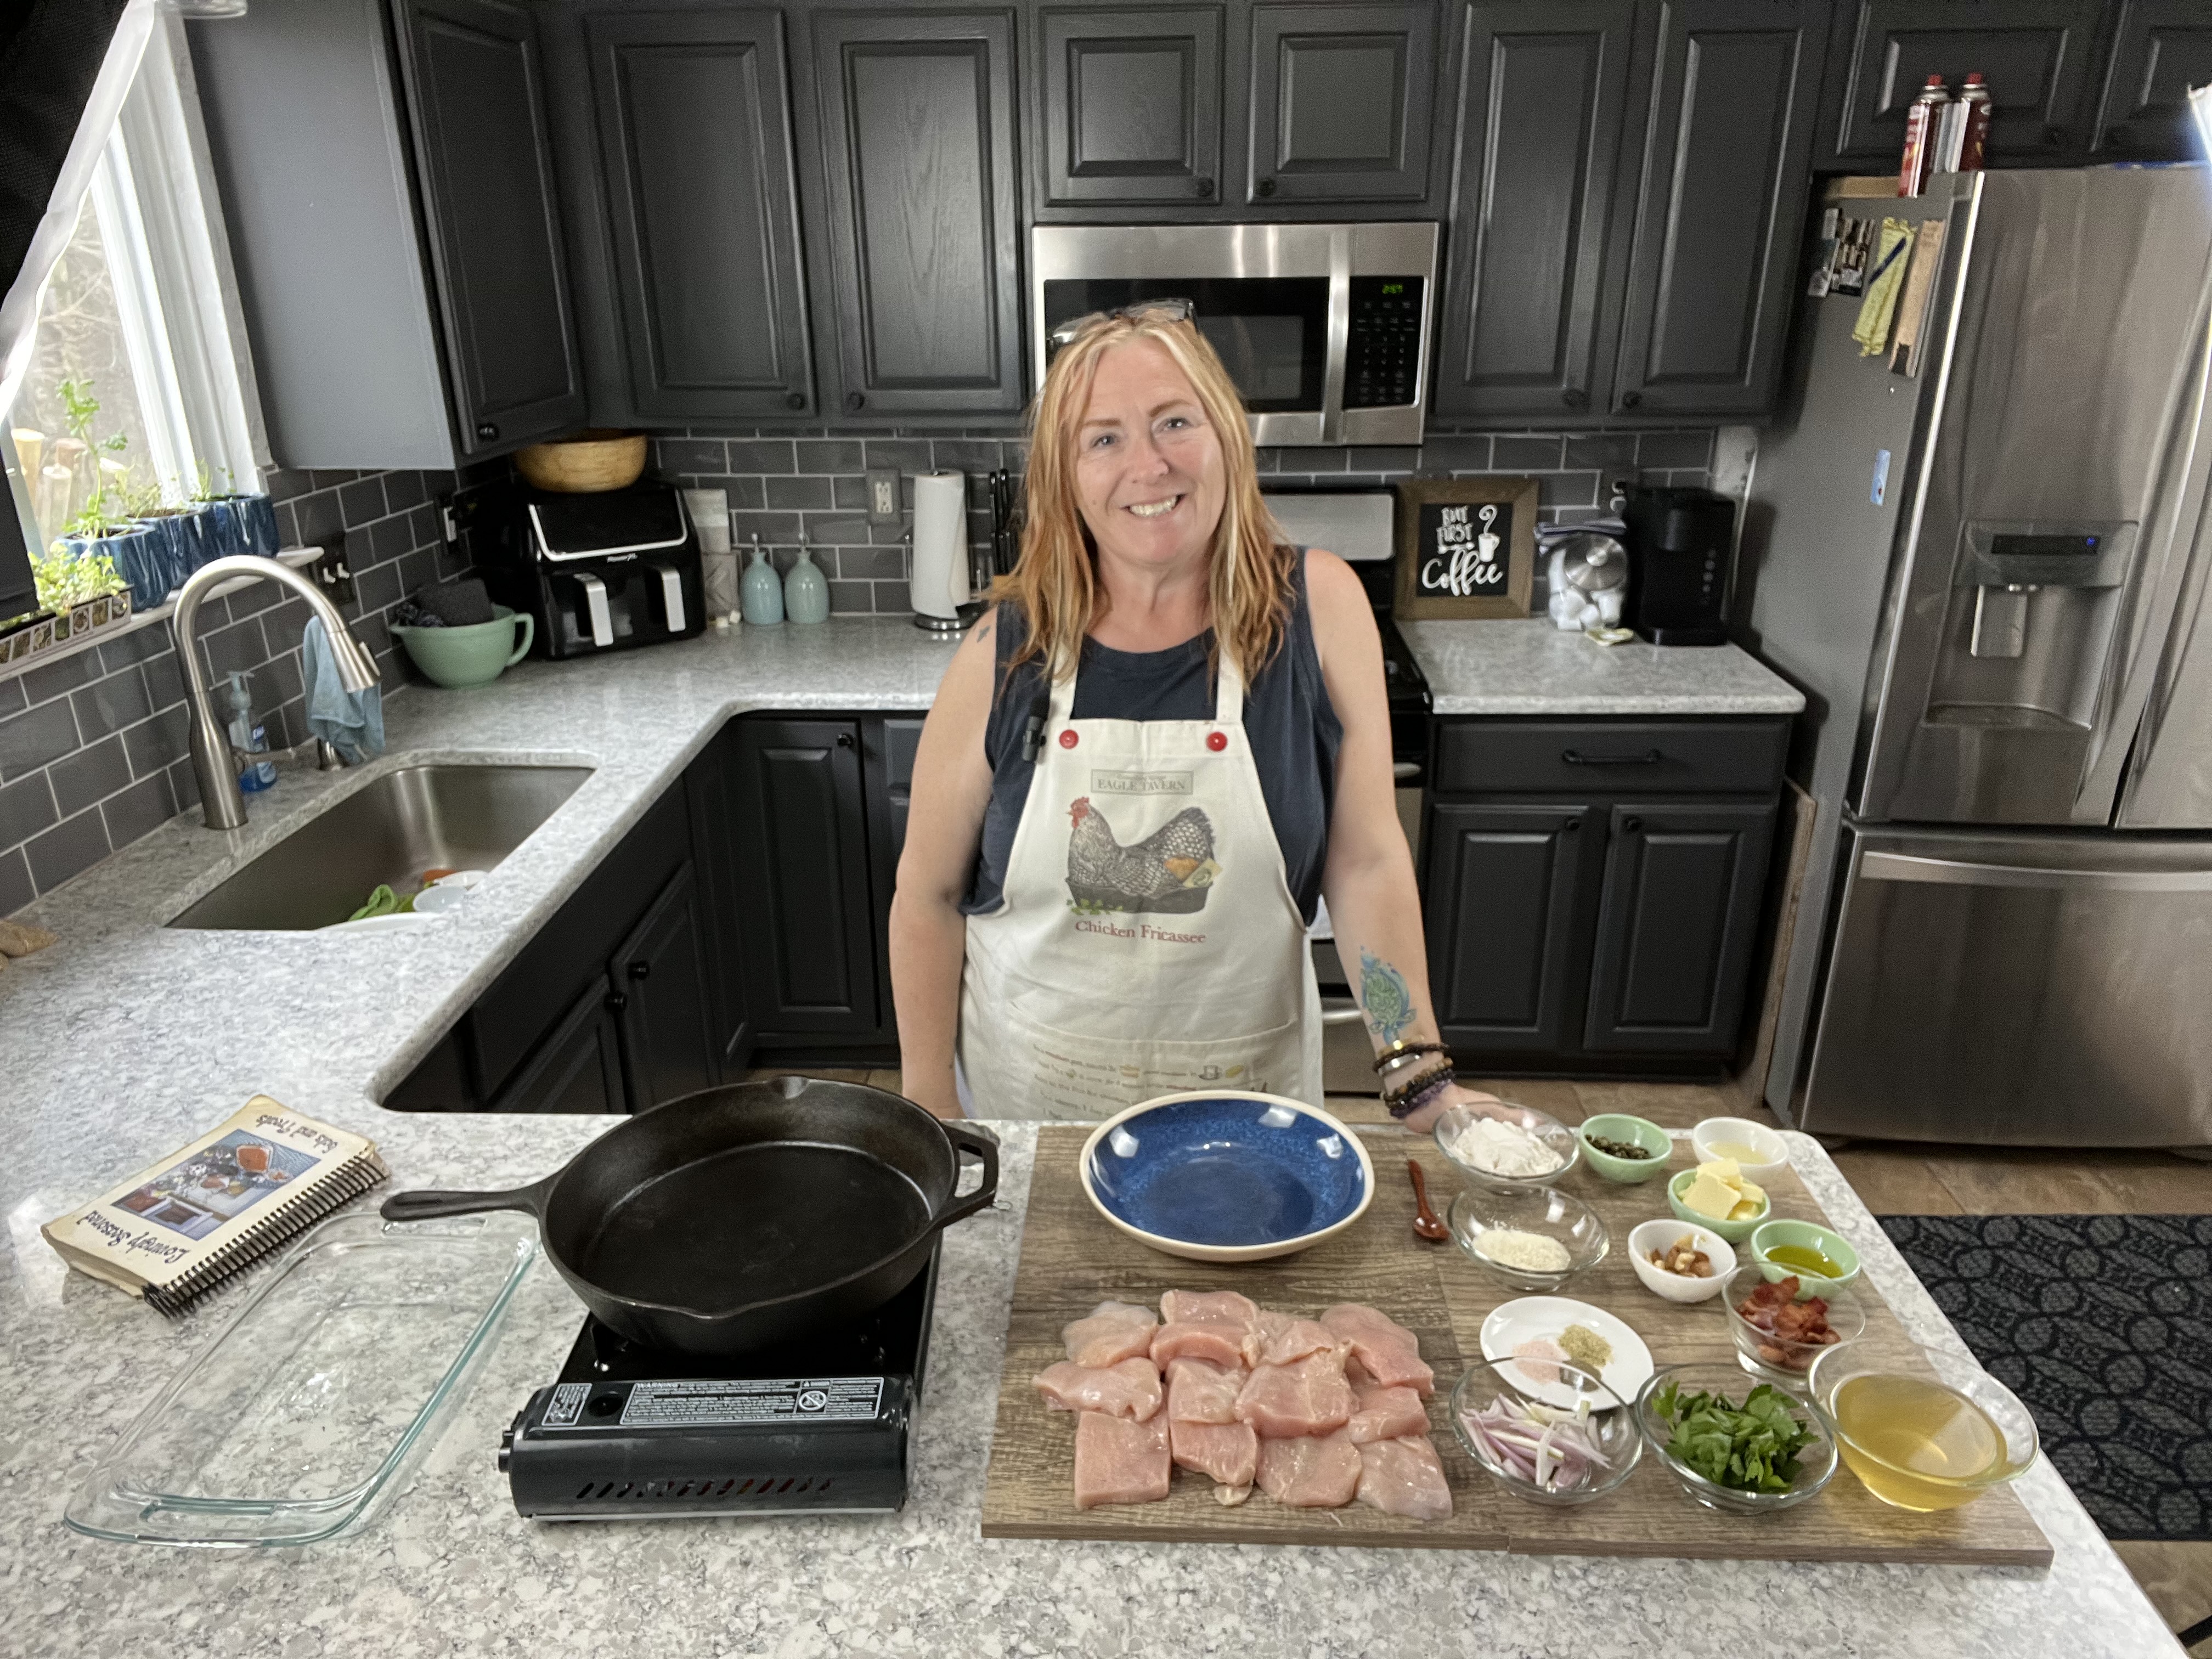
Ingredients: Yields approximately 4 servings
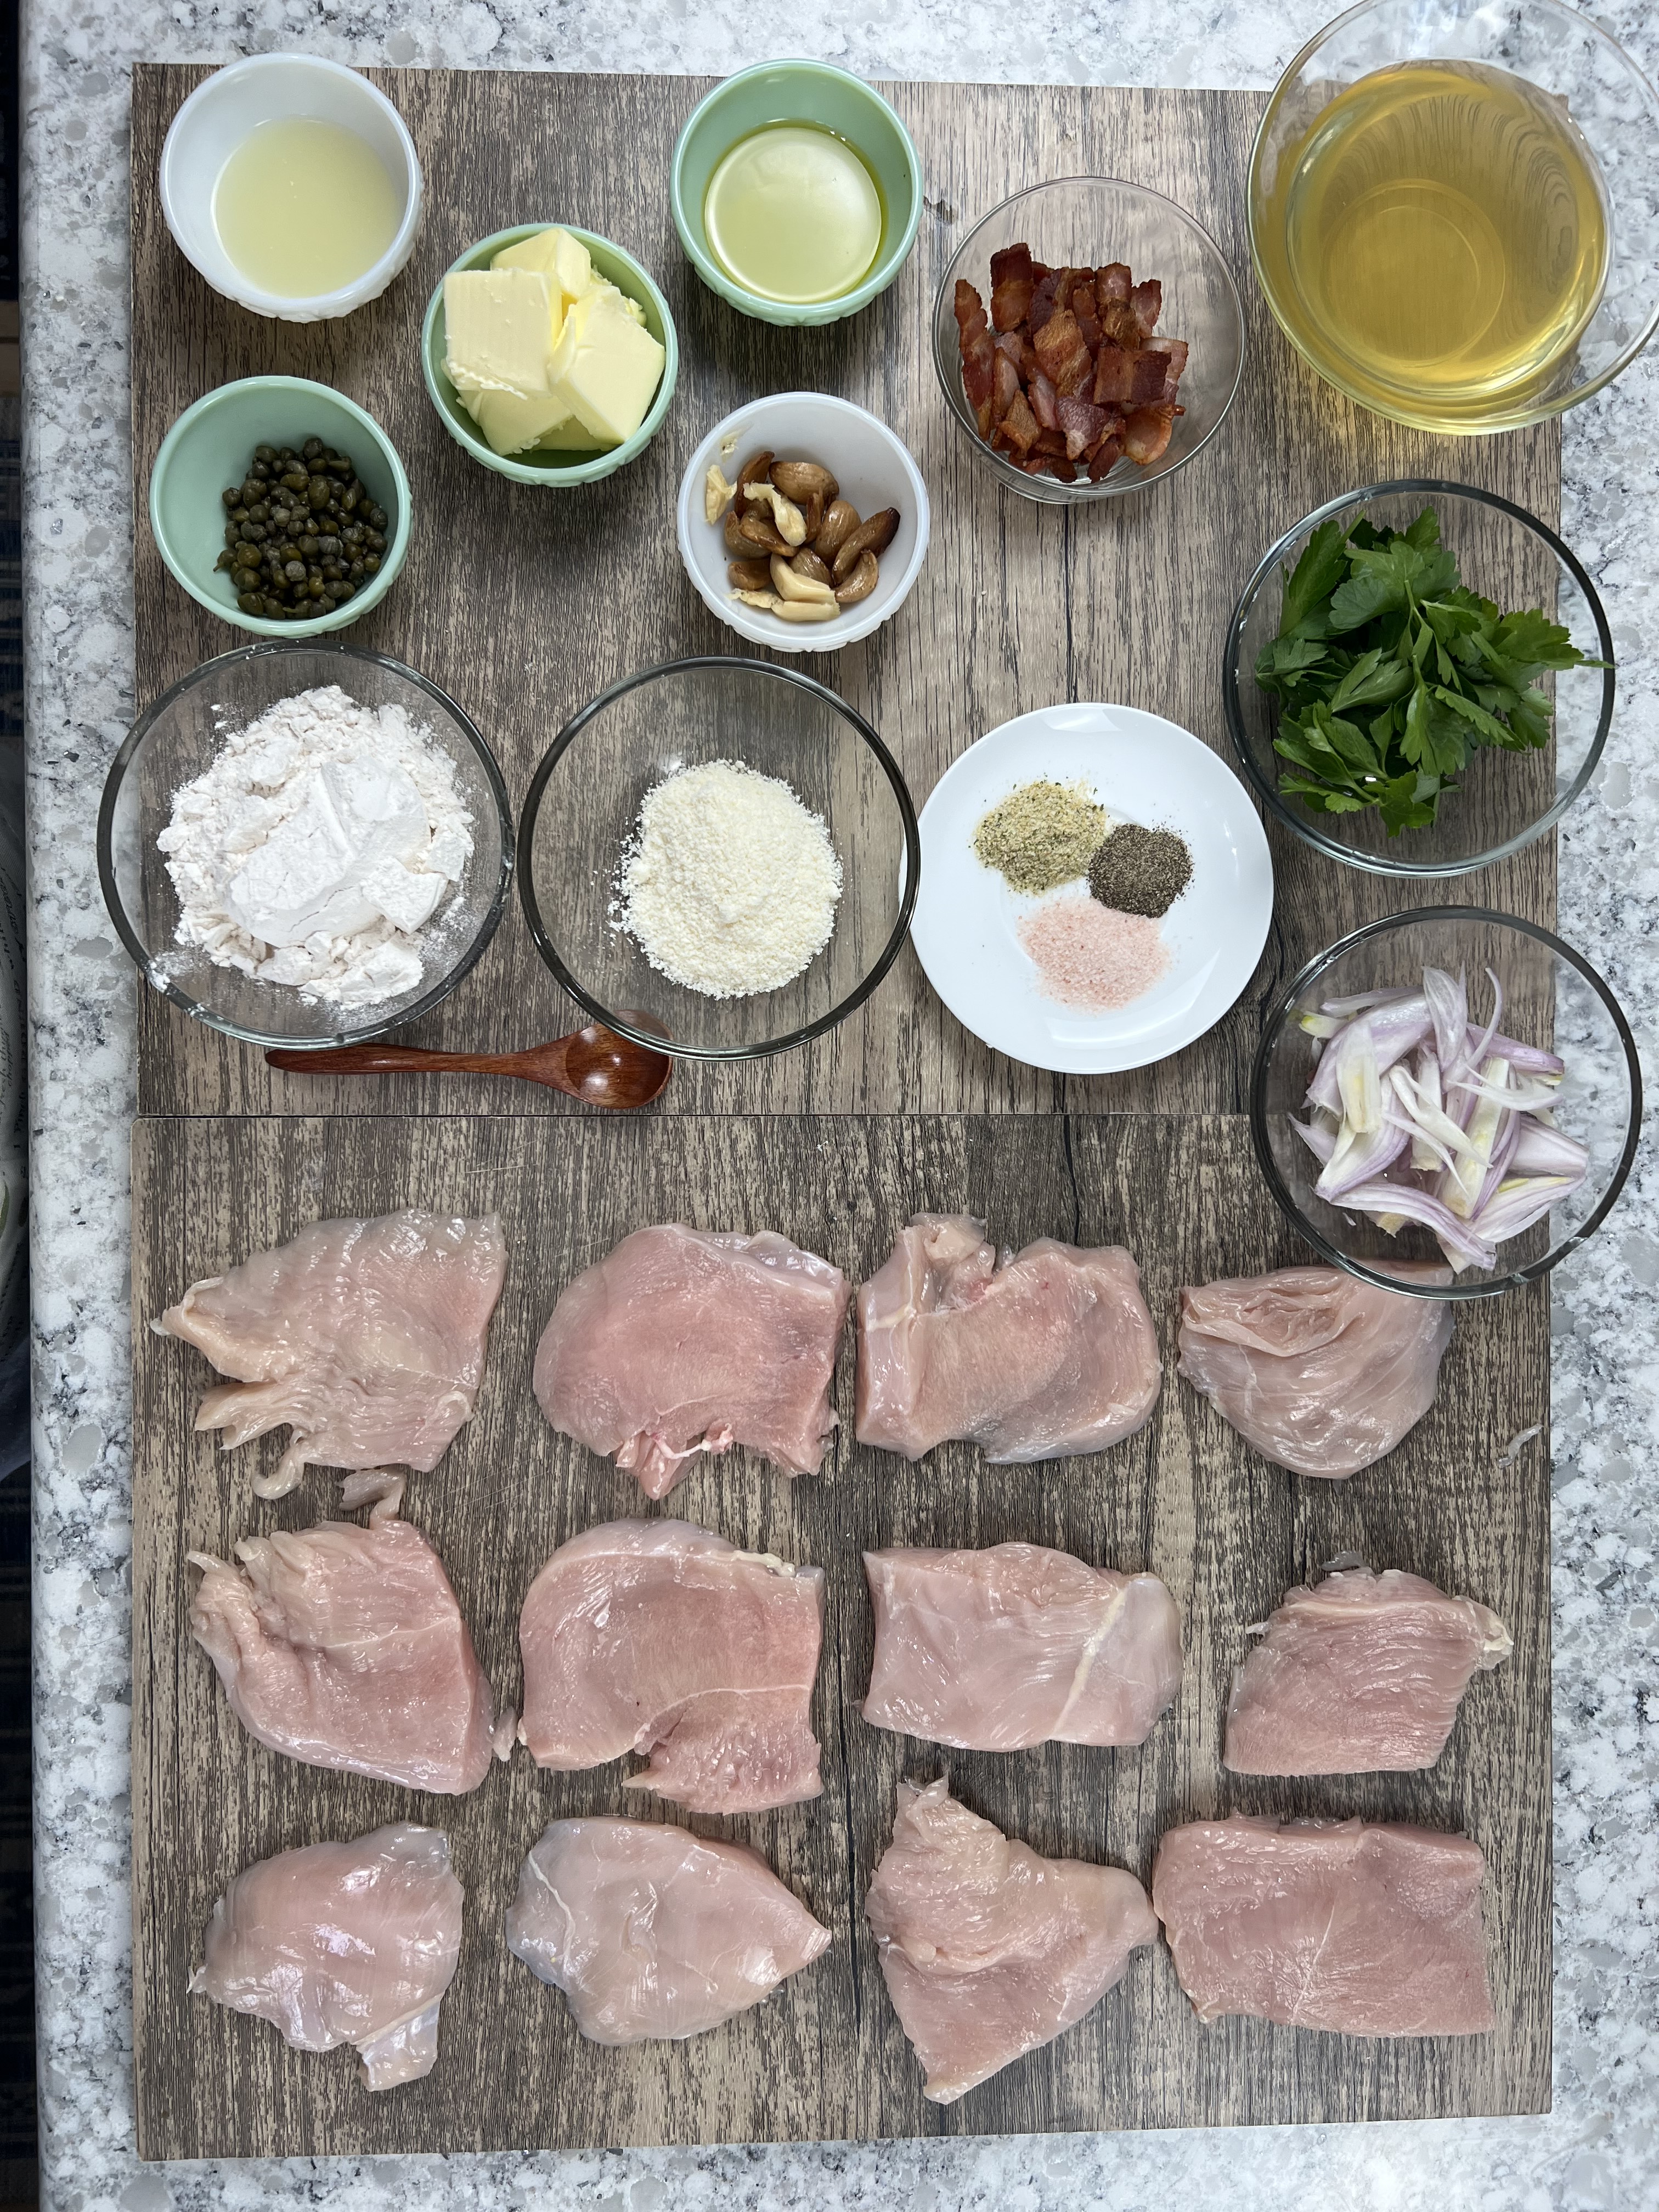
2 boneless, skinless chicken breasts, cut into sections
4 cups chicken broth
3 strips of bacon, fried and cut into 1 inch sections
1 medium shallot, sliced lengthwise
4 TBSP salted butter
2 TBSP garlic infused olive oil
2 TBSP lemon juice OR juice from 1 large lemon
2 TBSP capers, drained
½ cup all purpose white flour
¼ cup grated parmesan cheese
1 tsp seasoned garlic salt
½ tsp pink Himalayan salt
½ tsp fresh ground black pepper
About ¼ cup fresh parsley leaves
To watch the final portion of my YouTube Video, click the video below!
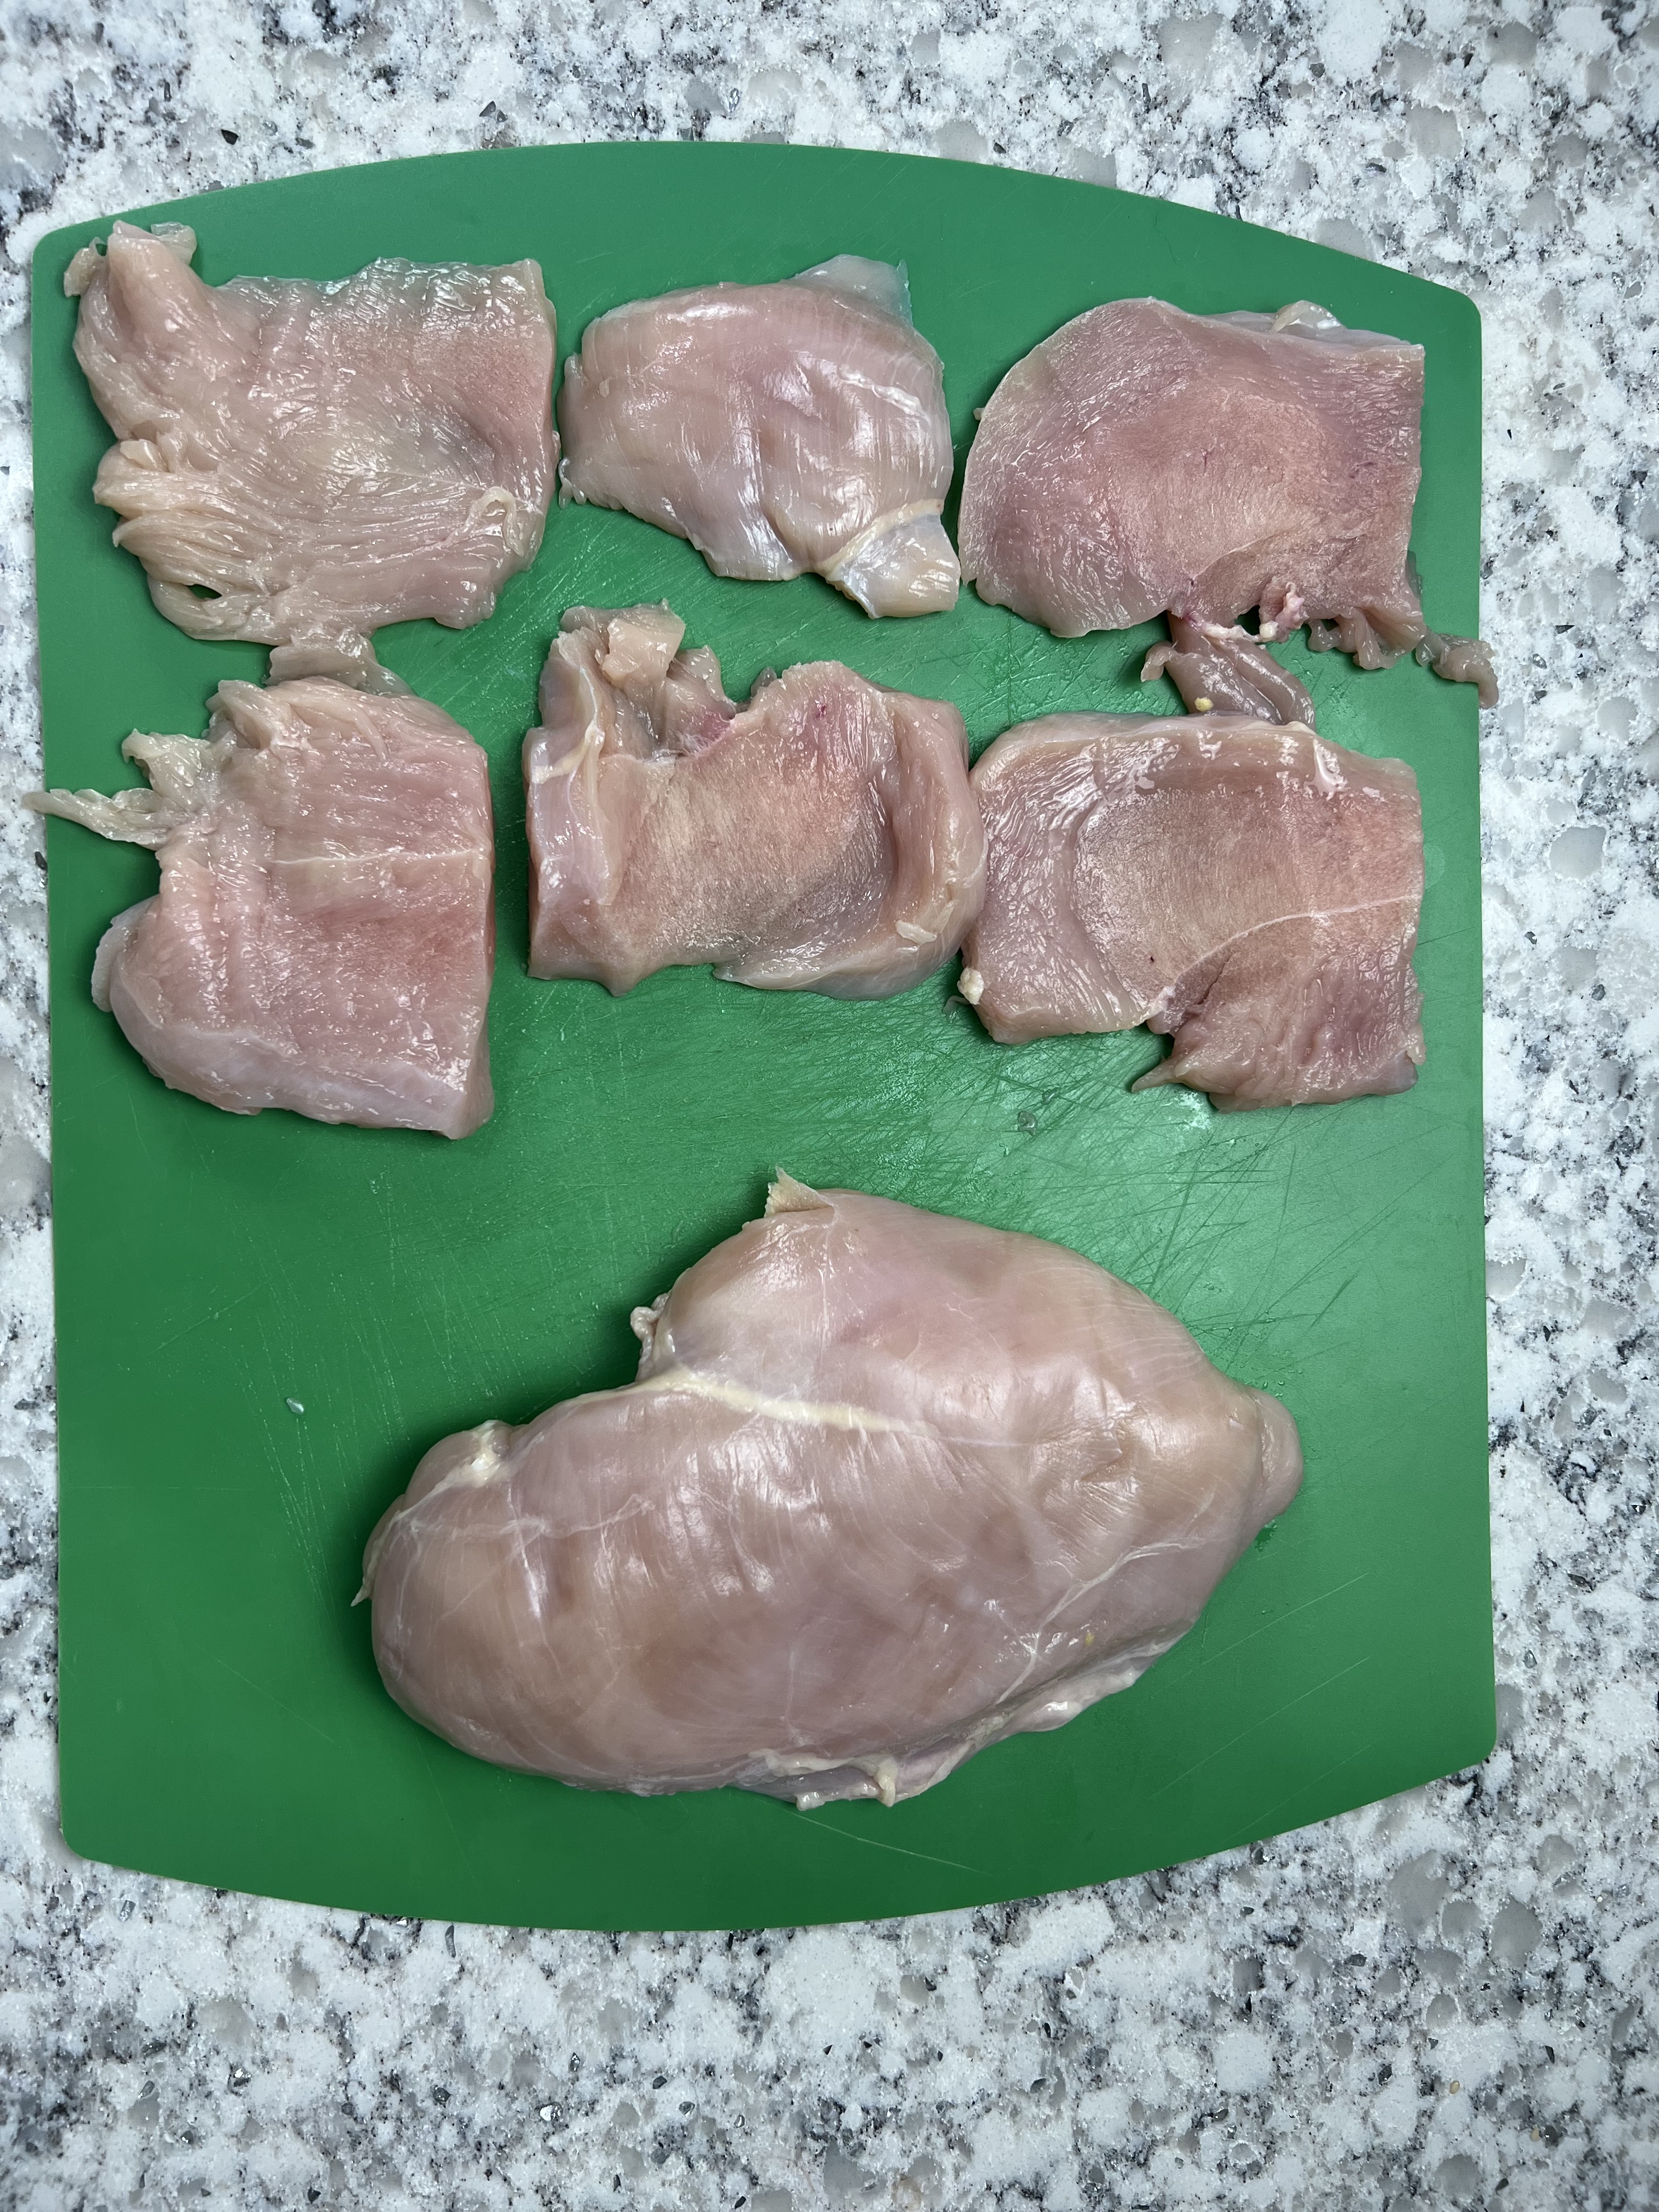
1. Wash chicken breasts and cut into smaller sections~ first in half lengthwise, and then into thirds horizontally. You should end up with about 6 pieces per breast.
2. In a bowl combine flour and parmesan cheese, garlic salt, salt & pepper; blend well.
3. Take each piece of chicken and dredge in flour coating both sides evenly.
Reserve remaining seasoned flour.

4. In a large cast iron skillet, heat half the butter and infused olive oil.
5. Begin adding in the chicken pieces in a single layer; you may need to repeat this process twice depending on the size of your skillet. Remove cooked pieces onto a paper towel lined plate while cooking. Fry each side about 2 to 4 minutes depending on thickness. Be sure to check doneness by cutting into the center and when the juices run clear.
6. Place cooked chicken in a container and cover to keep warm.
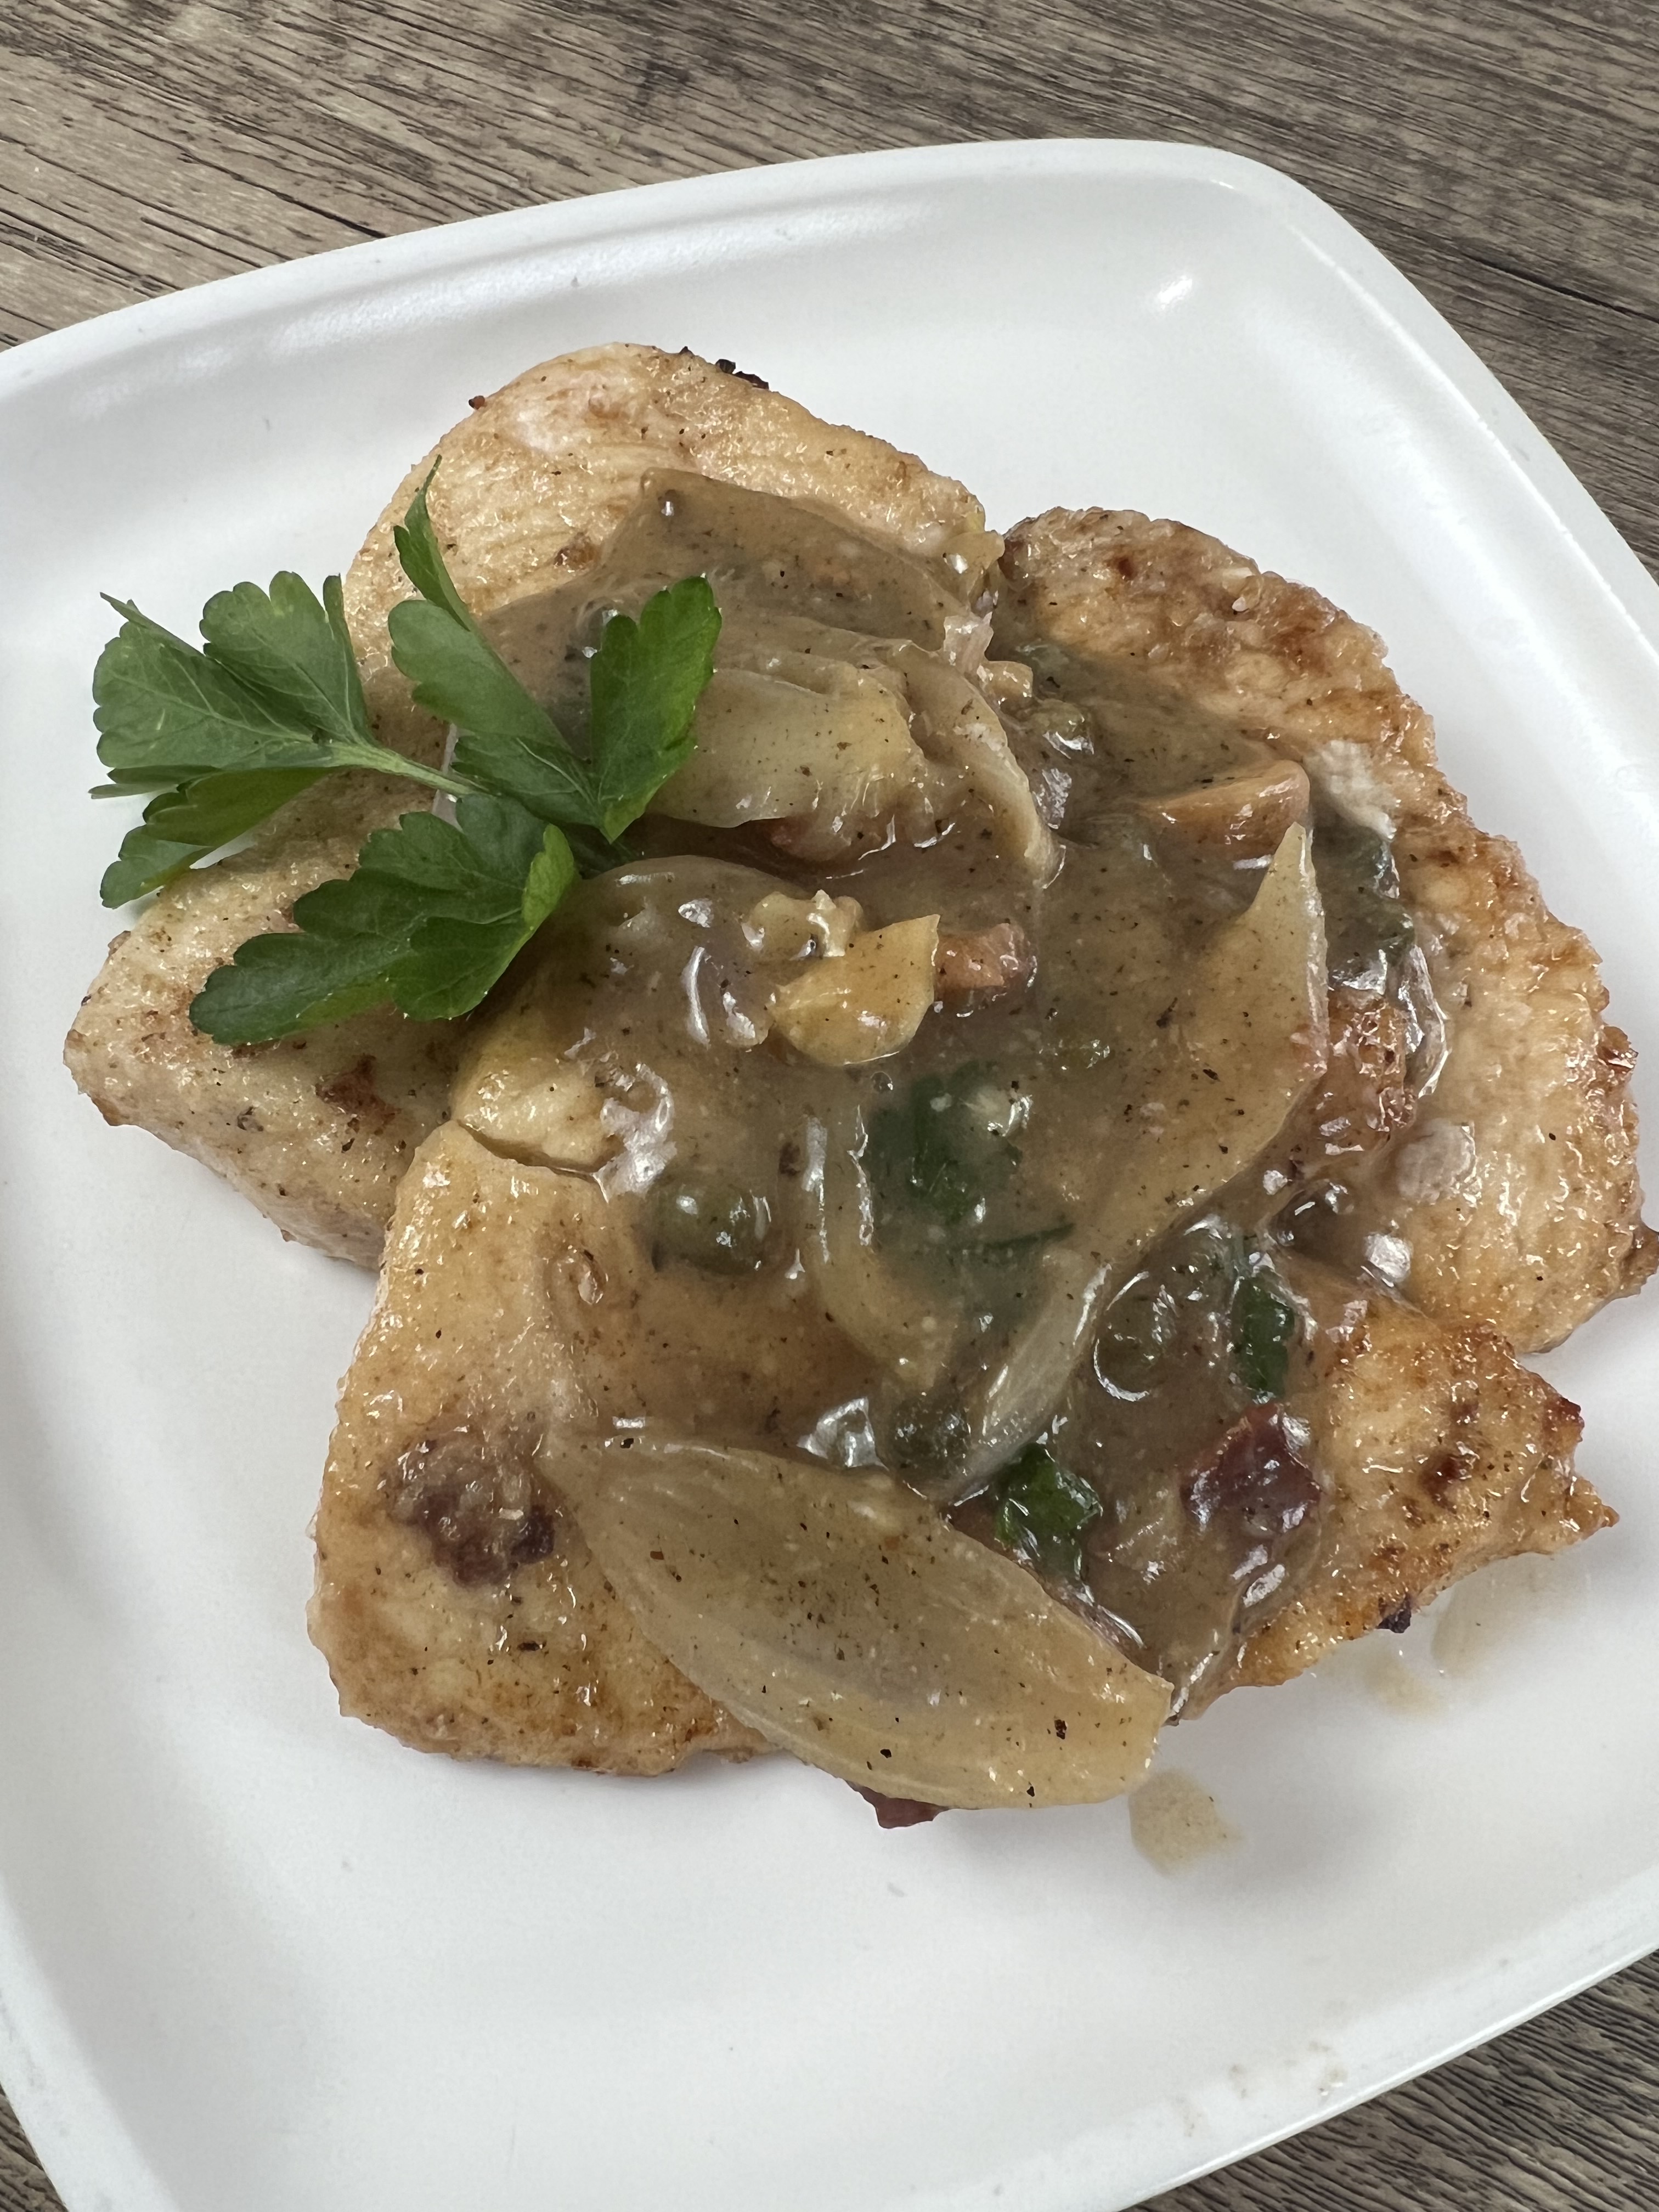
7. Once all your chicken is fried add remaining butter, broth, lemon juice, shallots, capers, bacon, and garlic cloves and ¼ cup of the remaining seasoned flour into the skillet; blend thoroughly until there are no flour clumps and all the ingredients are well blended.
Once picatta gravy has thickened, cook for about 1 minute.
Once the gravy is done, serve over the chicken with mashed potatoes and your favorite vegetable! So yum!
PRO TIP: Precut your bacon into 1 inch sections and then fry! This makes it easier than trying to crumble it!
If you enjoyed this blog, please LIKE, Follow, Share & leave me a comment! I love your feedback~
If you aren’t following me on Facebook & Instagram go on over & give a LIKE & Follow me for daily tips & tricks for your home & garden!
Added bonus: You can go to my blog at http://www.fordragonfliesandme.com to purchase my original cookbook, Lovingly Seasoned Eats and Treats in either a spiral bound soft cover OR NEW, a Downloadable PDF version. The cookbook has almost 1000 recipes on almost 500 pages! Check out the Cookbook Testimonials while you’re there!
Until next time remember to,
Eat fresh, shop local & have a happy day,
Jean
Copyright Policy
All text and images on this site are copyright of For Dragonflies And Me. Unless otherwise noted, you may not use this content.

“Cooking is about passion, so it may look slightly temperamental in a way that it’s too assertive to the naked eye.” – Gordon Ramsay

Dave and the boys really enjoy a good ramen! We have never made it from scratch, so as we were making our monthly menu, this was an item that got placed on it. So Dave & I looked for some recipes, and to say the least there were several types. We found a few that had different ingredients and decided to create our own version with what we liked from those recipe ideas.
This is what we came up with, and I’m sure you’re going to love it! Enjoy friends!
Watch my YouTube Video for the cooking demonstration!
For the full list of ingredients & instructions… scroll down!
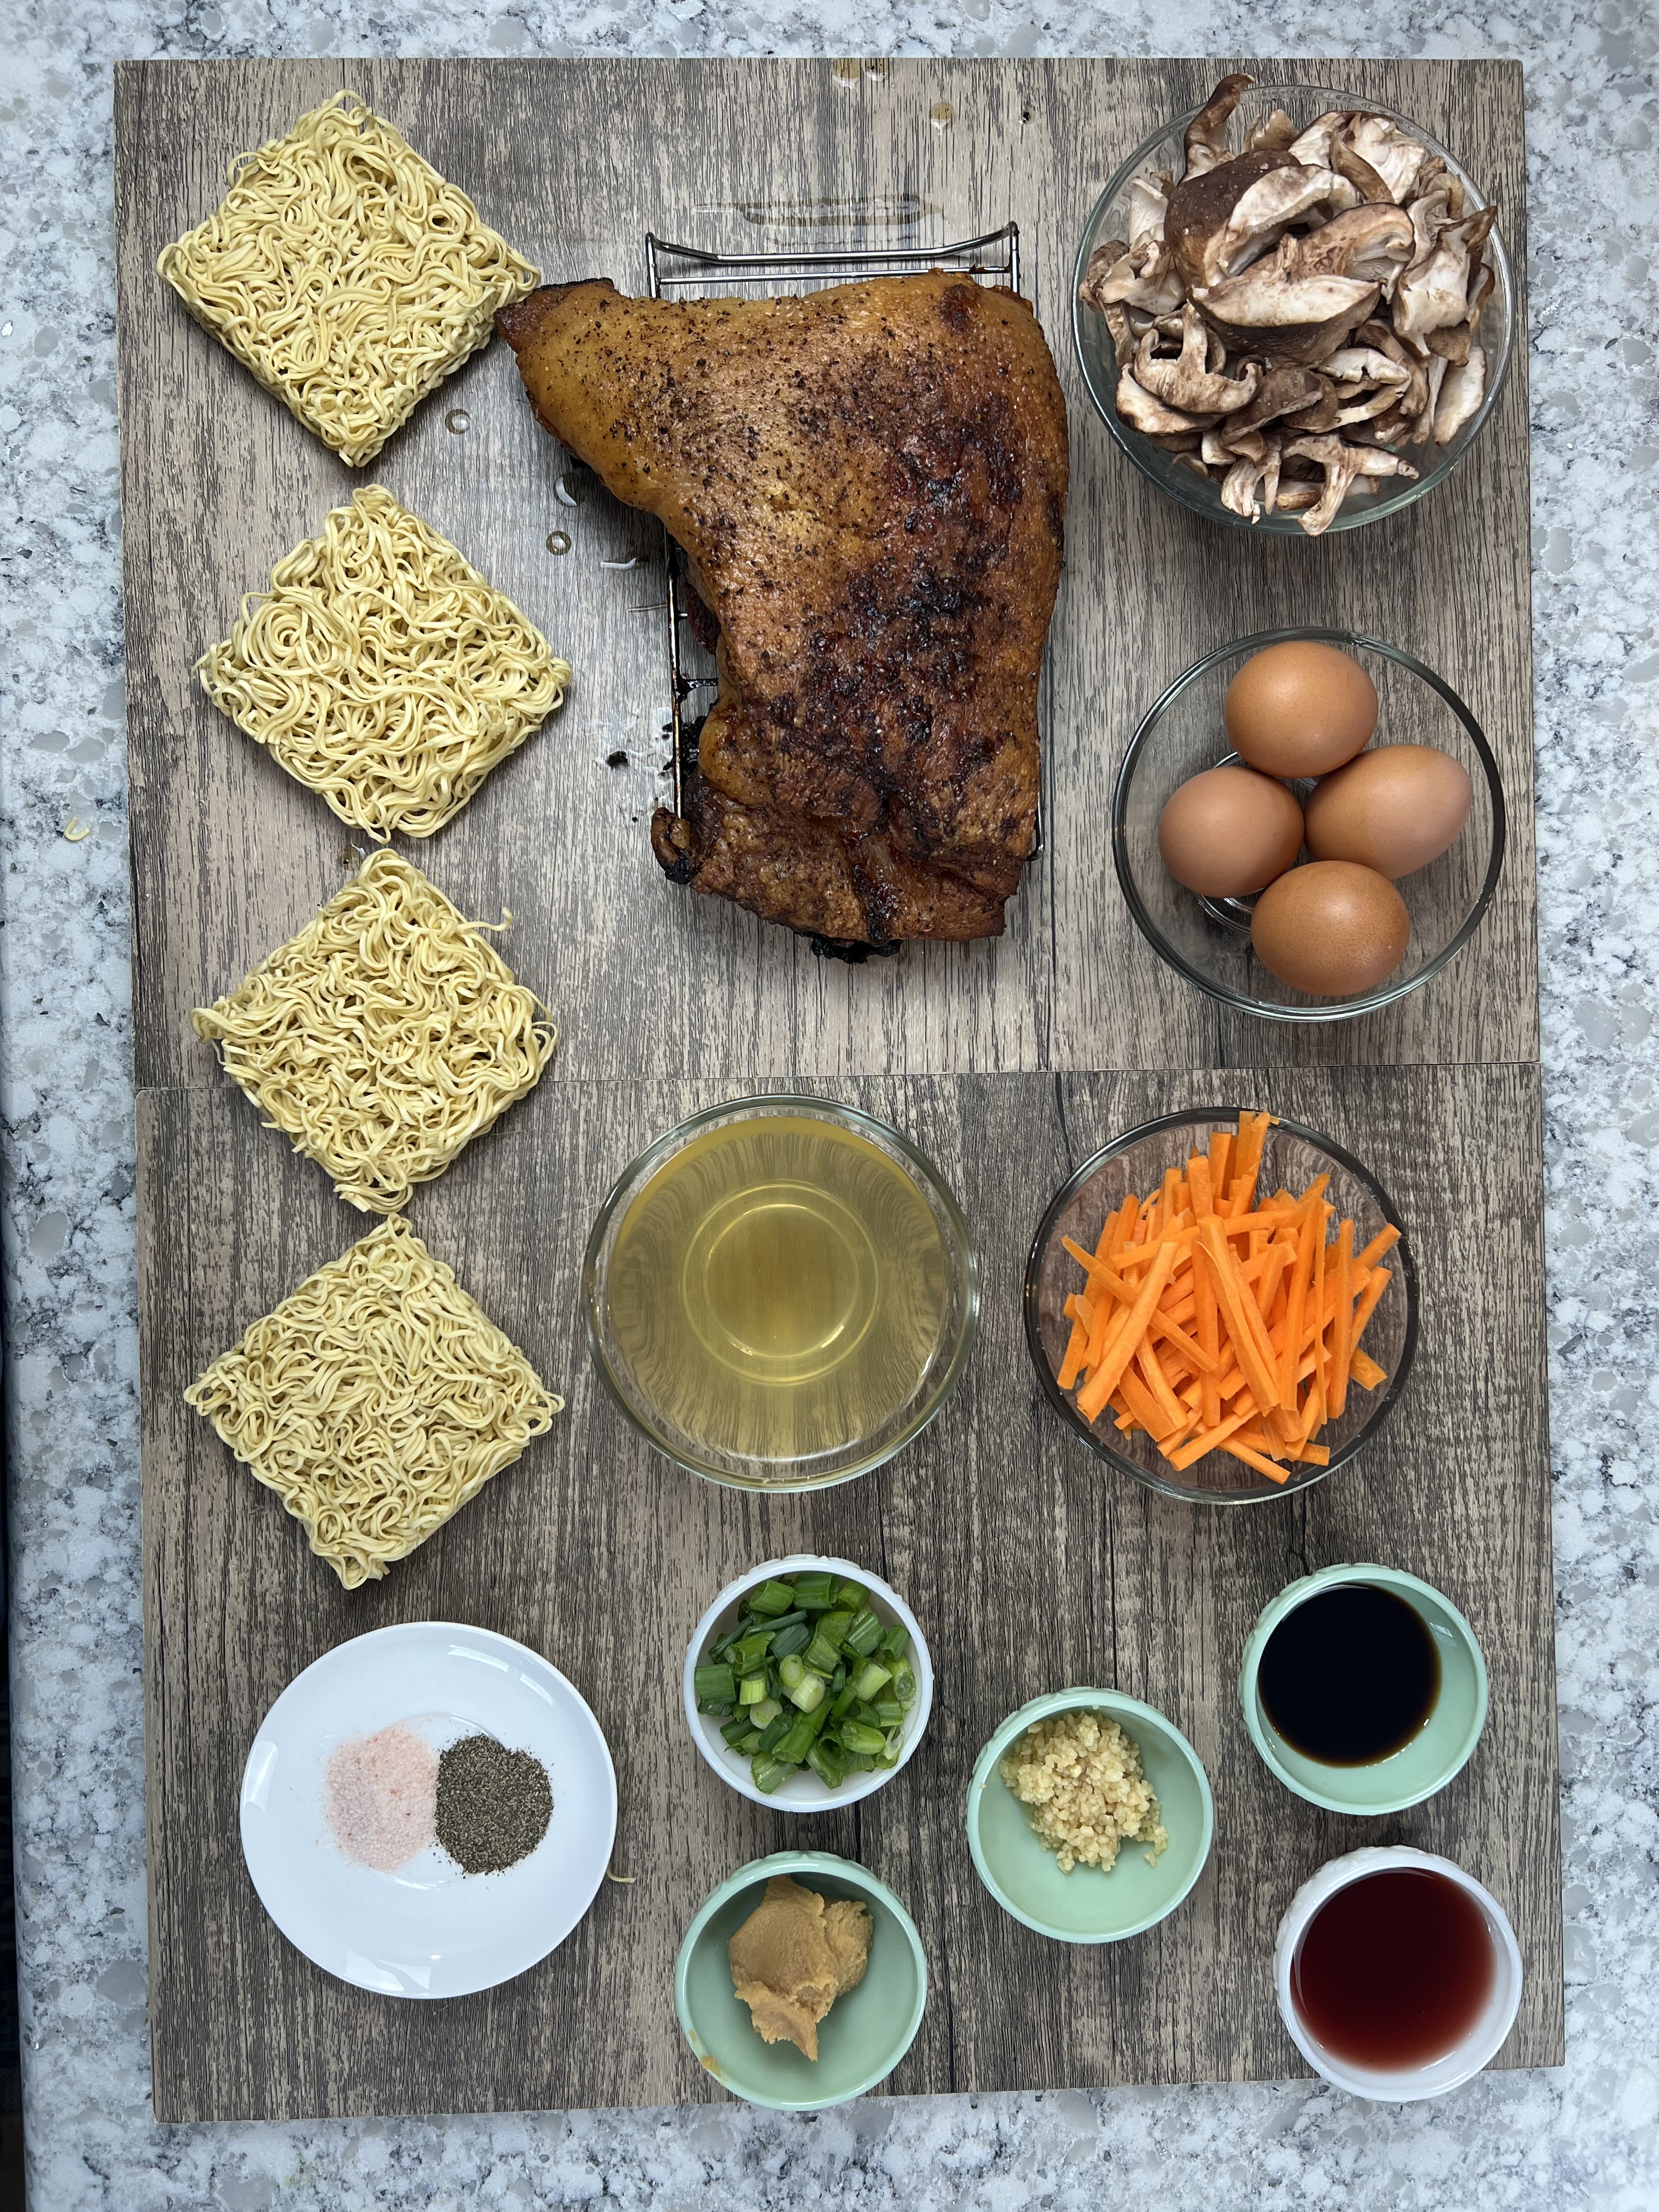
Ingredients: Yields 4 servings with a bit of left over!
About 3 pounds of pork belly unsliced and cooked
2~ 8 ounce packages of Japanese style ramen noodles
8 cups of chicken broth
4 ounces shiitake mushrooms
2 green onions, diced
2 large carrots cut into matchstick slices
2 TBSP soy sauce
2 TBSP rice wine
1 TBSP White Miso Soybean Paste
2 cloves of garlic minced OR 2 tsp jarred
1 tsp pink Himalayan salt
1 tsp fresh ground black pepper
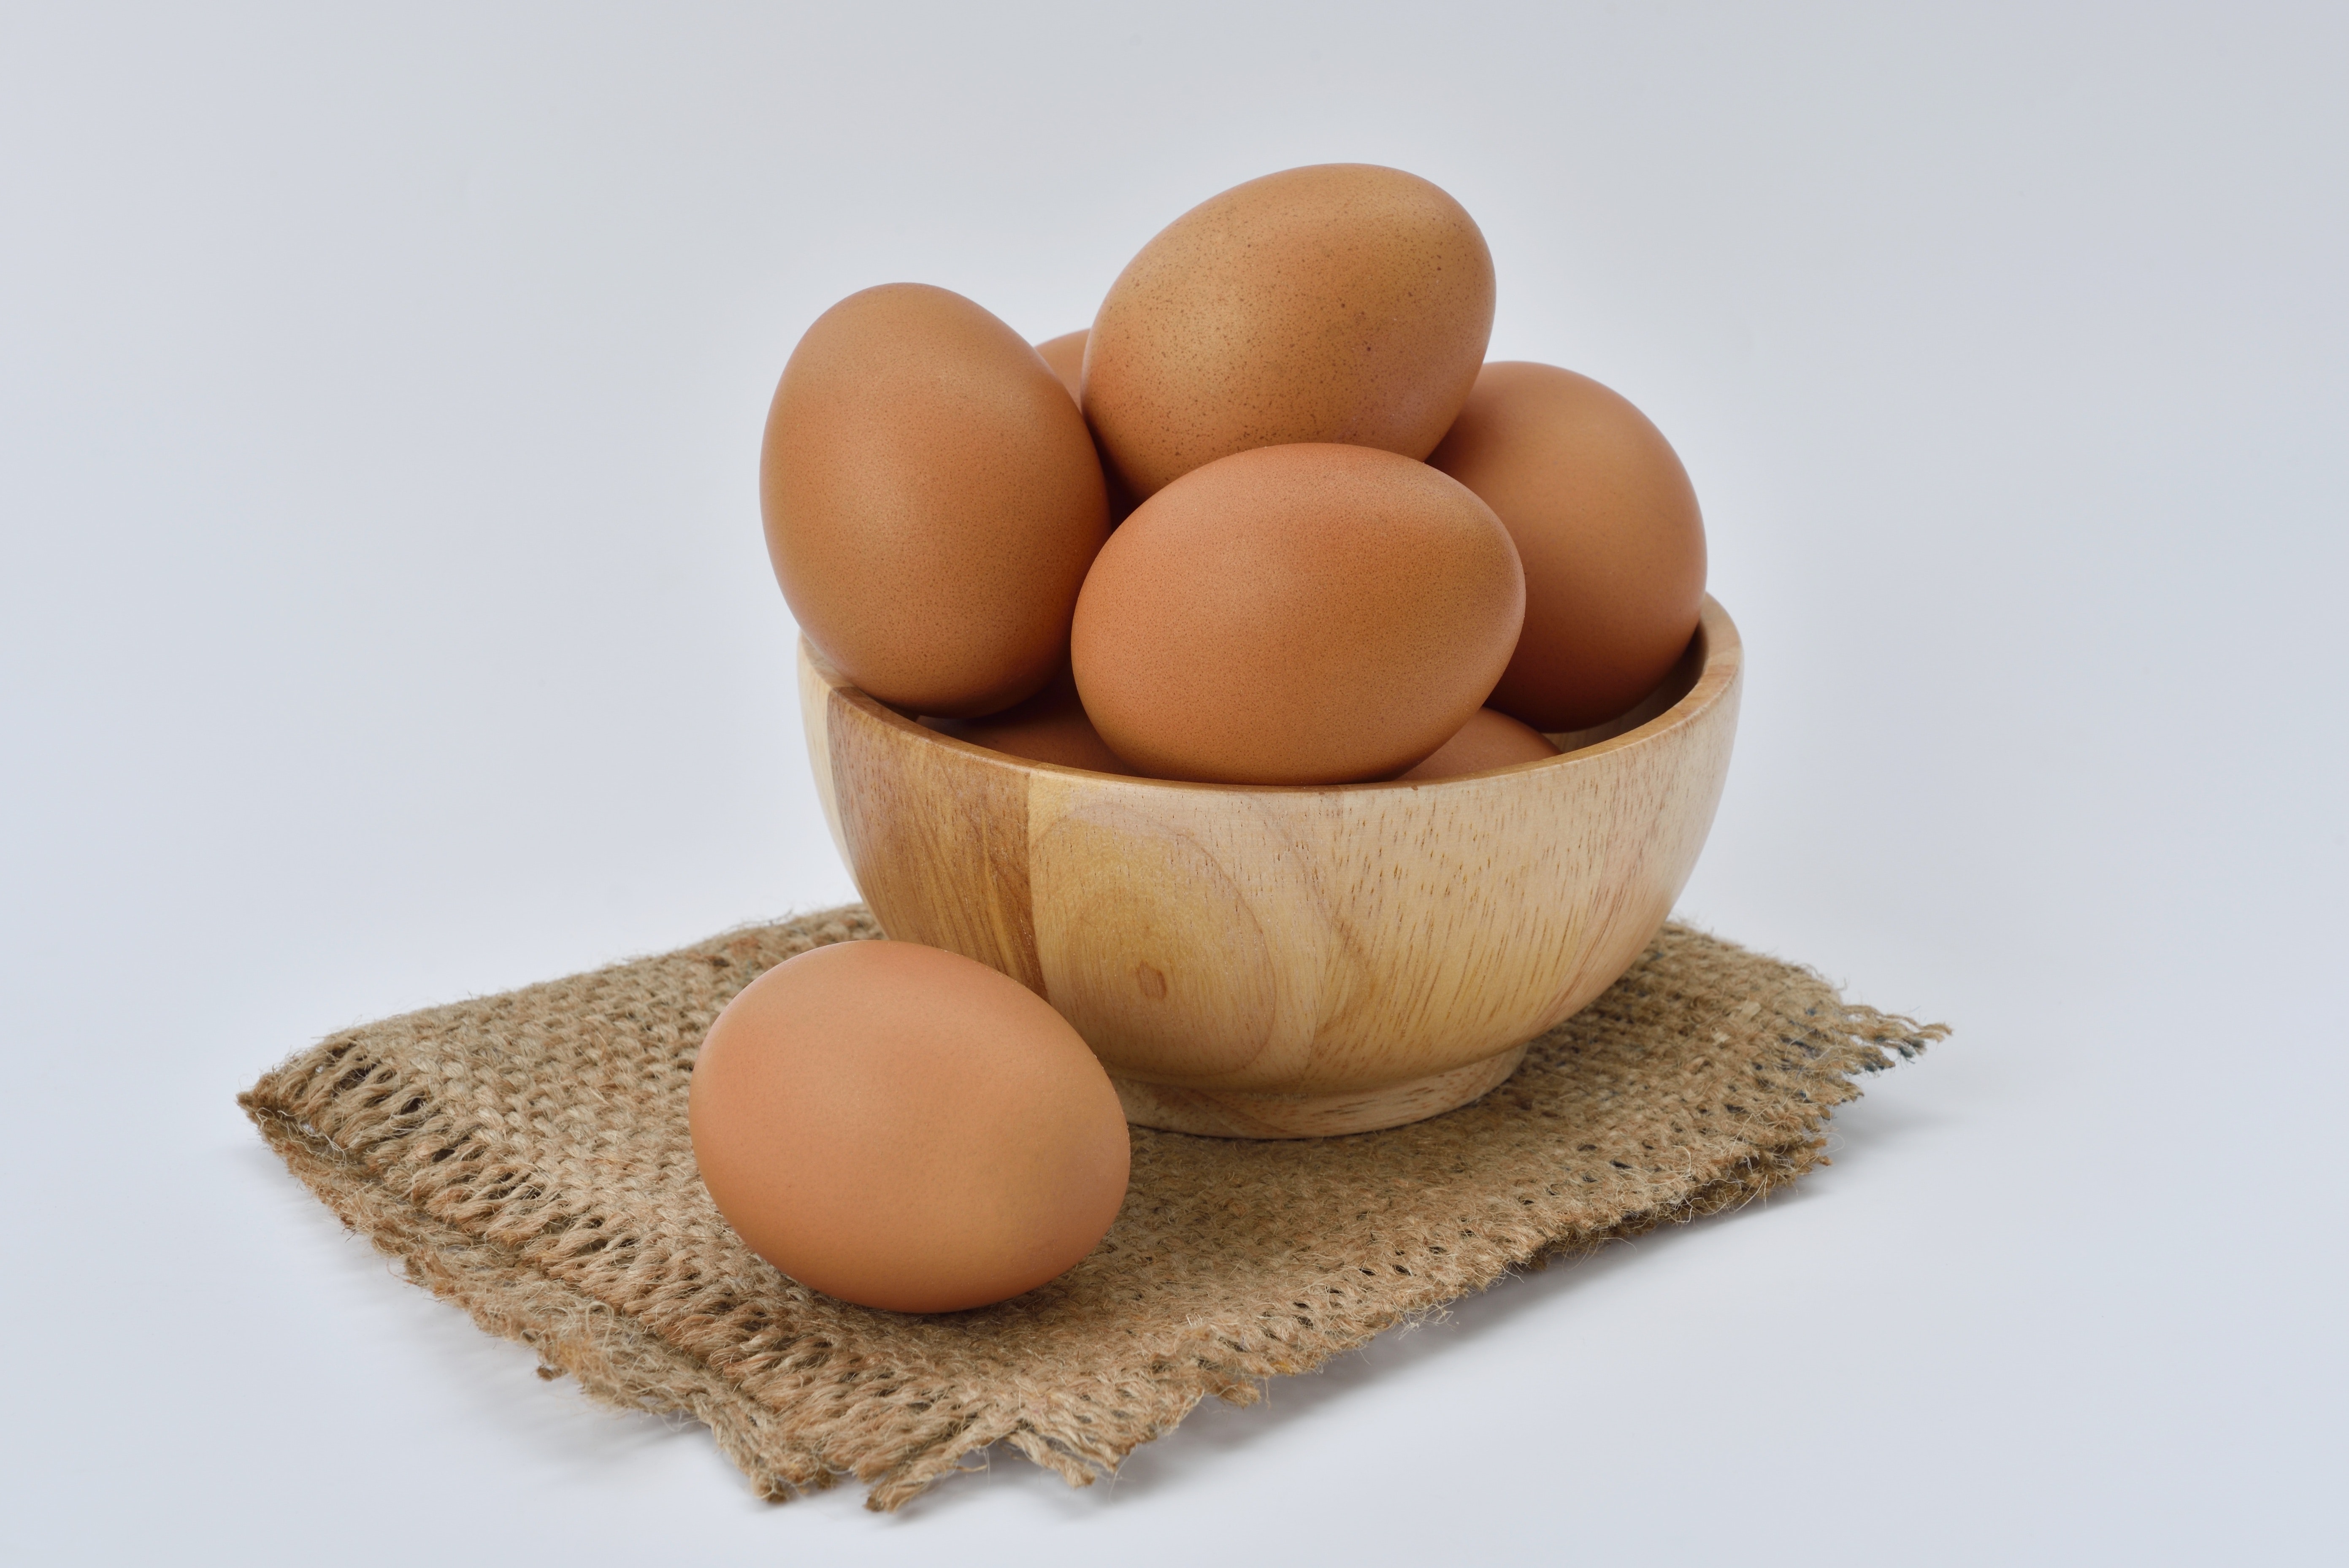
4 soft or hard boiled eggs~ however you prefer them.
Be sure to purchase traditional ramen noodles for the best result!

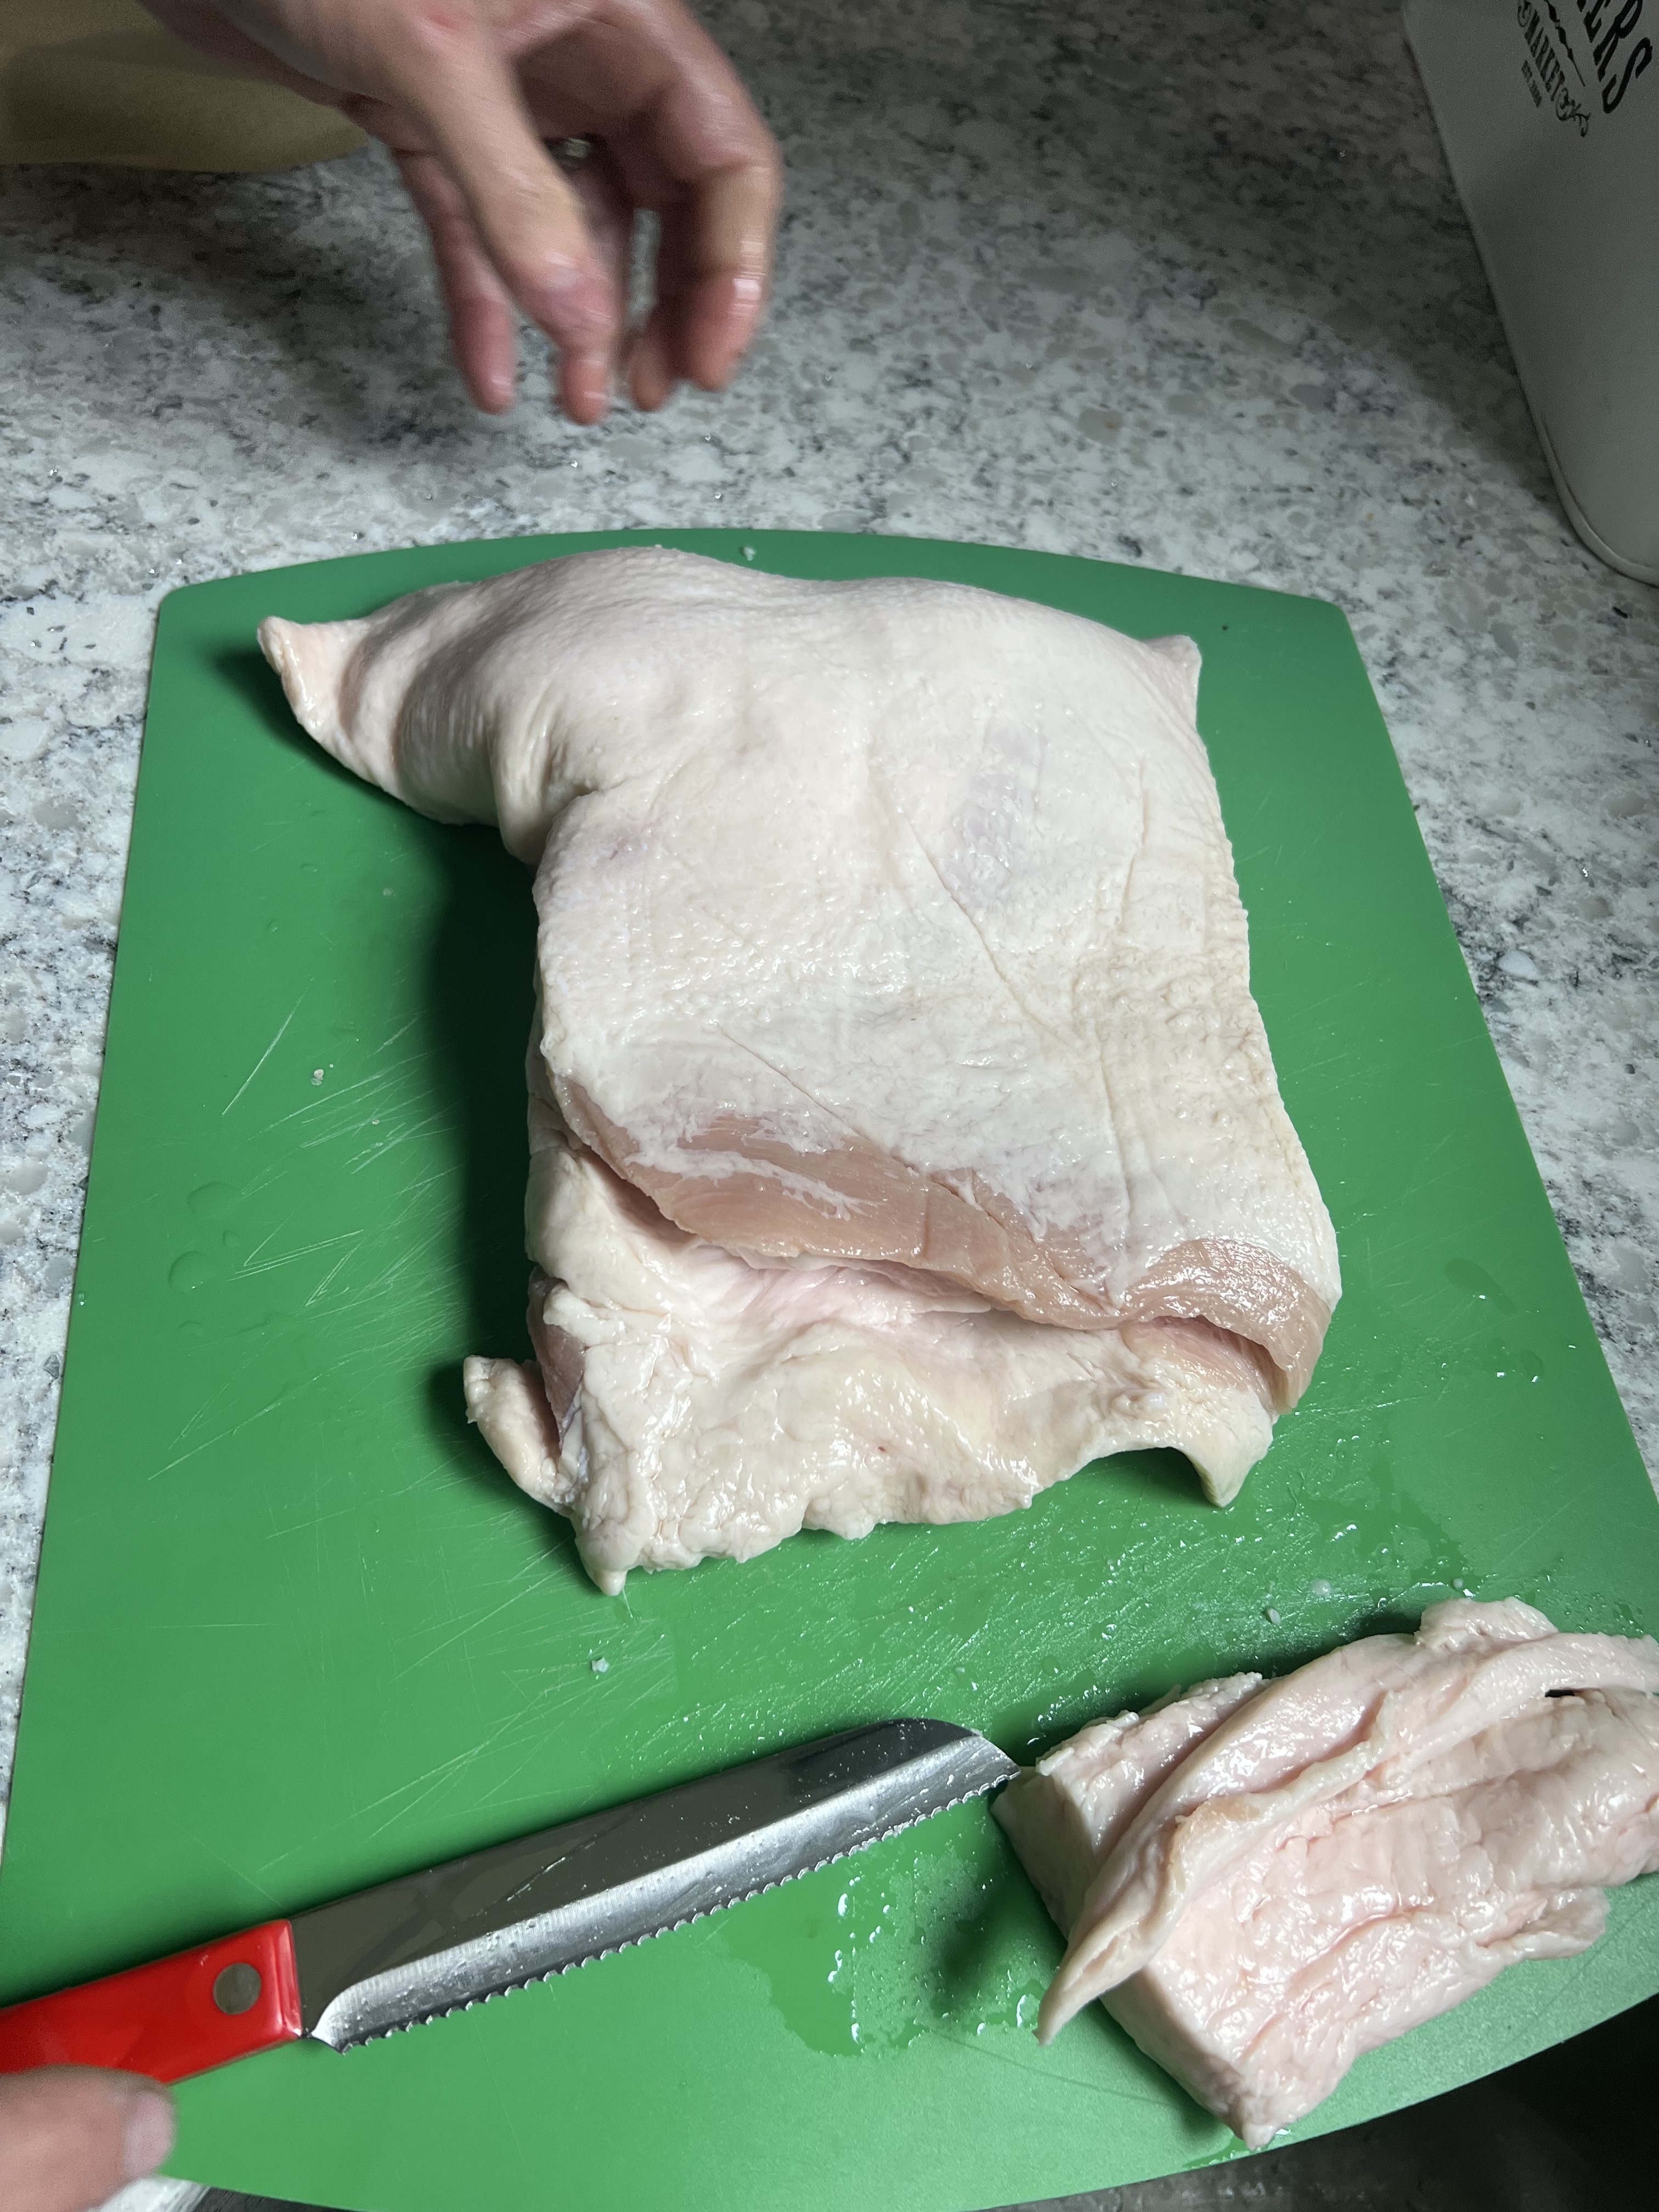
1. Precook the pork belly:
Wash the meat and trim off any excess fat.
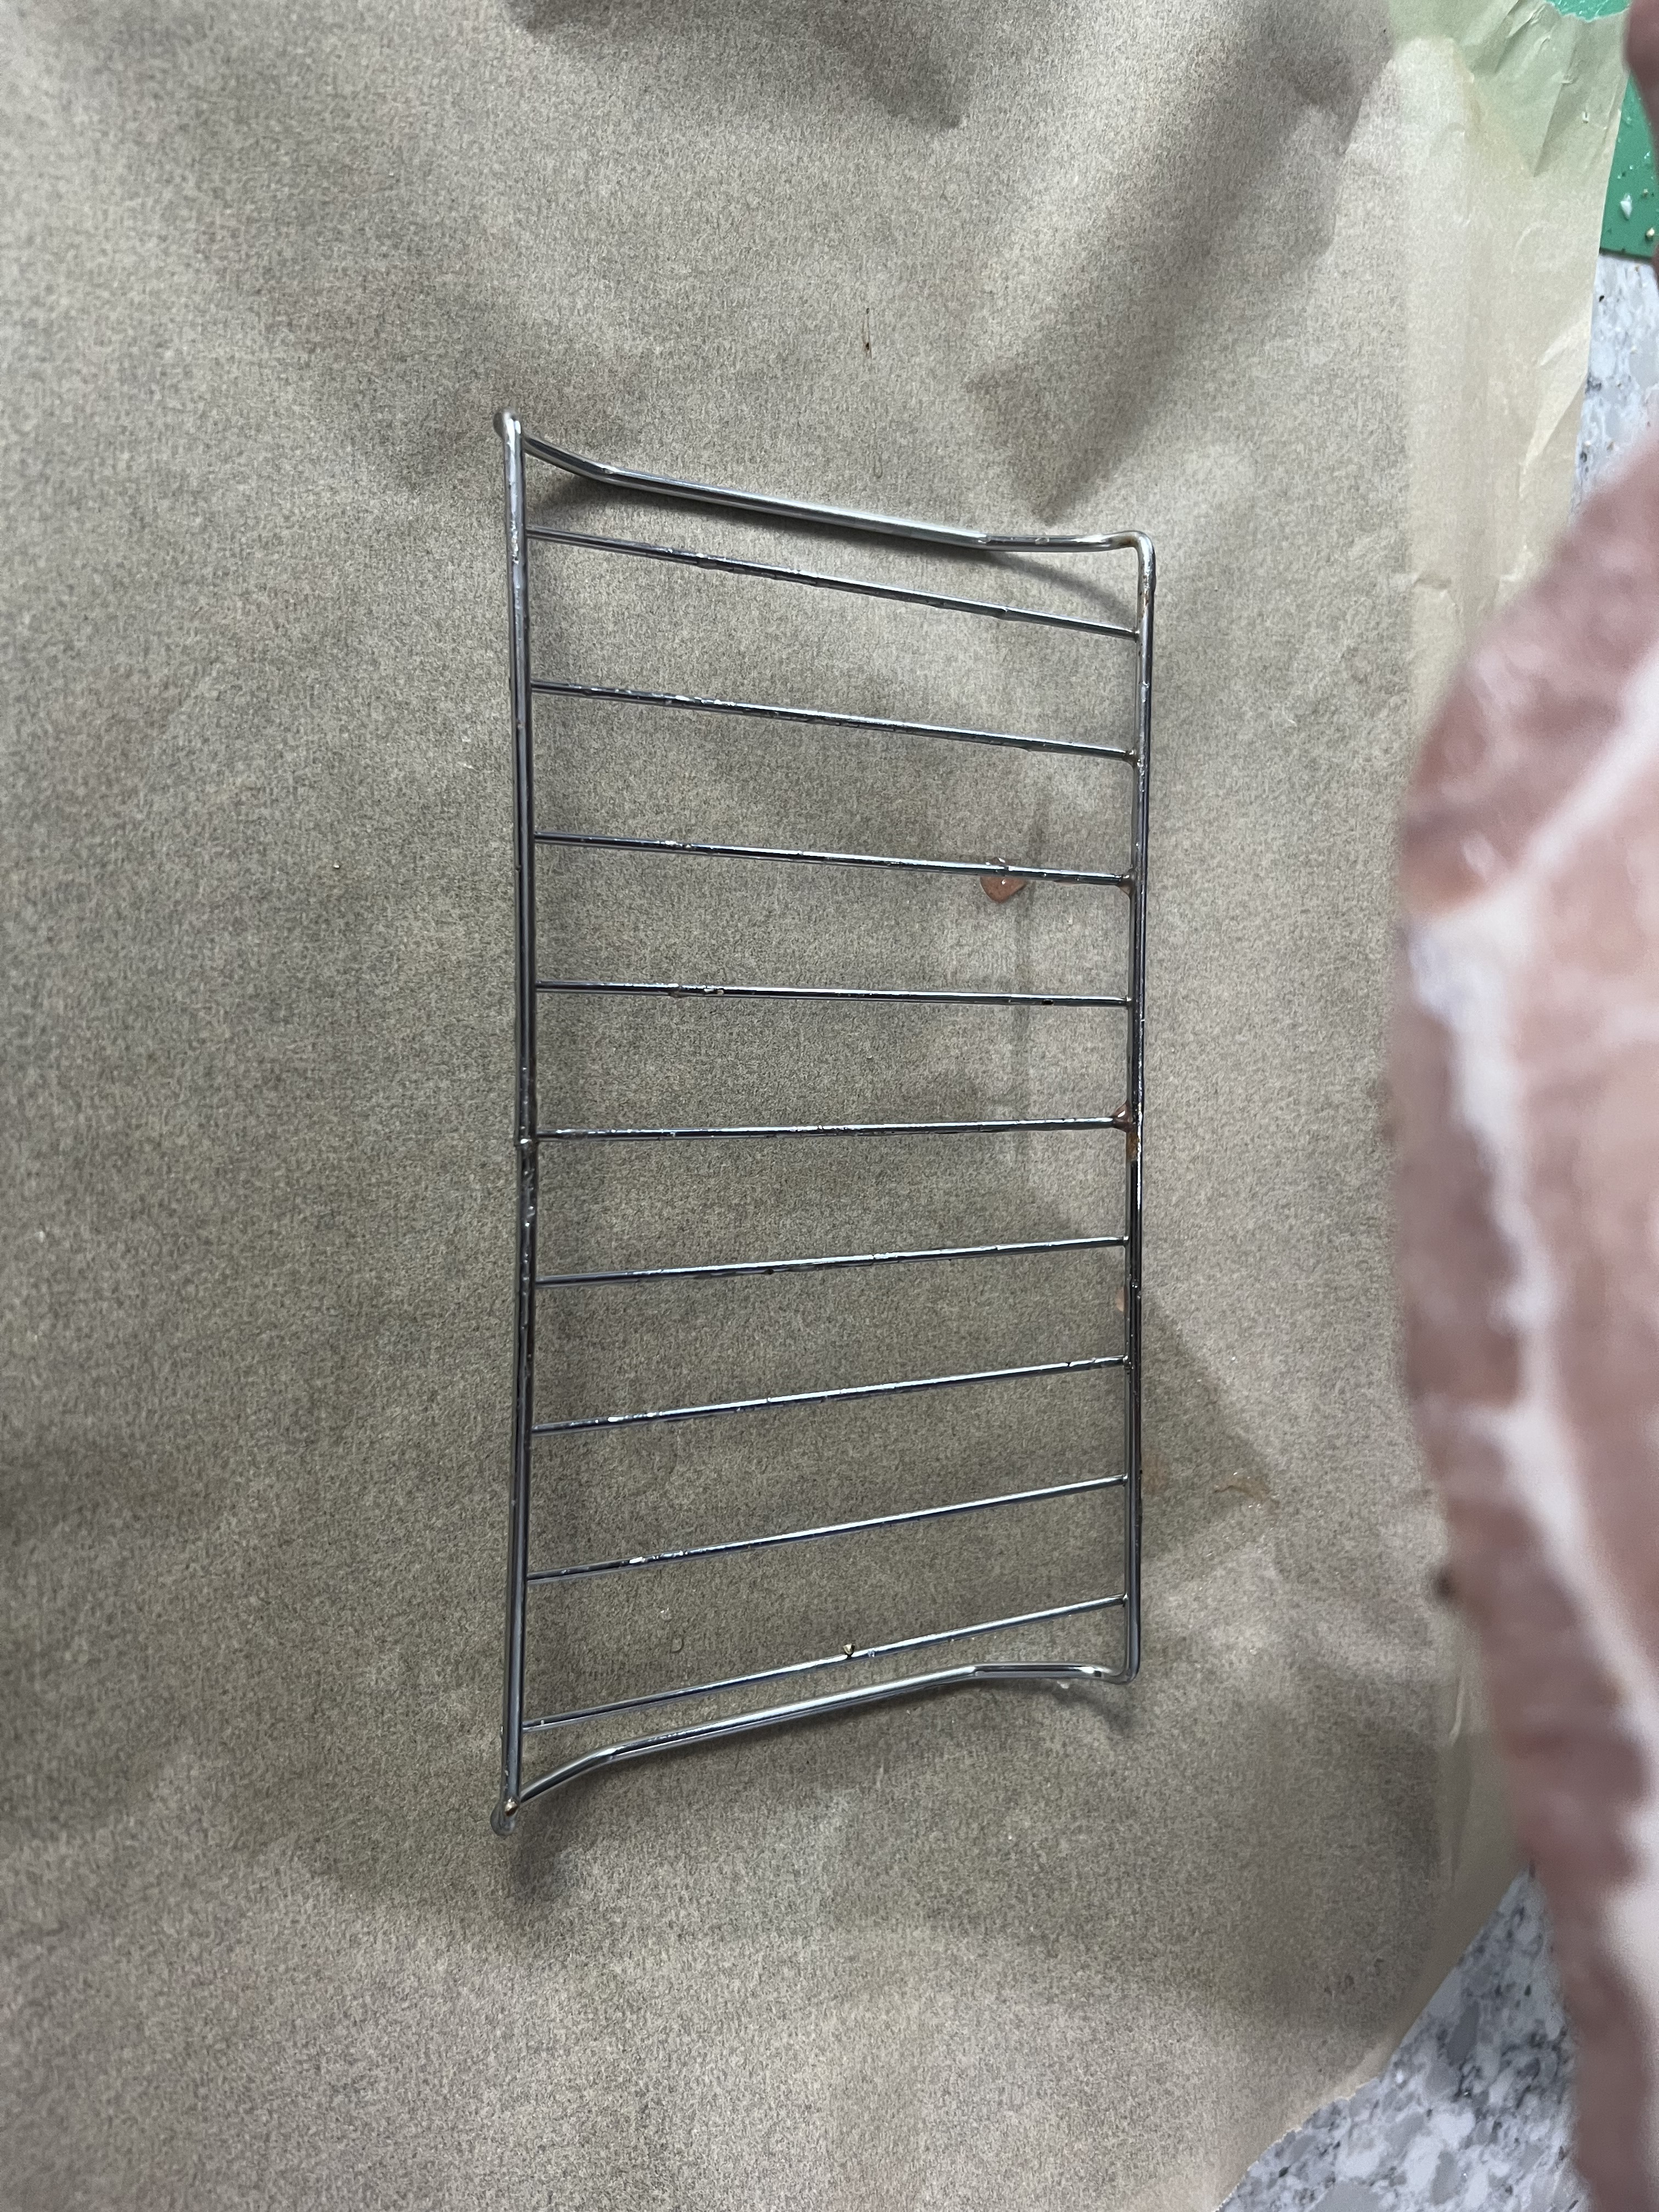
On a foil lined cookie sheet, place a wire cooling rack.
Be sure to have all your ingredients!

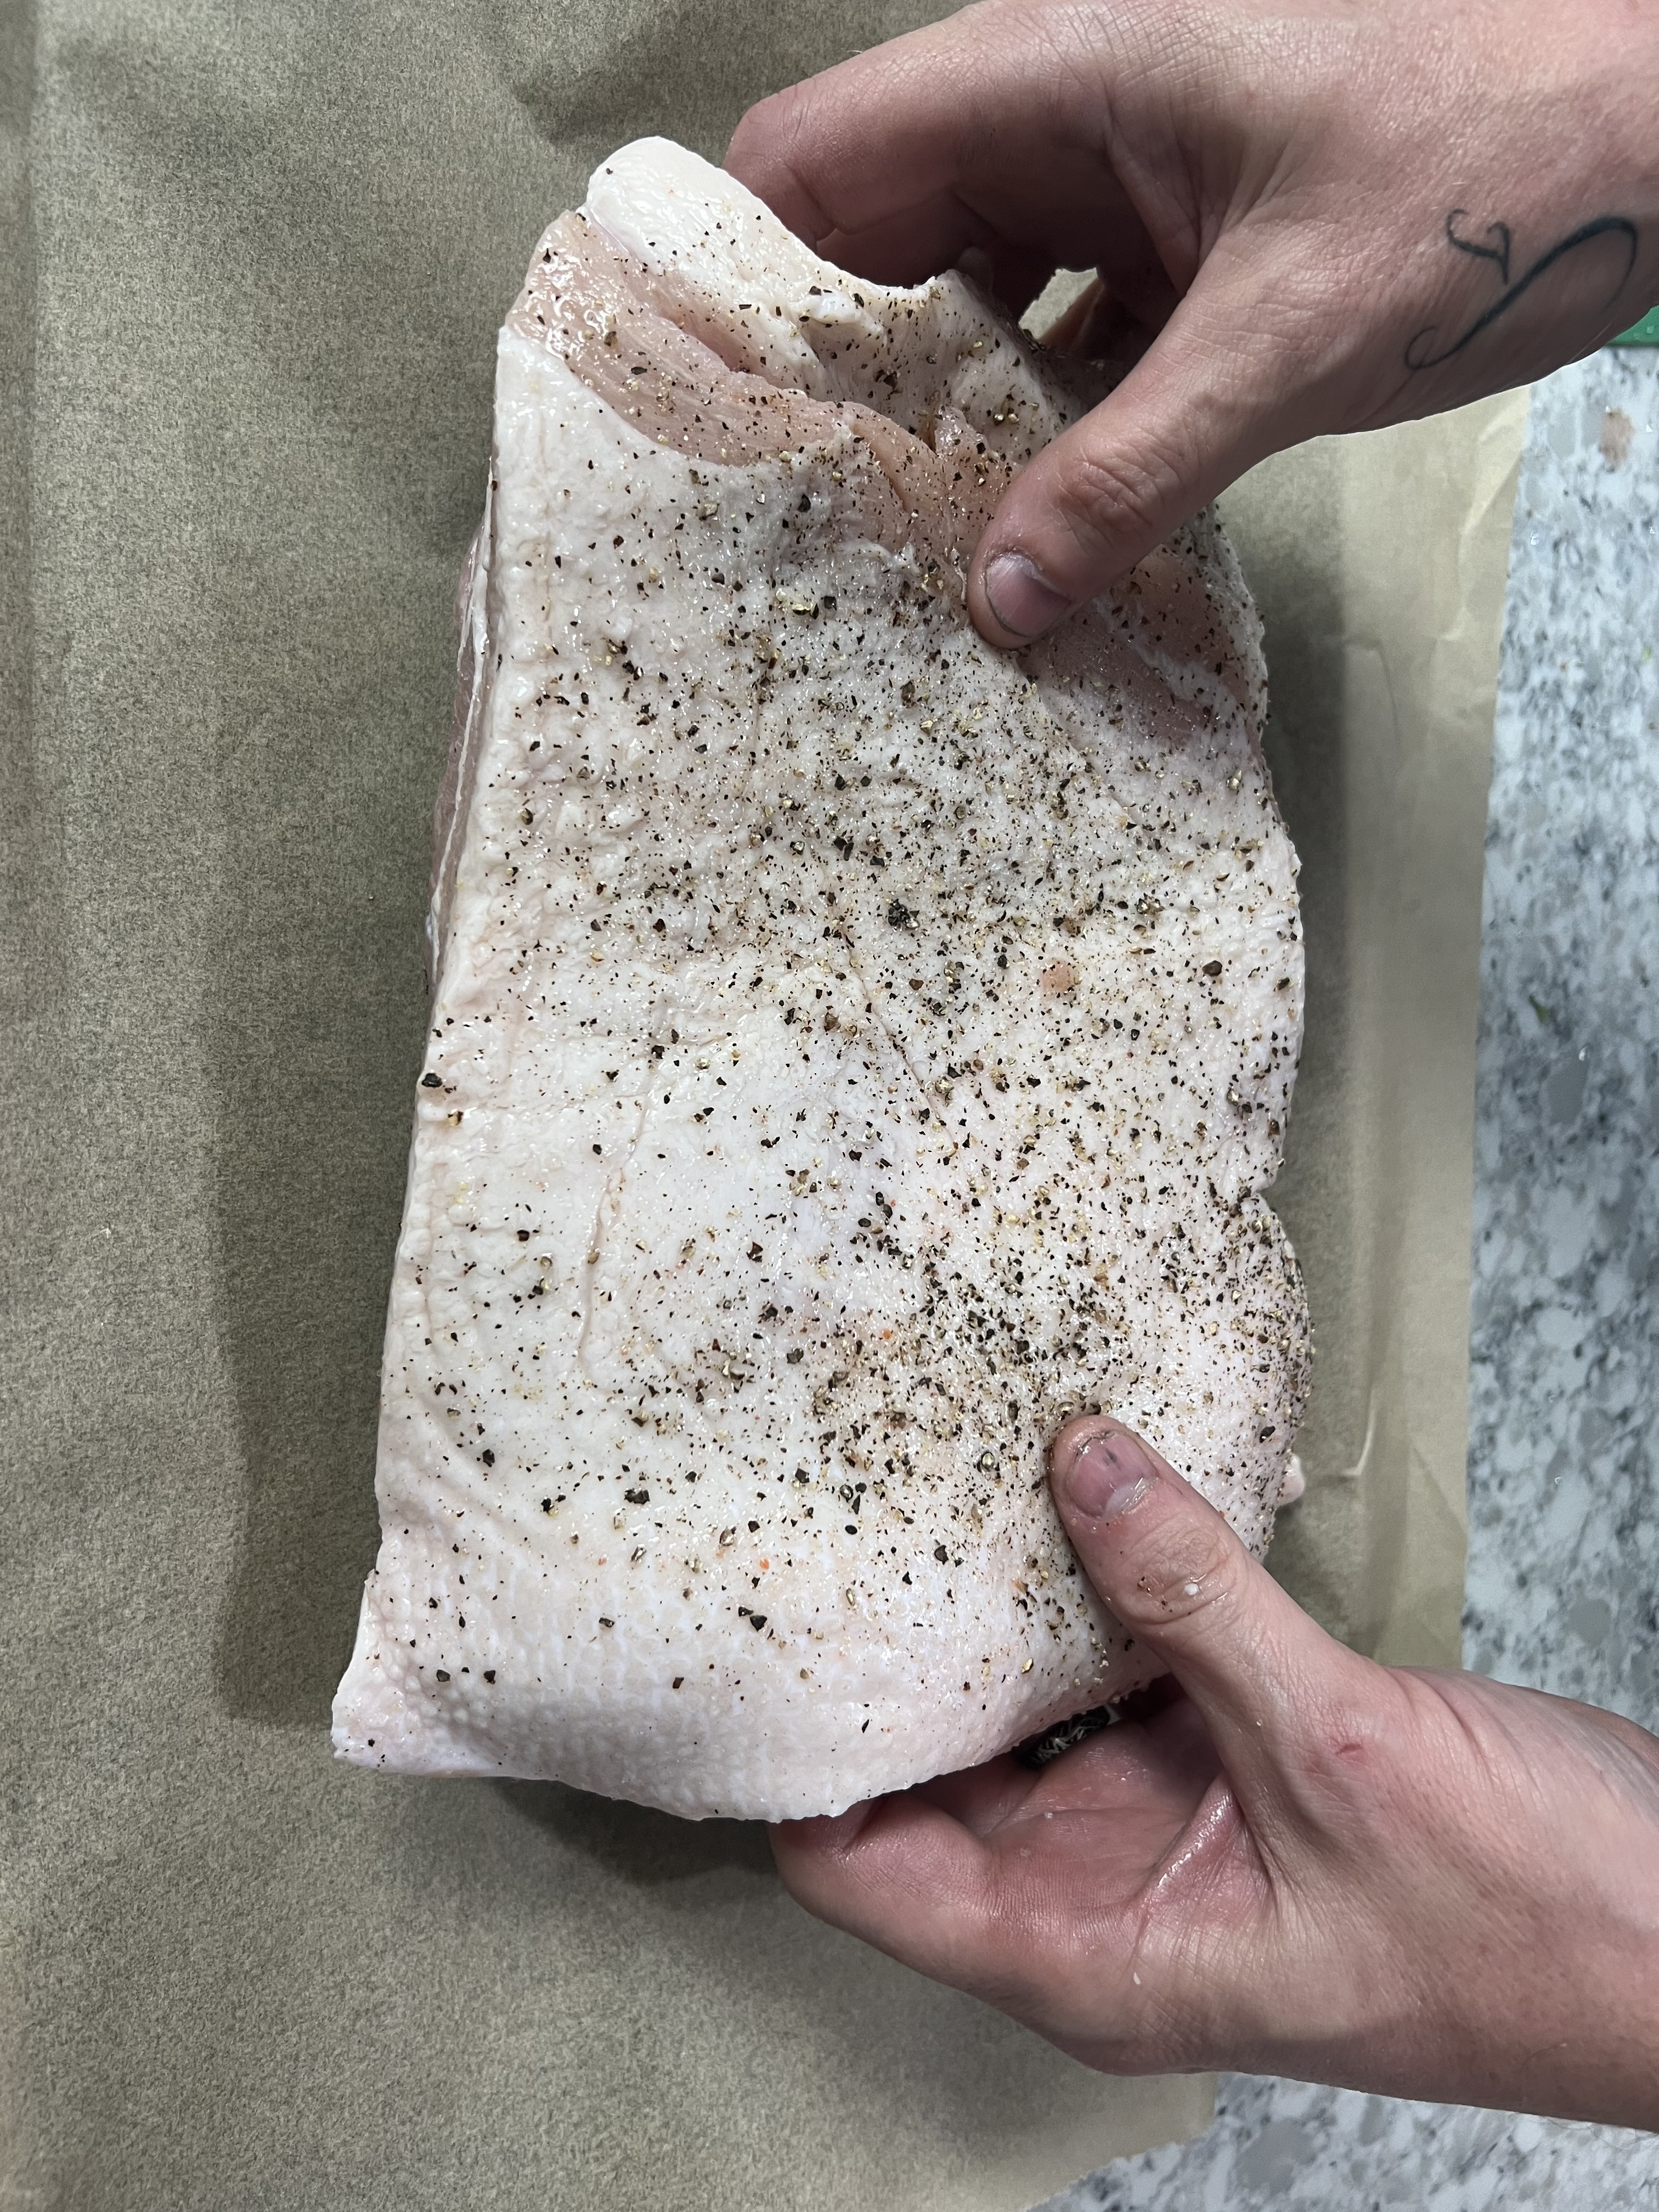
Take pork belly and slather it with about 2 TBSP of olive oil, and then blend the salt and pepper over the entire slab on both sides.
Place the pork belly fat side up on the wire rack and bake for 1 ½ hours.
Turn heat up to 450 degrees and bake for an additional 20 to 30 minutes, or until golden brown and crisp.
2. While the pork belly is cooking begin the soup:
In a large stockpot pour chicken broth on high heat and add soy sauce, miso, mushrooms, and garlic.
Bring to a boil and let simmer for about an hour.

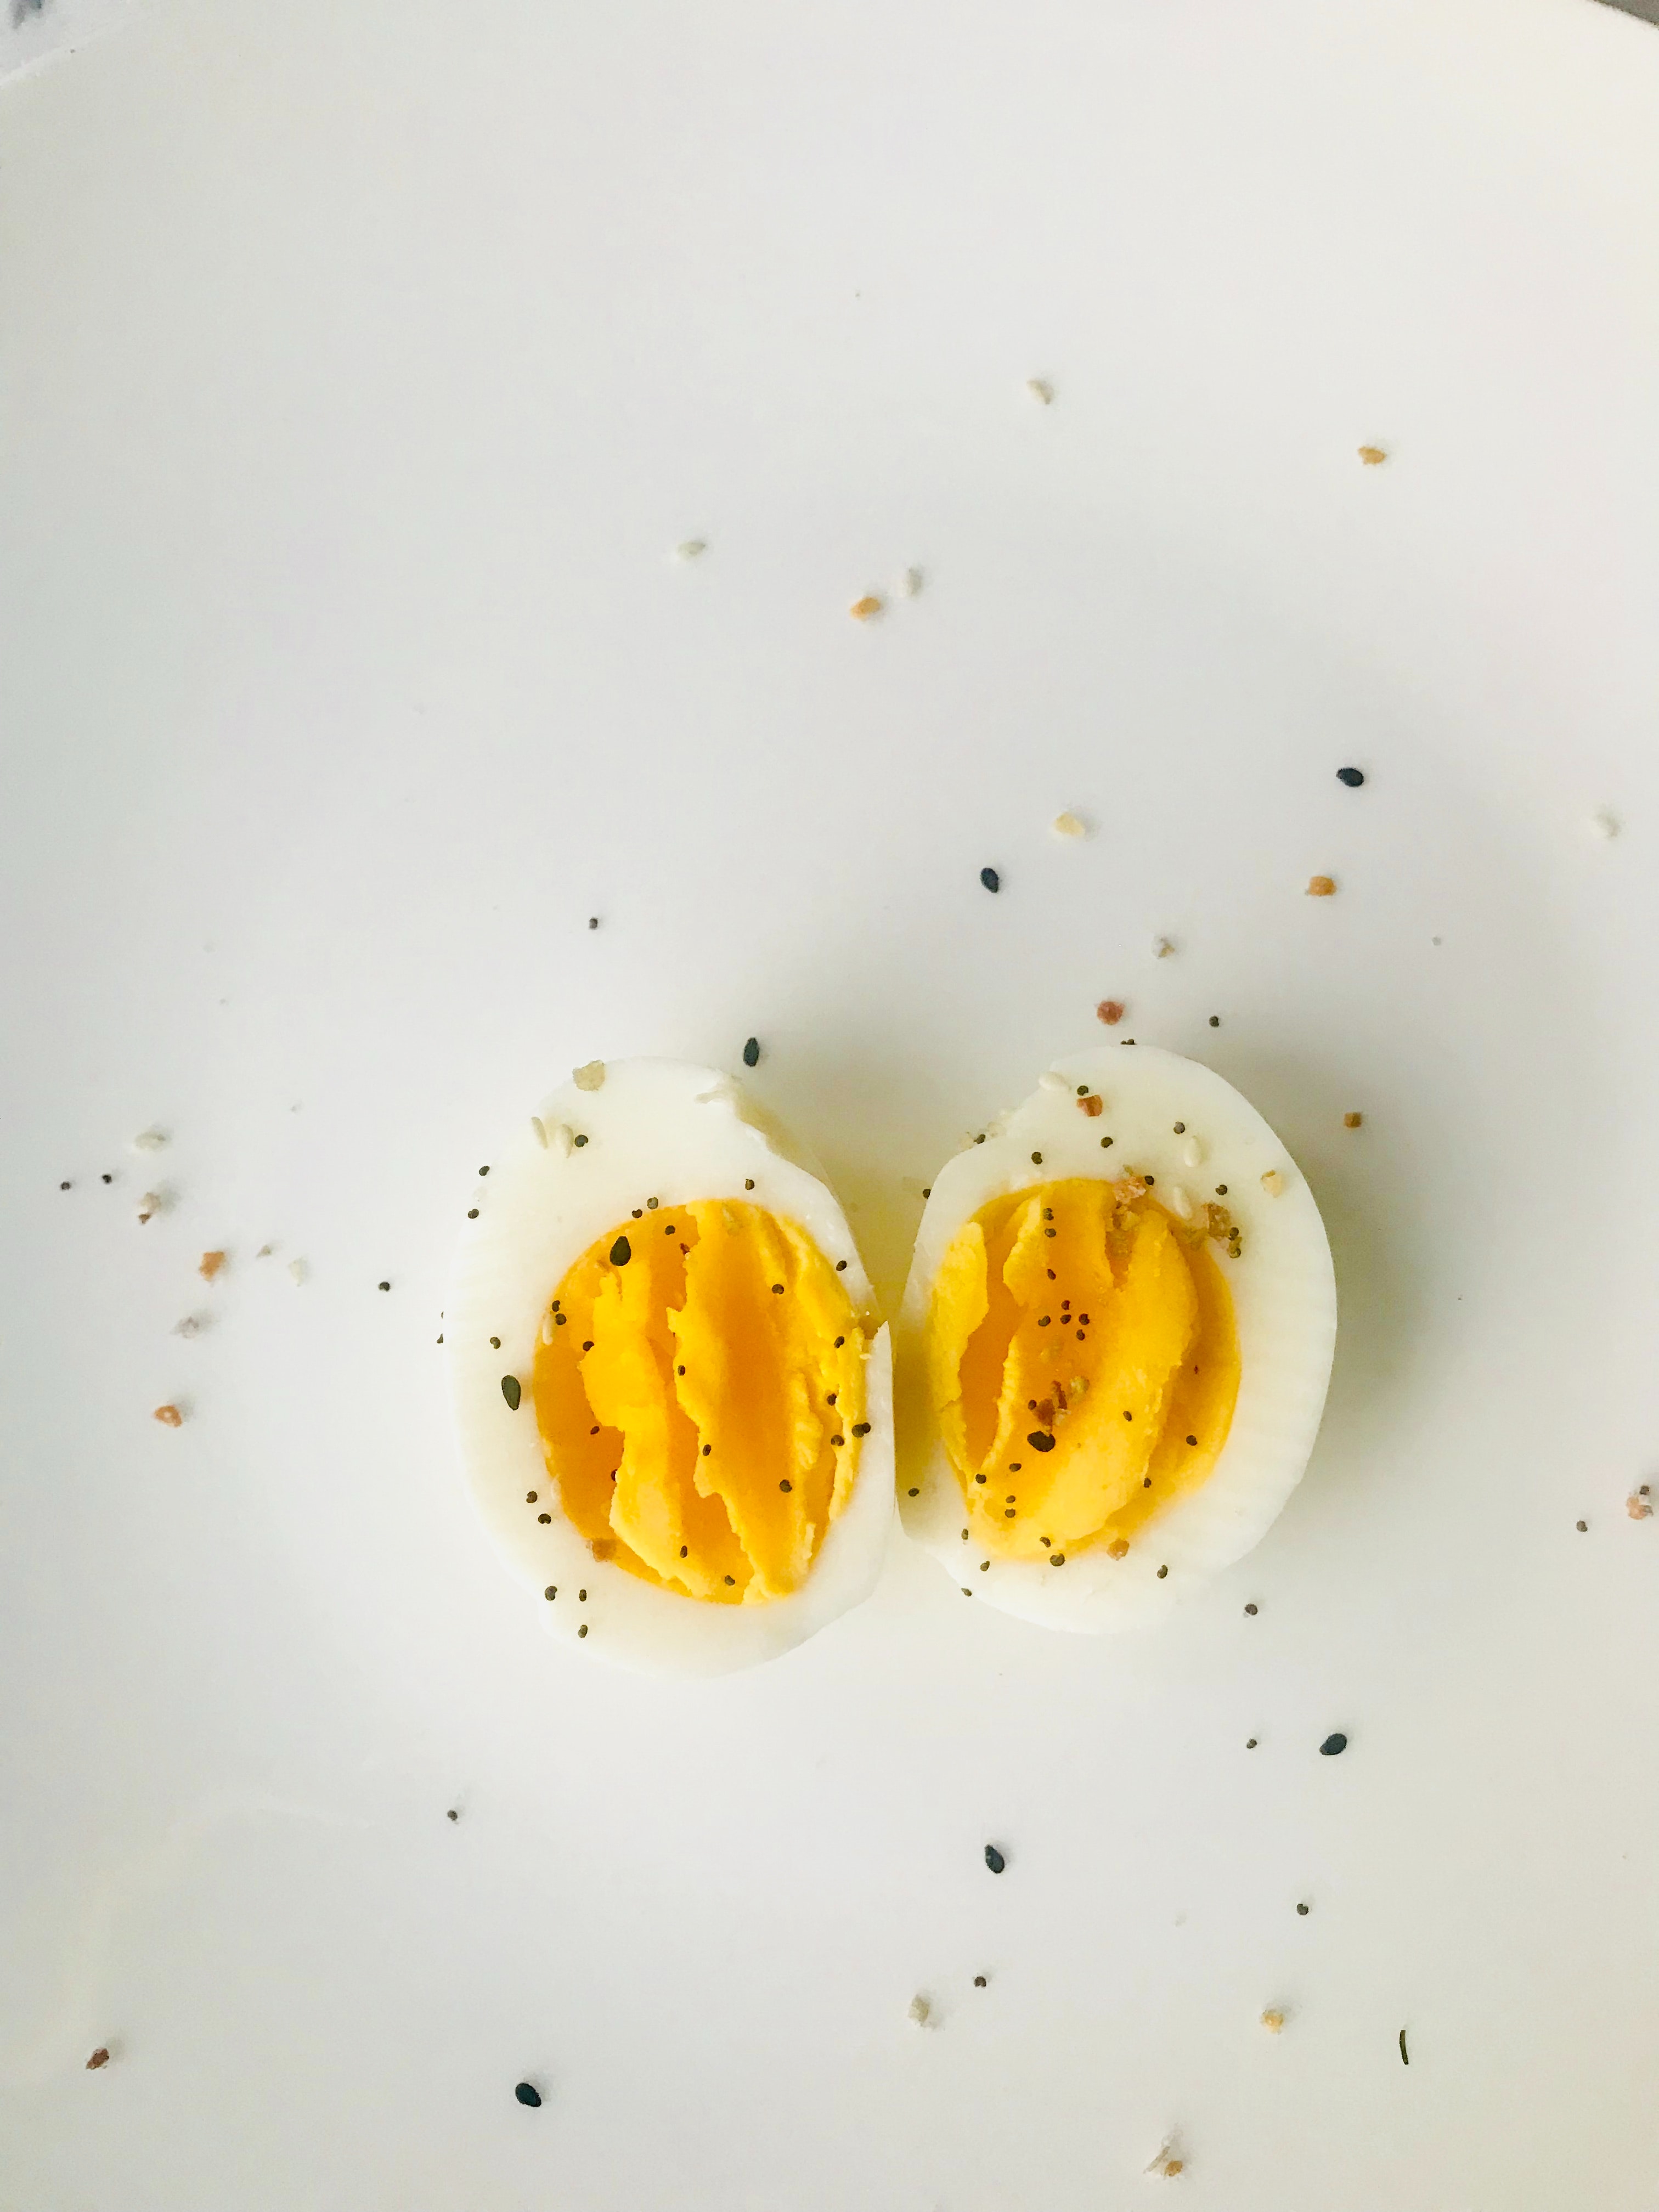
3. While pork belly and soup base are cooking, prepare the hard boiled eggs:
Fill a medium sized pot with enough water to cover the 4 eggs, place eggs in and bring to a rolling boil; turn the heat down to simmer for 5 minutes.
Turn the flame off and let the eggs set for an additional 5 minutes.
Run the eggs under cold water, peel, cut in half and place in a bowl. Cover and refrigerate until soup is ready.
4. When pork belly is done, remove from the oven and slice into strips. Place in a dish and cover to keep warm.
5. Fill another large stock pot about ⅔ full of water and bring to a boil; add Raman noodles and cook according to package directions.
6. Drain noodles and immediately divide among four large soup bowls.
7. Add broth mixture overtop of noodles.
8. Top with sliced pork belly, carrots, minced green onions, and an egg.

If you enjoyed this blog, please LIKE, Follow, Share & leave me a comment! I love your feedback!
If you aren’t following me on Facebook & Instagram go on over & give a LIKE & Follow me for daily tips & tricks for your home & garden!
Added bonus: You can go to my blog at http://www.fordragonfliesandme.com to purchase my original cookbook, Lovingly Seasoned Eats and Treats in either a spiral bound soft cover OR NEW, a Downloadable PDF version. The cookbook has almost 1000 recipes on almost 500 pages! Check out the Cookbook Testimonials while you’re there!
Until next time remember to,
Eat fresh, shop local & have a happy day,
Jean
Copyright Policy
All text and images on this site are copyright of For Dragonflies And Me. Unless otherwise noted, you may not use this content.
“Cooking is about passion, so it may look slightly temperamental in a way that it’s too assertive to the naked eye.” – Gordon Ramsay
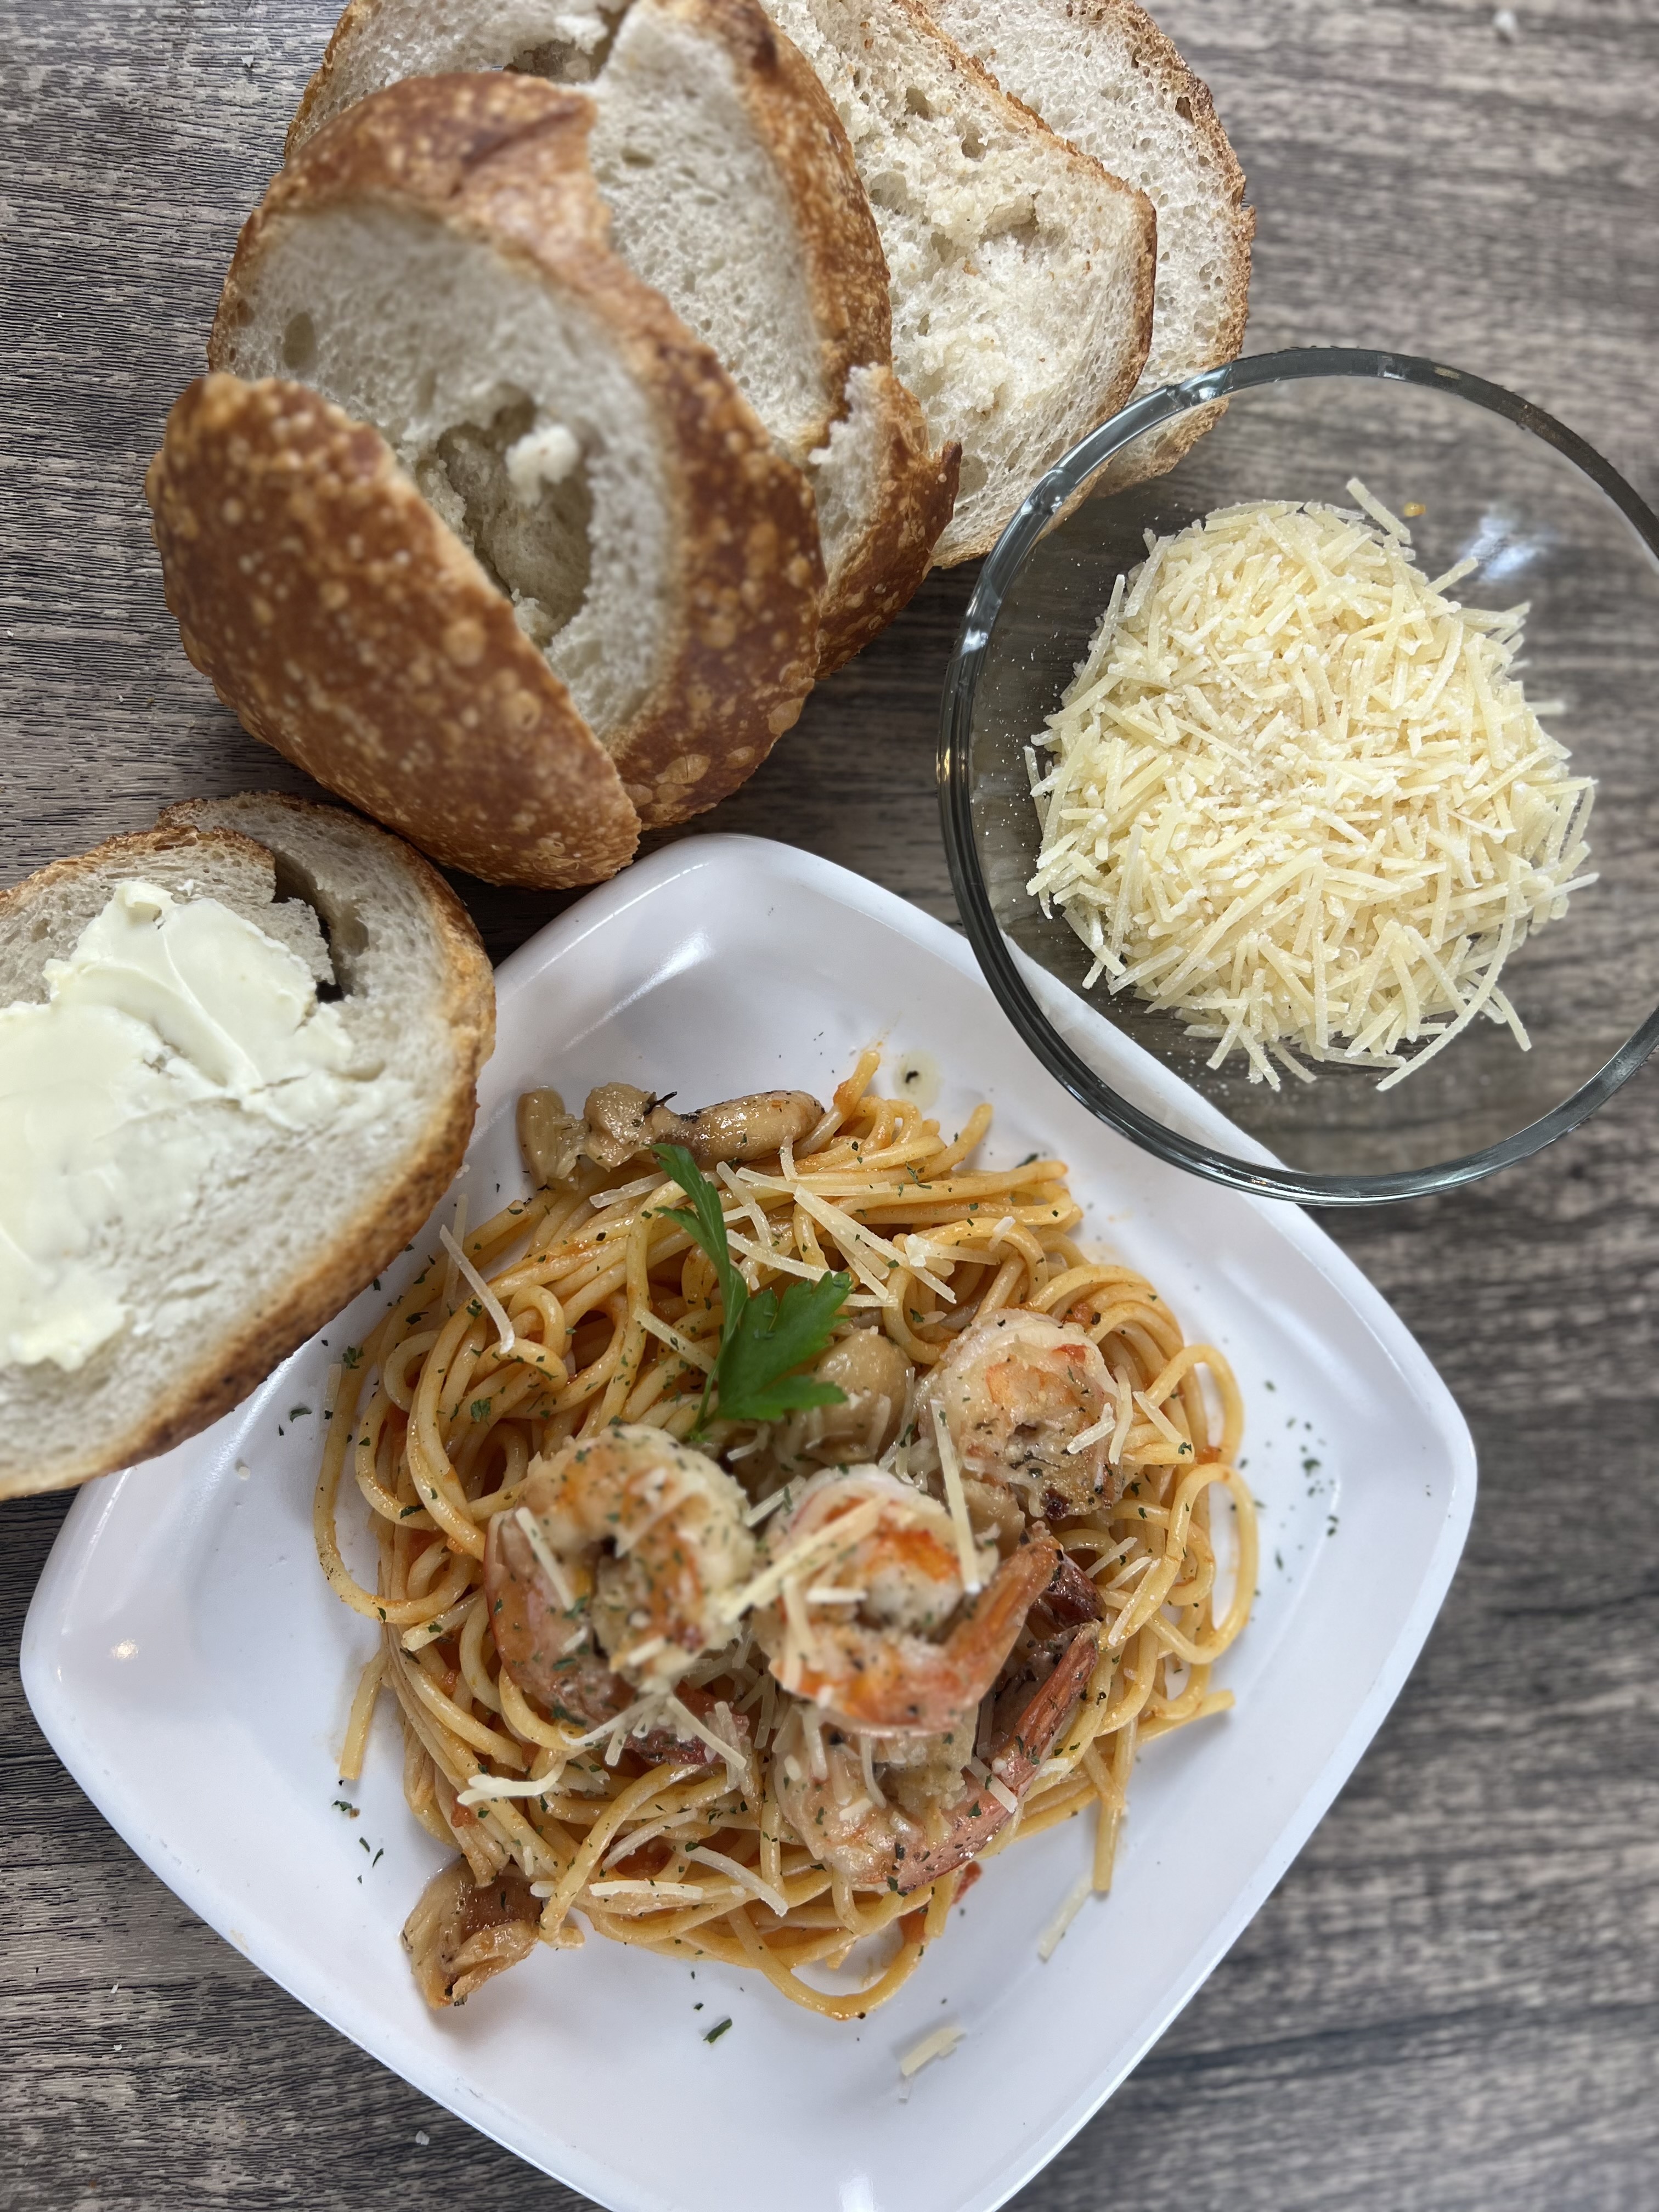
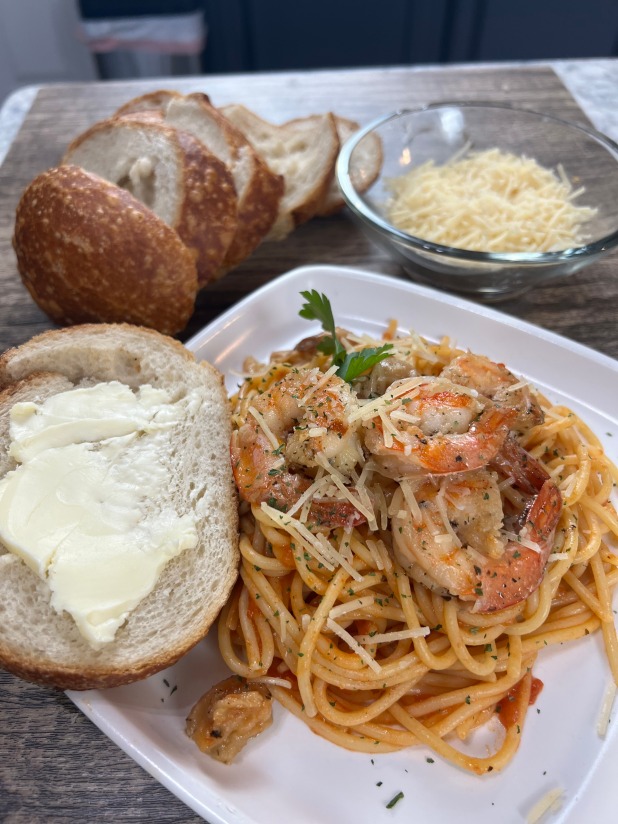
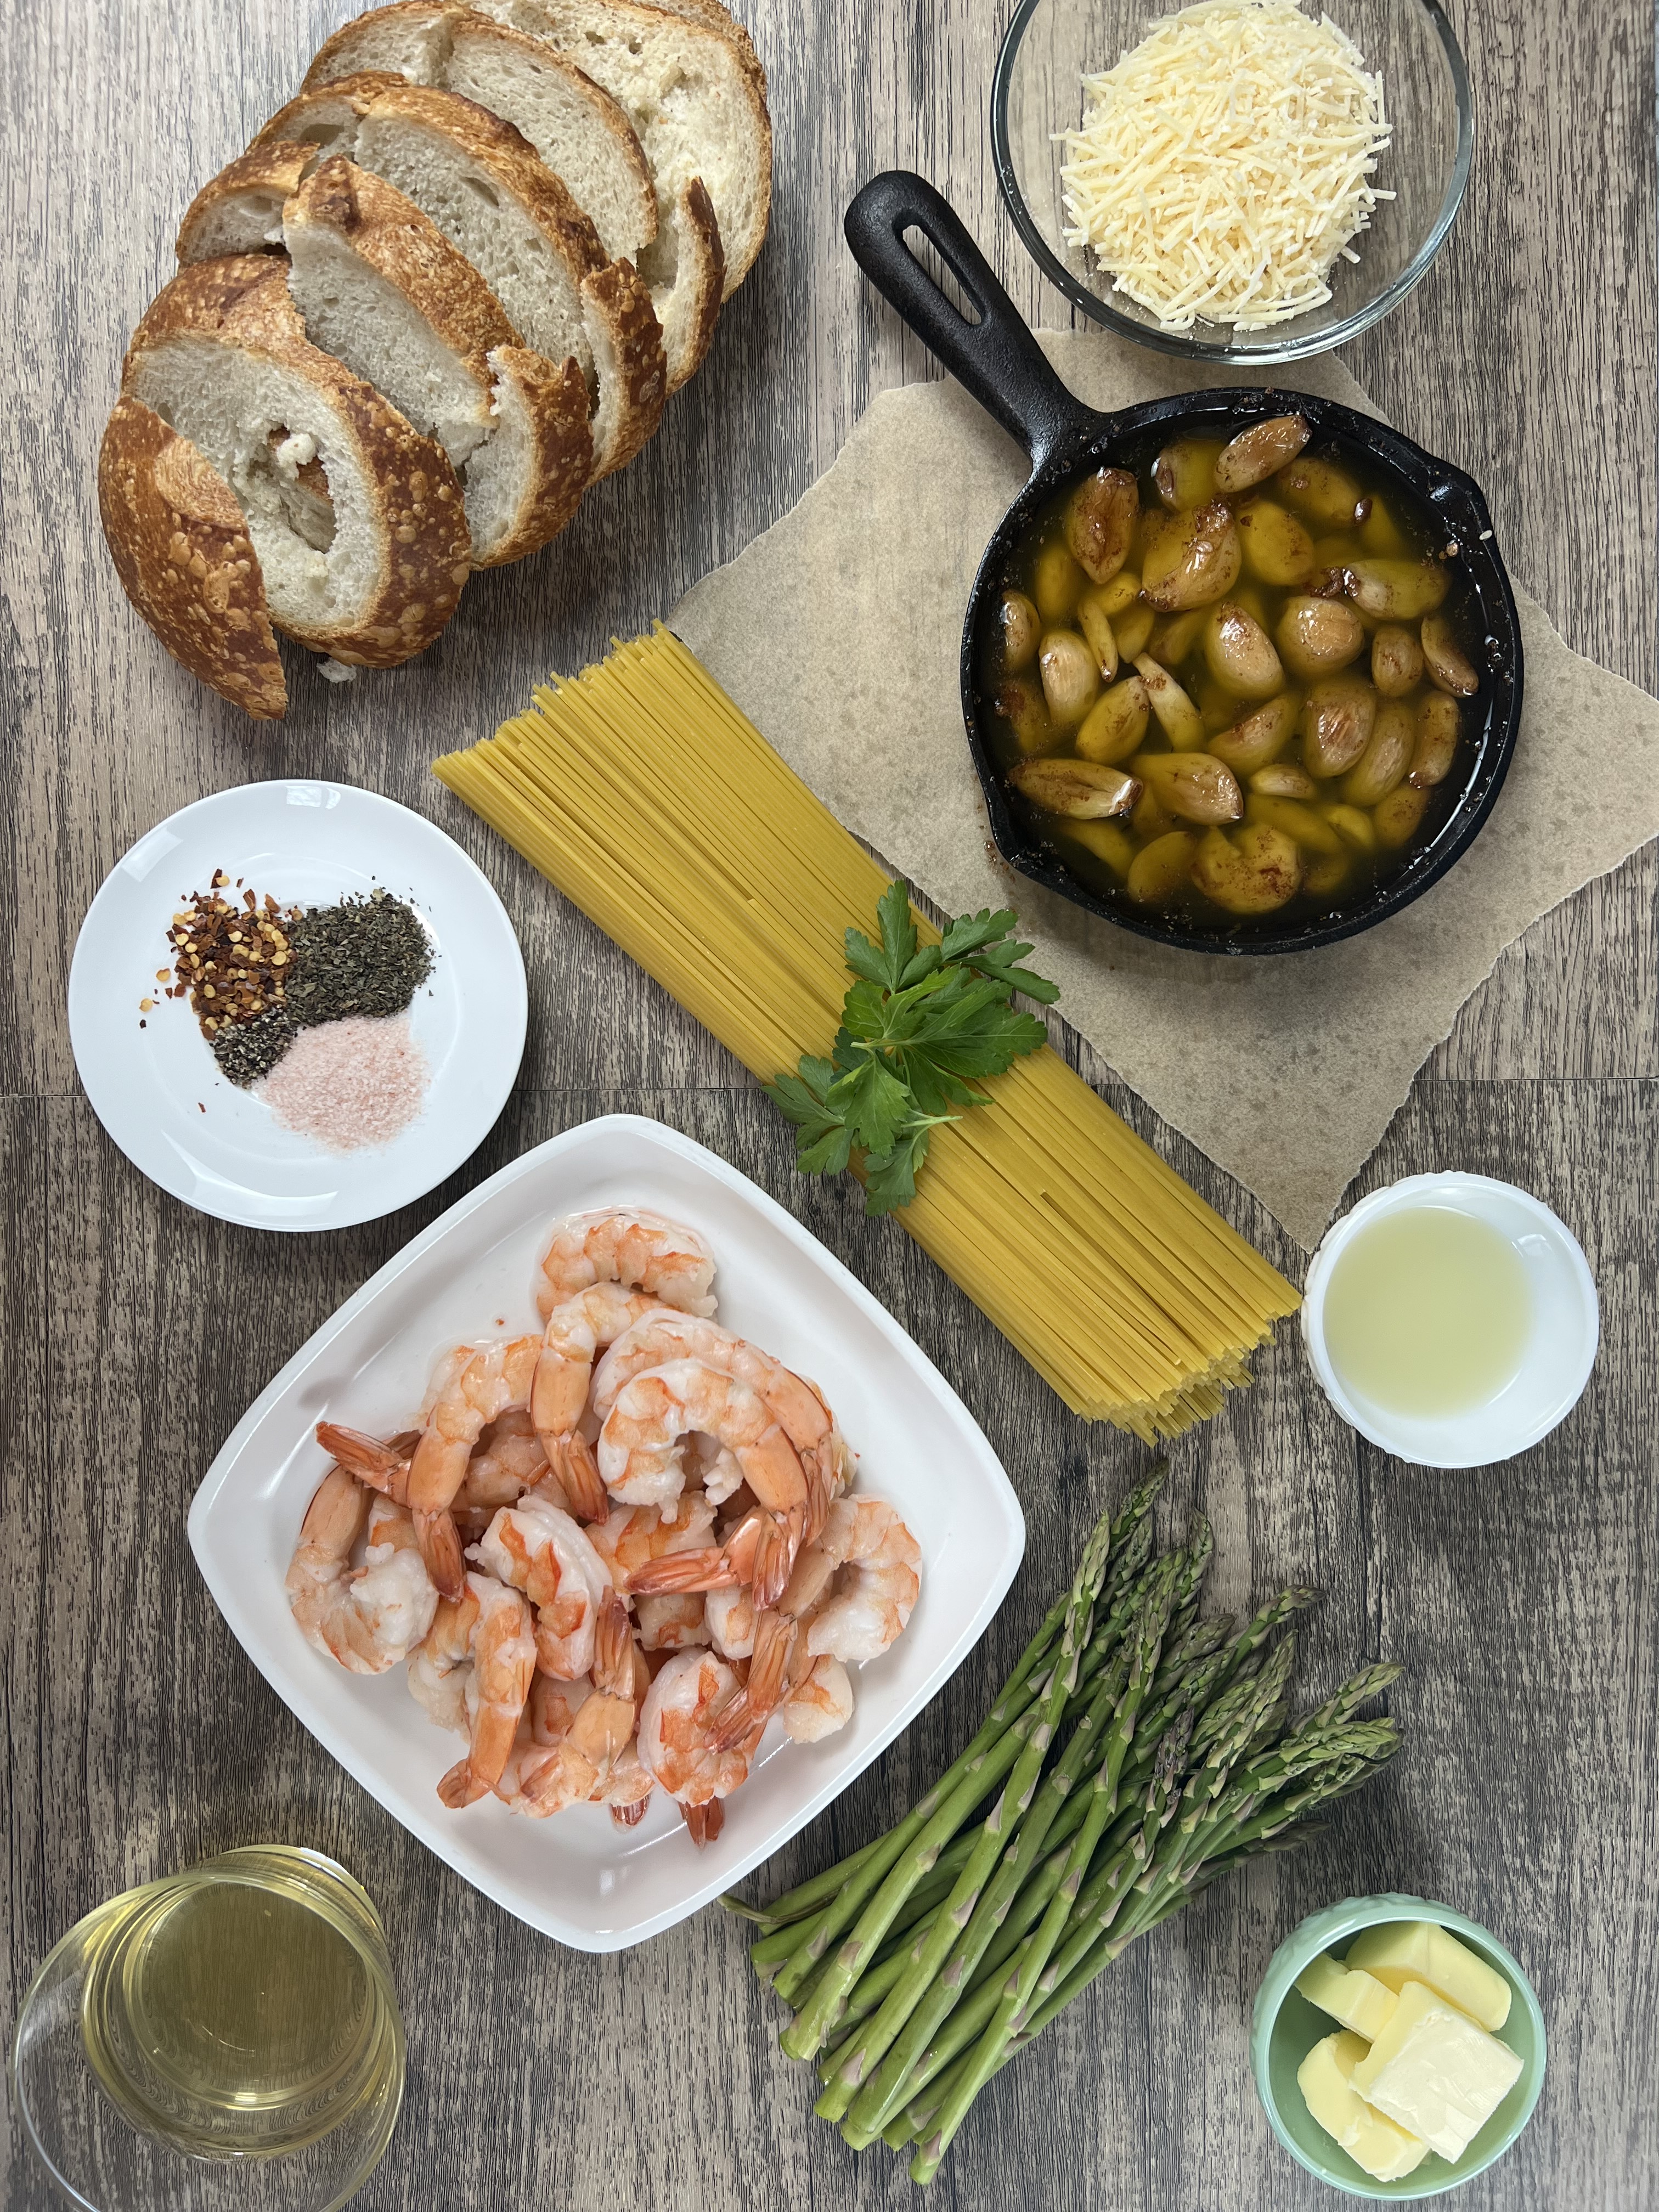
We just love pasta with shrimp.. Or steak & shrimp… or really anything with shrimp! We love shrimp! This is a really easy & fast dish to make to add to any pasta or vegetable dish, or as an accompaniment to meat. Ok, you can even just eat this as an appetizer… it’s so good friends.
If you follow me at all, you know I love to change up a traditional recipe and give it a Jean or Dave twist, and of course this recipe is no different. Dave & the boys like a bit of spice to their food, so we decide to add some red pepper flakes and fresh ground pepper to this already amazing dish. But we didn’t stop there! If you recall, I just did a recipe for roasted garlic and infused garlic olive oil… yep, you guessed it! We use the oil & cloves to add that extra special oompf! You will love this recipe friends, so be sure to let me know how you enjoyed it in the comments!
Watch me make this delicious recipe at my YouTube Channel below!
Ingredients: Yields 4 ~ 2 cup servings approximately
1 ~ 12 ounce bag of cooked extra large, peeled & deveined shrimp with or without the tails on
1~ 1 pound bag of angel hair OR thin OR regular spaghetti noodles, cooked.
¼ cup Garlic Infused Olive Oil~ see recipe
Roasted garlic~ about 3 bulbs worth
½ cup chicken broth
4 TBSP salted butter
2 TBSP lemon juice OR juice from 1 large lemon
½ tsp pink Himalayan salt
½ tsp red pepper flakes
¼ tsp fresh ground black pepper
Fresh parsley
Marinara sauce~ Click link for my easy homemade recipe!
Freshly grated parmesan cheese
Watch my super easy YouTube video on how to make roasted garlic and garlic infused olive oil!

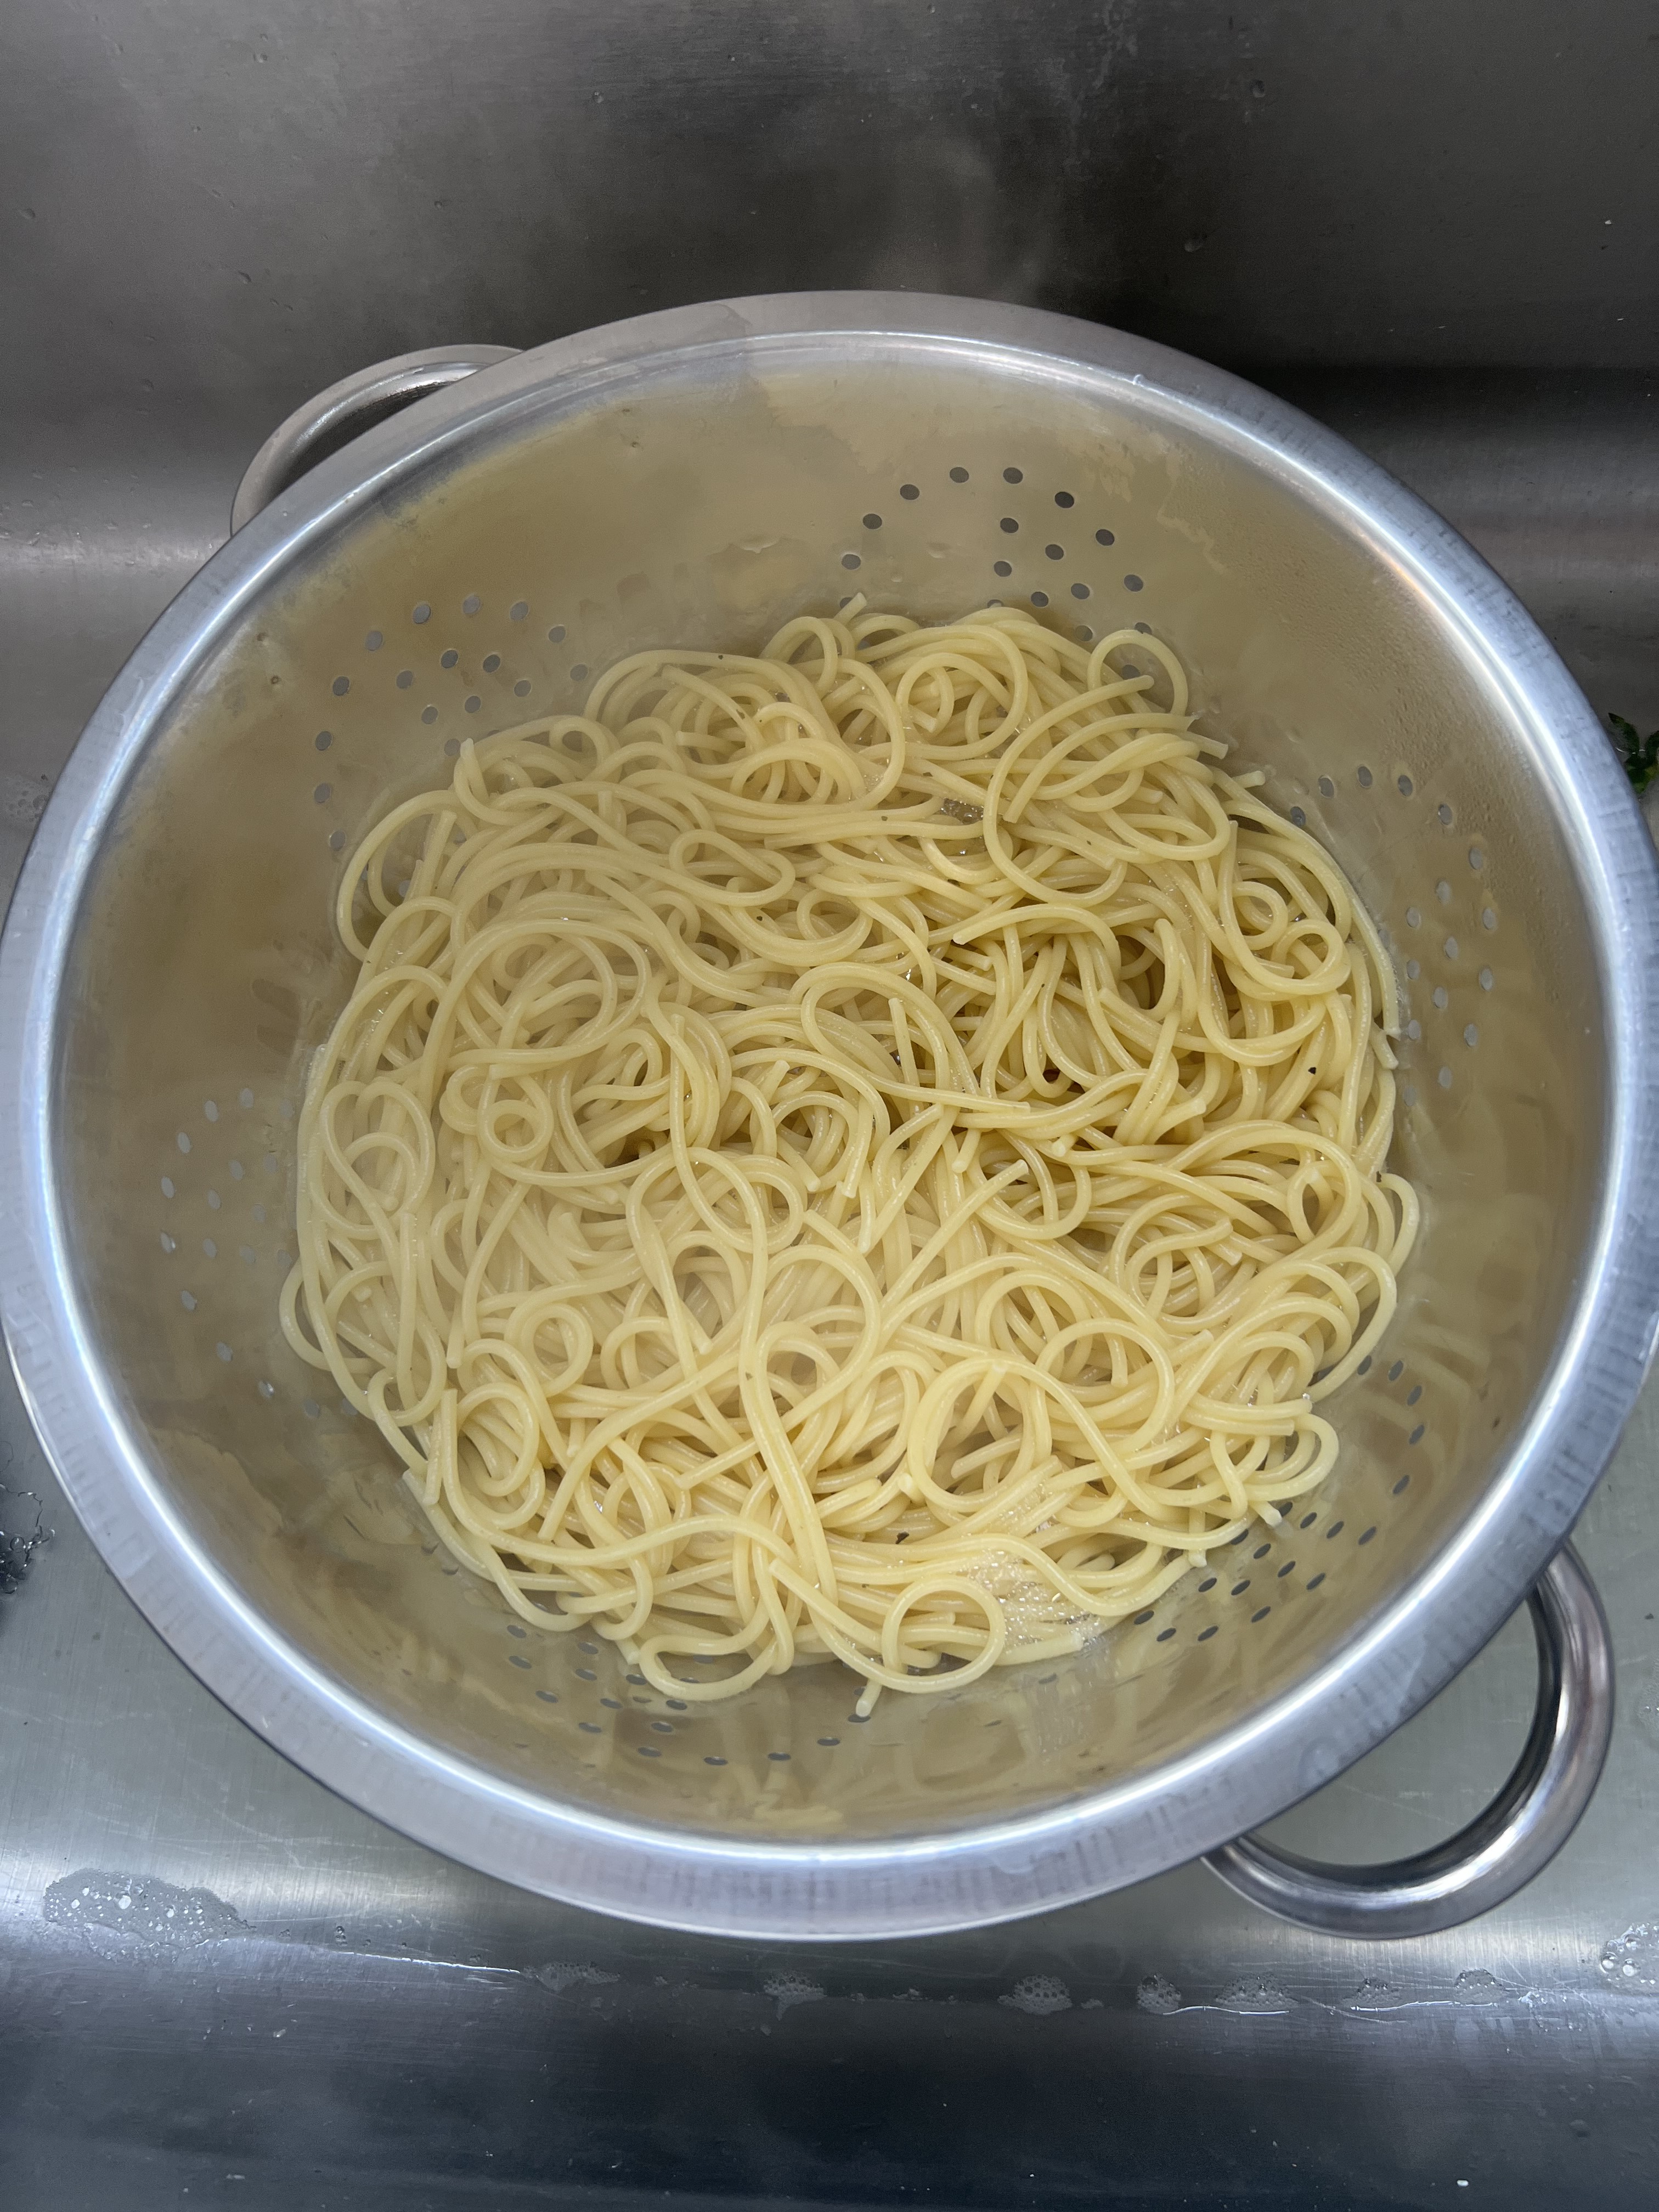
1. Fill a large stock pot about ¾ way full with water, add 1 tsp salt; bring to a rolling boil and add pasta; cook following package instructions. Drain and return to the pot with some butter and olive oil so it doesn’t stick.
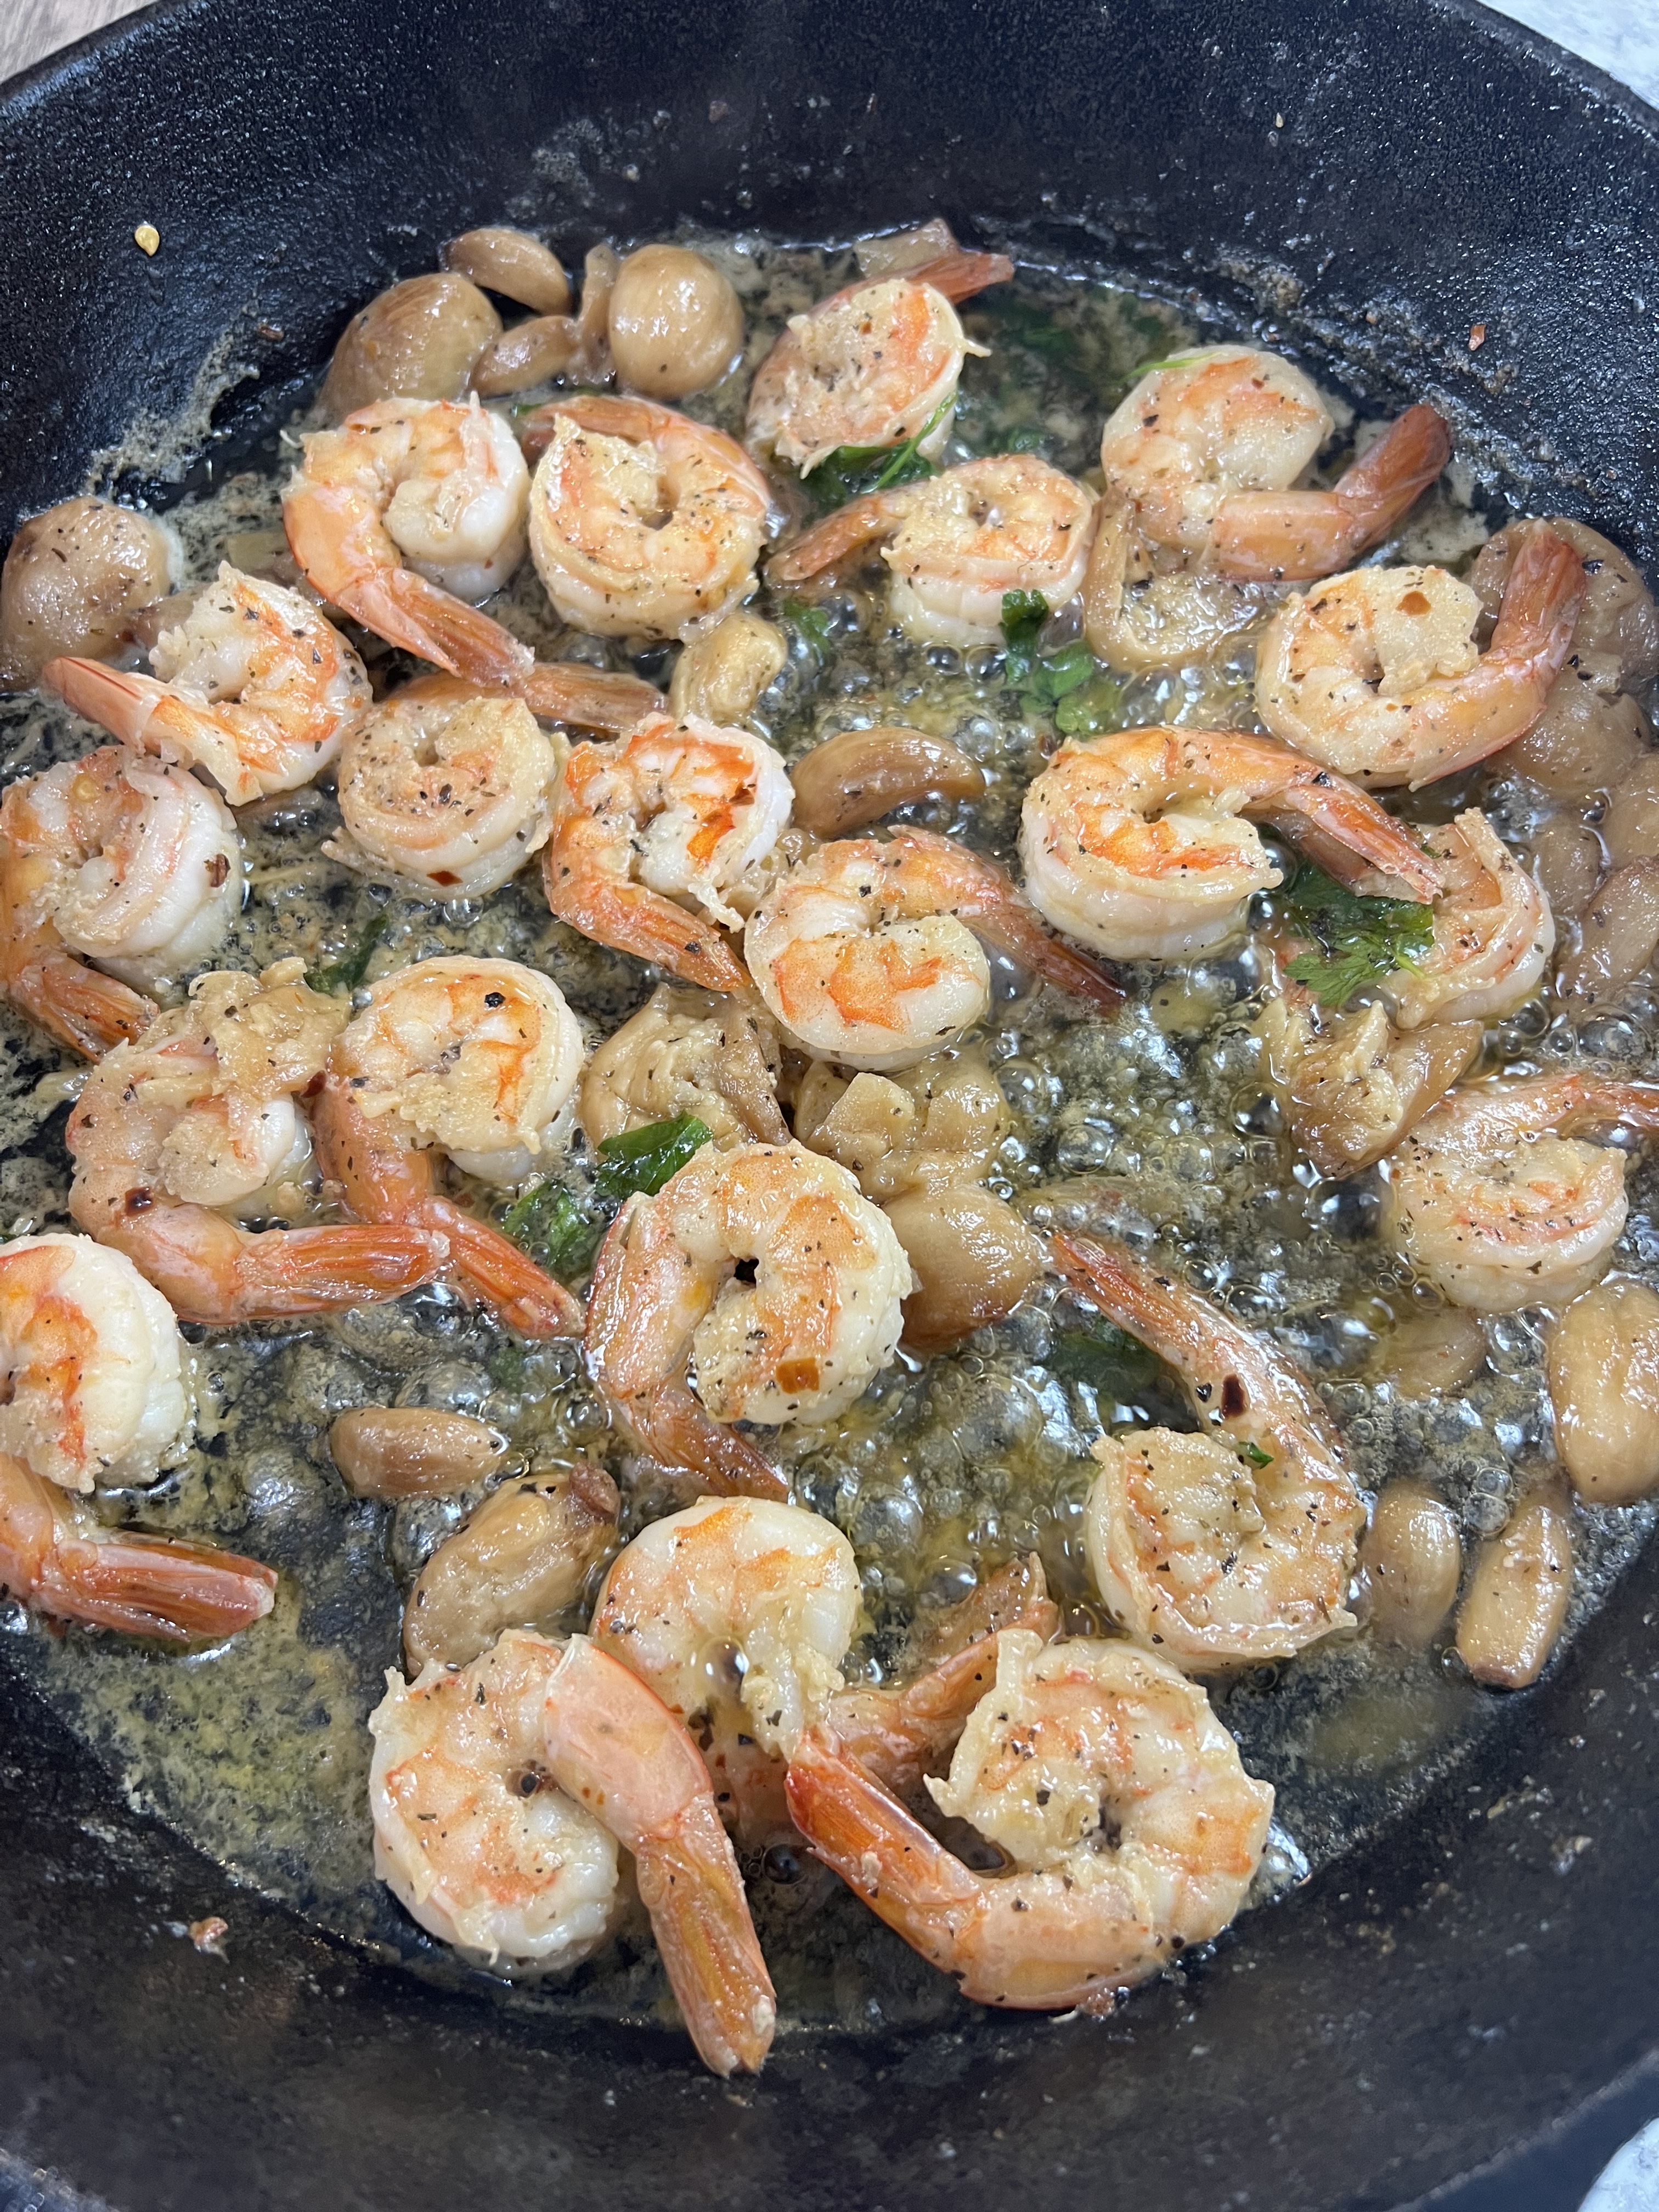
2. While water is boiling, in a large cast iron skillet or stainless steel skillet, heat 2 TBSP of the butter and all the olive oil; make sure butter is melted.
3. Toss the shrimp in and add all seasonings; toss to evenly coat the shrimp.
4. Cook for about 2 minutes and turn; cook an additional 2 minutes.
5. Add the remaining ingredients and cooked for about 3 to 5 minutes stirring to blend evenly.

6. When done, place about 2 cups of the pasta on a plate, top with desired amount of marinara sauce, take about 6 to 8 shrimp and place on top and garnish with shredded parmesan cheese.
Enjoy with a salad & some delicious sourdough bread and dip in infused olive oil.
If you enjoyed this blog, please LIKE, Follow, Share & leave me a comment! I love your feedback!
If you aren’t following me on Facebook & Instagram go on over & give a LIKE & Follow me for daily tips & tricks for your home & garden!
Added bonus: You can go to my blog at http://www.fordragonfliesandme.com to purchase my original cookbook, Lovingly Seasoned Eats and Treats in either a spiral bound soft cover OR NEW, a Downloadable PDF version. The cookbook has almost 1000 recipes on almost 500 pages! Check out the Cookbook Testimonials while you’re there!
Until next time remember to,
Eat fresh, shop local & have a happy day,
Jean
Copyright Policy
All text and images on this site are copyright of For Dragonflies And Me. Unless otherwise noted, you may not use this content.

“Food, to me, is always about cooking and eating with those you love and care for.” – David Chang

This is one of our new favorites! After Dave & I experienced this at a wonderful restaurant, Mint 29 in Dearborn Michigan, we were hooked. This is so easy to do, I just had to share it with you… along with a bonus on how to make your own garlic infused olive oil.
Today I’ll show you how to roast a whole bulb, as well as cloves in olive oil to produce your own infused oil. So easy & so yum!
Watch my YouTube Video to watch me demonstrate!
If you enjoyed this blog, please LIKE, Follow, Share & leave me a comment! I love your feedback~
Ingredients: Yields 1 roasted bulb AND ½ cup infused oil with ½ cup roasted cloves
See ingredients & step by step below for both recipes!

Roasted Bulb~ You will need:
1 whole bulb of garlic
1 TBSP extra virgin olive oil
¼ tsp pink Himalayan salt
Parchment paper
Carefully cut the top of the bulb off, about ½ inch until you see the cloves.
Place on parchment paper and drizzle the olive oil over the visible clove; sprinkle with the salt.

Fold parchment paper around the bulb, and tuck underneath.
Place in a preheated 250 degree oven and bake for 2 to 3 hours depending on the size of the bulb.
To store: Place the bulb in a plastic container and store in the refrigerator for up to 2 weeks.
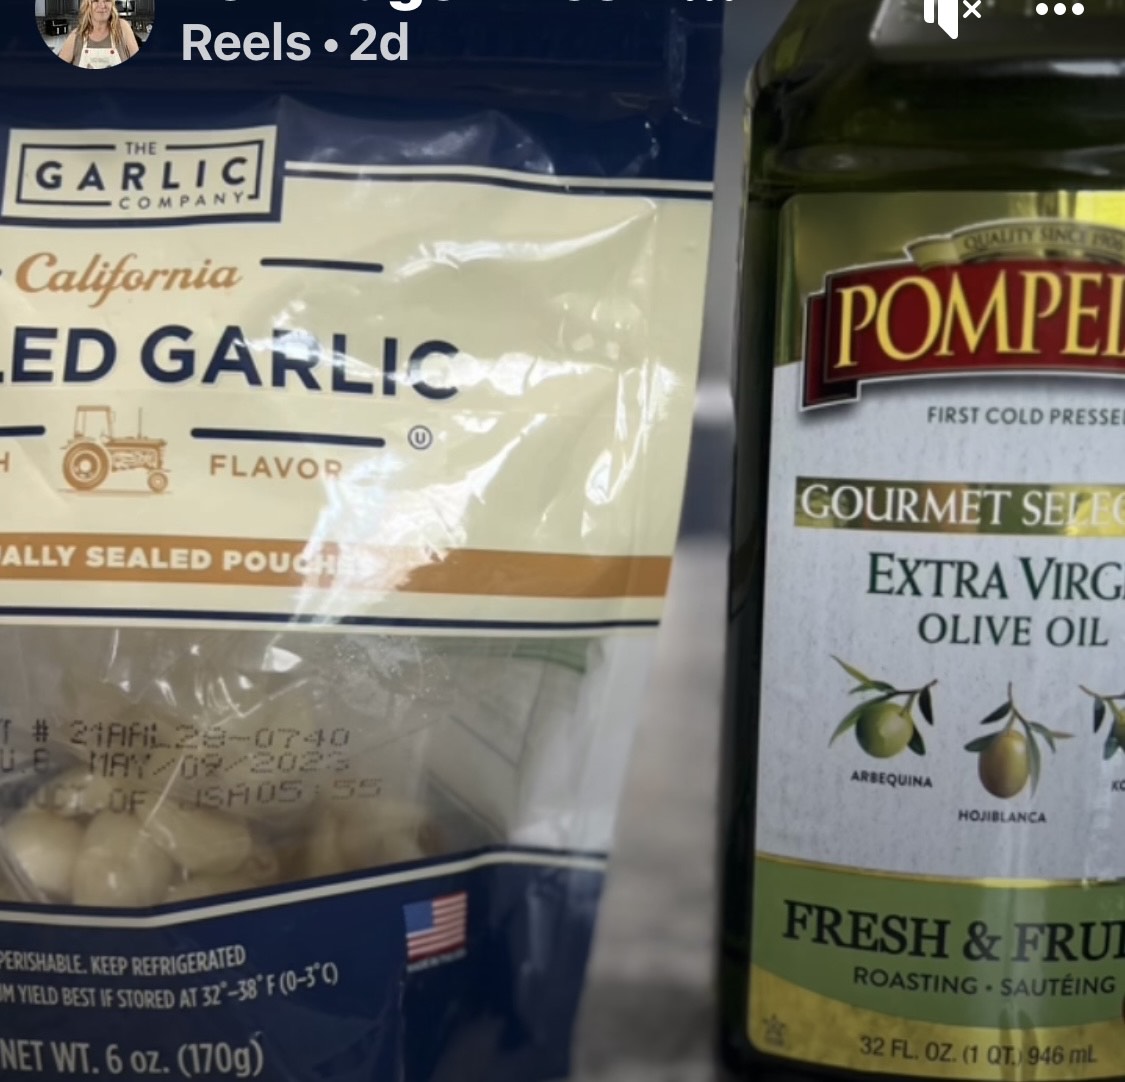
Infused Olive Oil & Roasted Garlic Cloves~ You will need:
Pre Peeled & packaged garlic cloves, about 4 of the bags. This is equivalent to about 4 bulbs of garlic
½ cup extra virgin olive oil
¼ tsp pink Himalayan salt
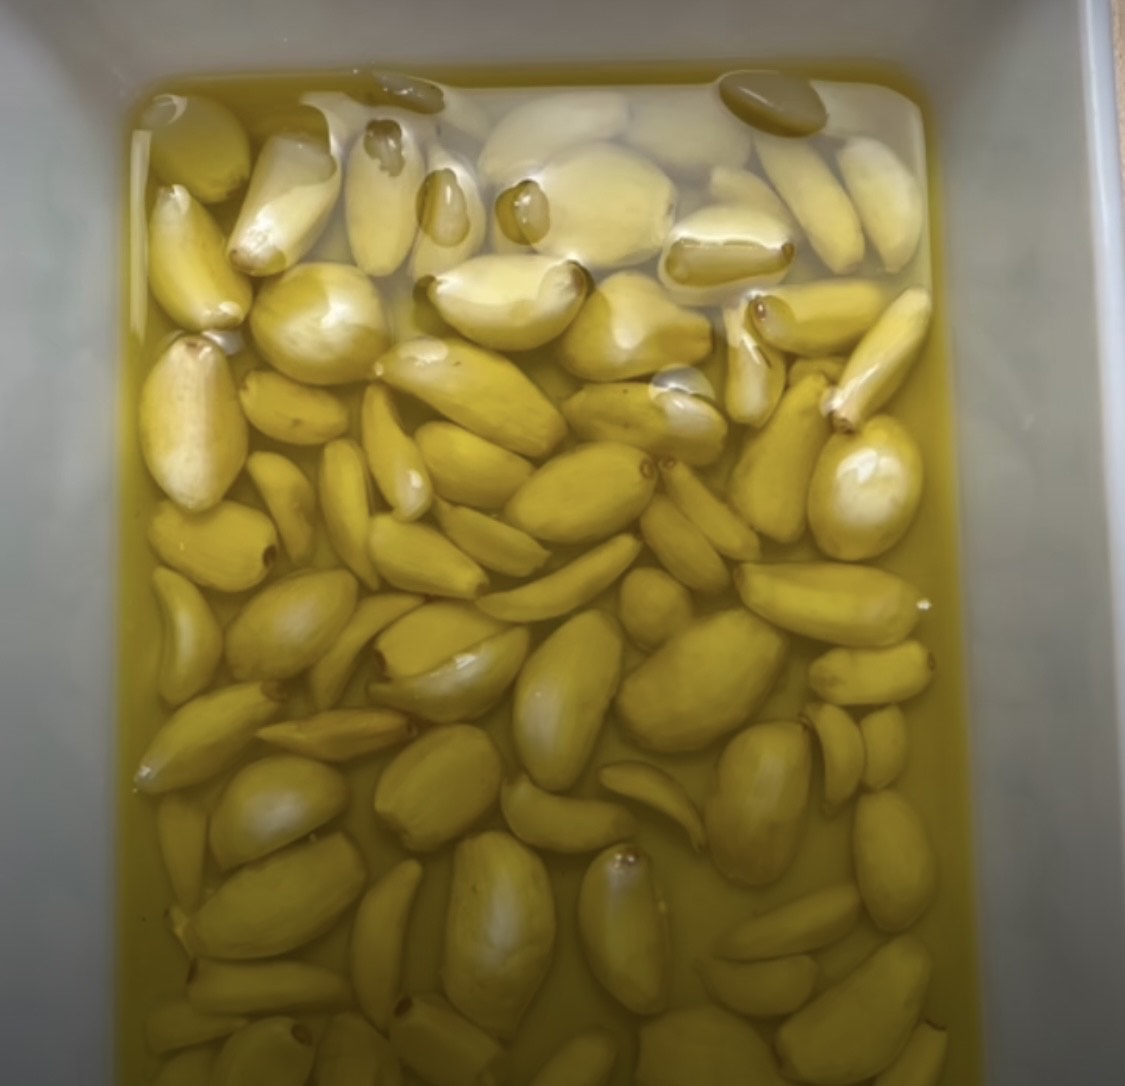
In a small baking dish, place the garlic cloves in a single layer; pour olive oil over top of them ensuring they are fully covered. Add more oil if needed.
Sprinkle with salt and bake in a preheated 250 degree oven for 2 to 3 hours or until mashable.
To store: Place infused olive oil in a container with lid and refrigerate for up to 2 weeks. Place cloves in a plastic container with a lid and store in the fridge for up to 2 weeks.
Baste meats or veggies with your olive oil and serve cloves with steak or chicken or add to any vegetable dish!
If you aren’t following me on Facebook & Instagram go on over & give a LIKE & Follow me for daily tips & tricks for your home & garden!
Added bonus: You can go to my blog at http://www.fordragonfliesandme.com to purchase my original cookbook, Lovingly Seasoned Eats and Treats in either a spiral bound soft cover OR NEW, a Downloadable PDF version. The cookbook has almost 1000 recipes on almost 500 pages! Check out the Cookbook Testimonials while you’re there!
Until next time remember to,
Eat fresh, shop local & have a happy day,
Jean
Copyright Policy
All text and images on this site are copyright of For Dragonflies And Me. Unless otherwise noted, you may not use this content.
“Food, to me, is always about cooking and eating with those you love and care for.” – David Chang

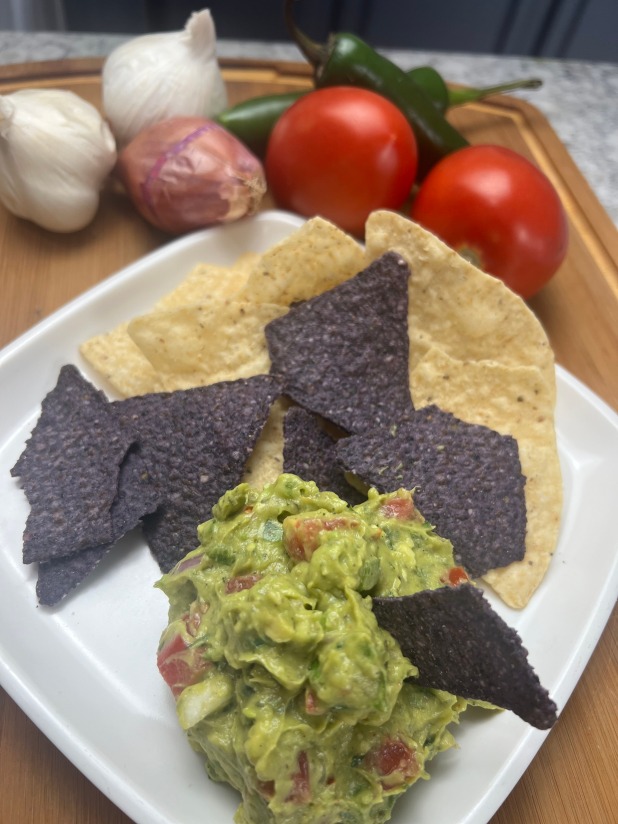
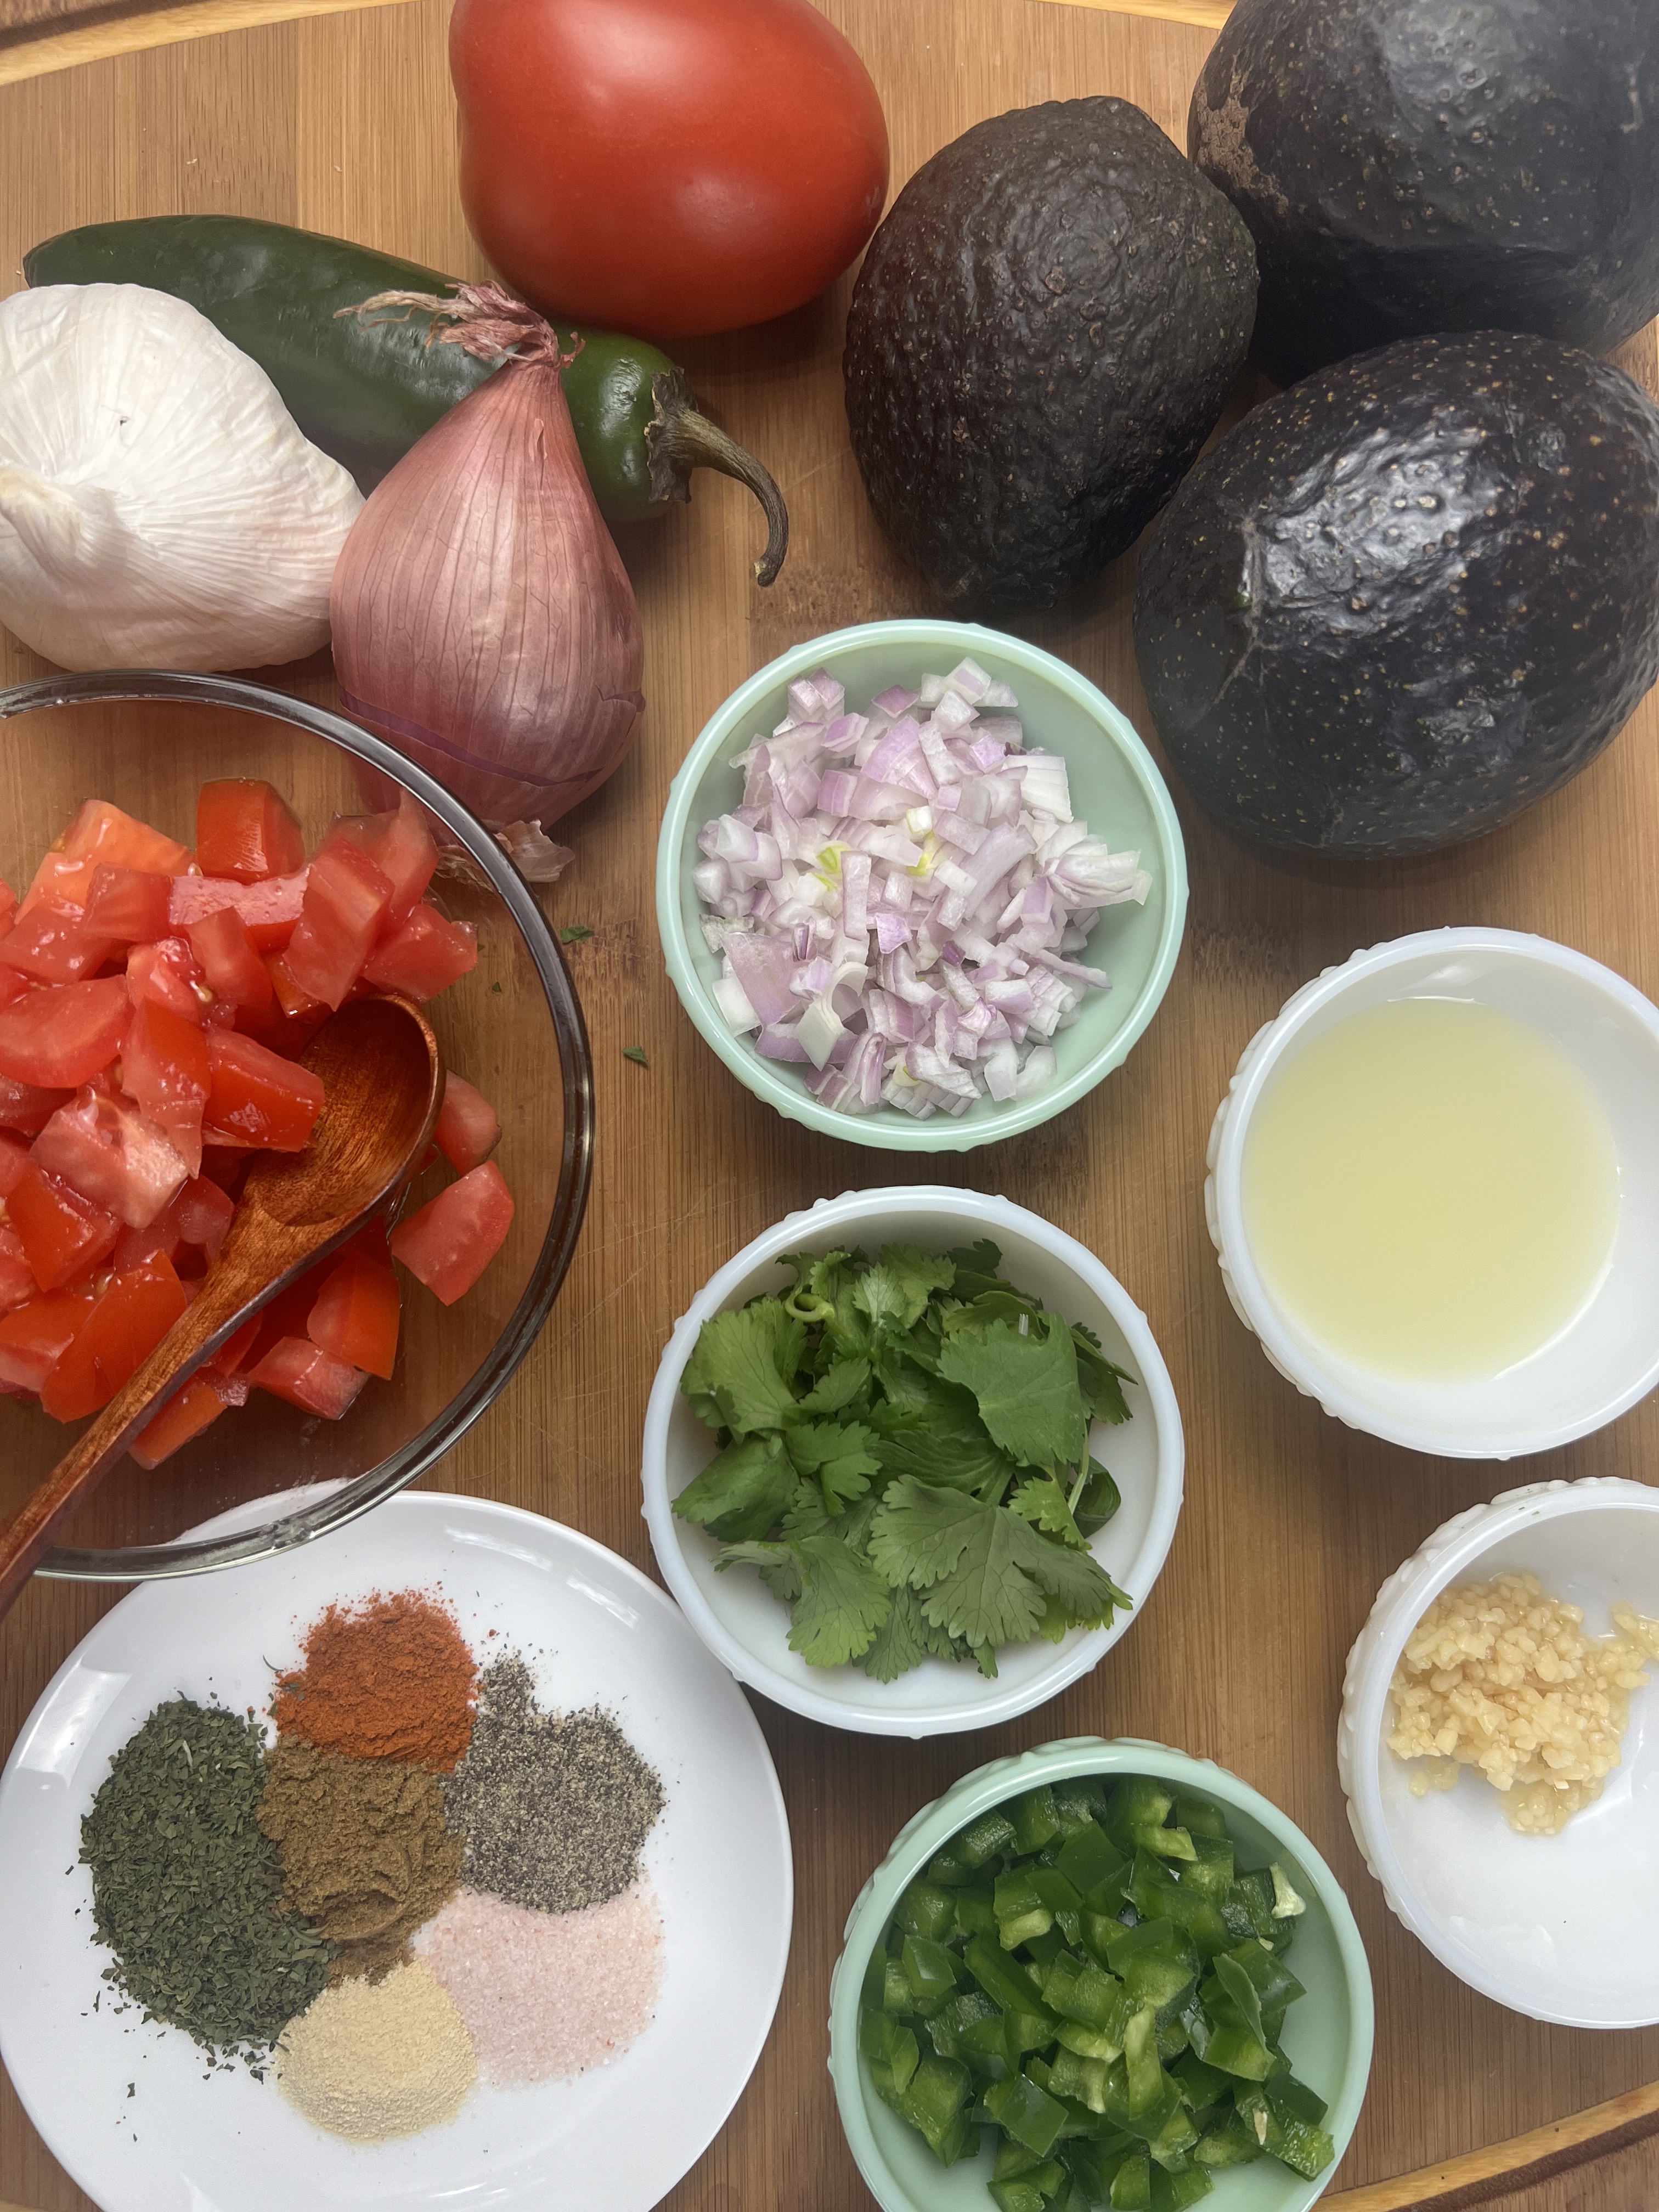
This is by far one of our favorite appetizers and snacks. Dave’s recipe is super delish & incredibly easy to make. With just a few ingredients, you can have the best homemade guacamole around.
Watch Dave & I make this at my YouTube Channel below!
For full list of ingredients & directions, check it out below~
Ingredients: Yields about 2 cups of finished guacamole!
2 to 3 ripe avocados, peeled & pitted
2 Roma tomatoes, diced
1 small red onion diced~ about ¼ cup
1 large jalapeno pepper, seeded and diced
¼ cup fresh cilantro minced
1 fresh garlic clove minced OR 1 tsp jarred
2 TBSP lime juice or lime from 1 large lime
1 tsp pink Himalayan salt
1 tsp dried cilantro
½ tsp cumin
½ tsp fresh ground pepper
½ tsp garlic powder
½ tsp cayenne pepper

Watch the video to see how Dave removes the pit and fruit from the avocado!
Check out how I mince fresh cilantro as well!
1. Cut Avocado in half as shown in video; remove pit and discard.
2. Using a sharp knife, cut a checker board pattern into the fruit, and then simply press the outside skin to press out the fruit into a bowl! Watch Dave demonstrate in the video.
You can also simply use a spoon and scoop it out.

3. After you’ve cut the avocado’s and placed fruit in the bowl, begin adding each ingredient one at a time, making sure to blend each ingredient in thoroughly.
a. seasonings
b. lime juice
c. minced garlic
d. onion
e. jalapeño
f. tomato
g. fresh cilantro

You can eat right away with your favorite chips!
If you choose to wait, be sure to cover the guacamole with plastic wrap snugly so the wrap is hugging the mixture. Try not to leave any air pockets so it doesn’t turn grey.
I then add a second piece of plastic wrap over that one.
I then add a second piece of plastic wrap over that one.
If you enjoyed this blog, please LIKE, Follow, Share & leave me a comment! I love your feedback!
If you aren’t following me on Facebook & Instagram go on over & give a LIKE & Follow me for daily tips & tricks for your home & garden!
Added bonus: You can go to my blog at http://www.fordragonfliesandme.com to purchase my original cookbook, Lovingly Seasoned Eats and Treats in either a spiral bound soft cover OR NEW, a Downloadable PDF version. The cookbook has almost 1000 recipes on almost 500 pages! Check out the Cookbook Testimonials while you’re there!
Until next time remember to,
Eat fresh, shop local & have a happy day,
Jean
Copyright Policy
All text and images on this site are copyright of For Dragonflies And Me. Unless otherwise noted, you may not use this content.

“Cooking for some is joy, for others a way to relax after a hectic day at work, and for a few, it’s purely a means to an end. Whatever your feelings are about cooking, it is so rewarding to see friends and family enjoy your food.” – Chetna Makan
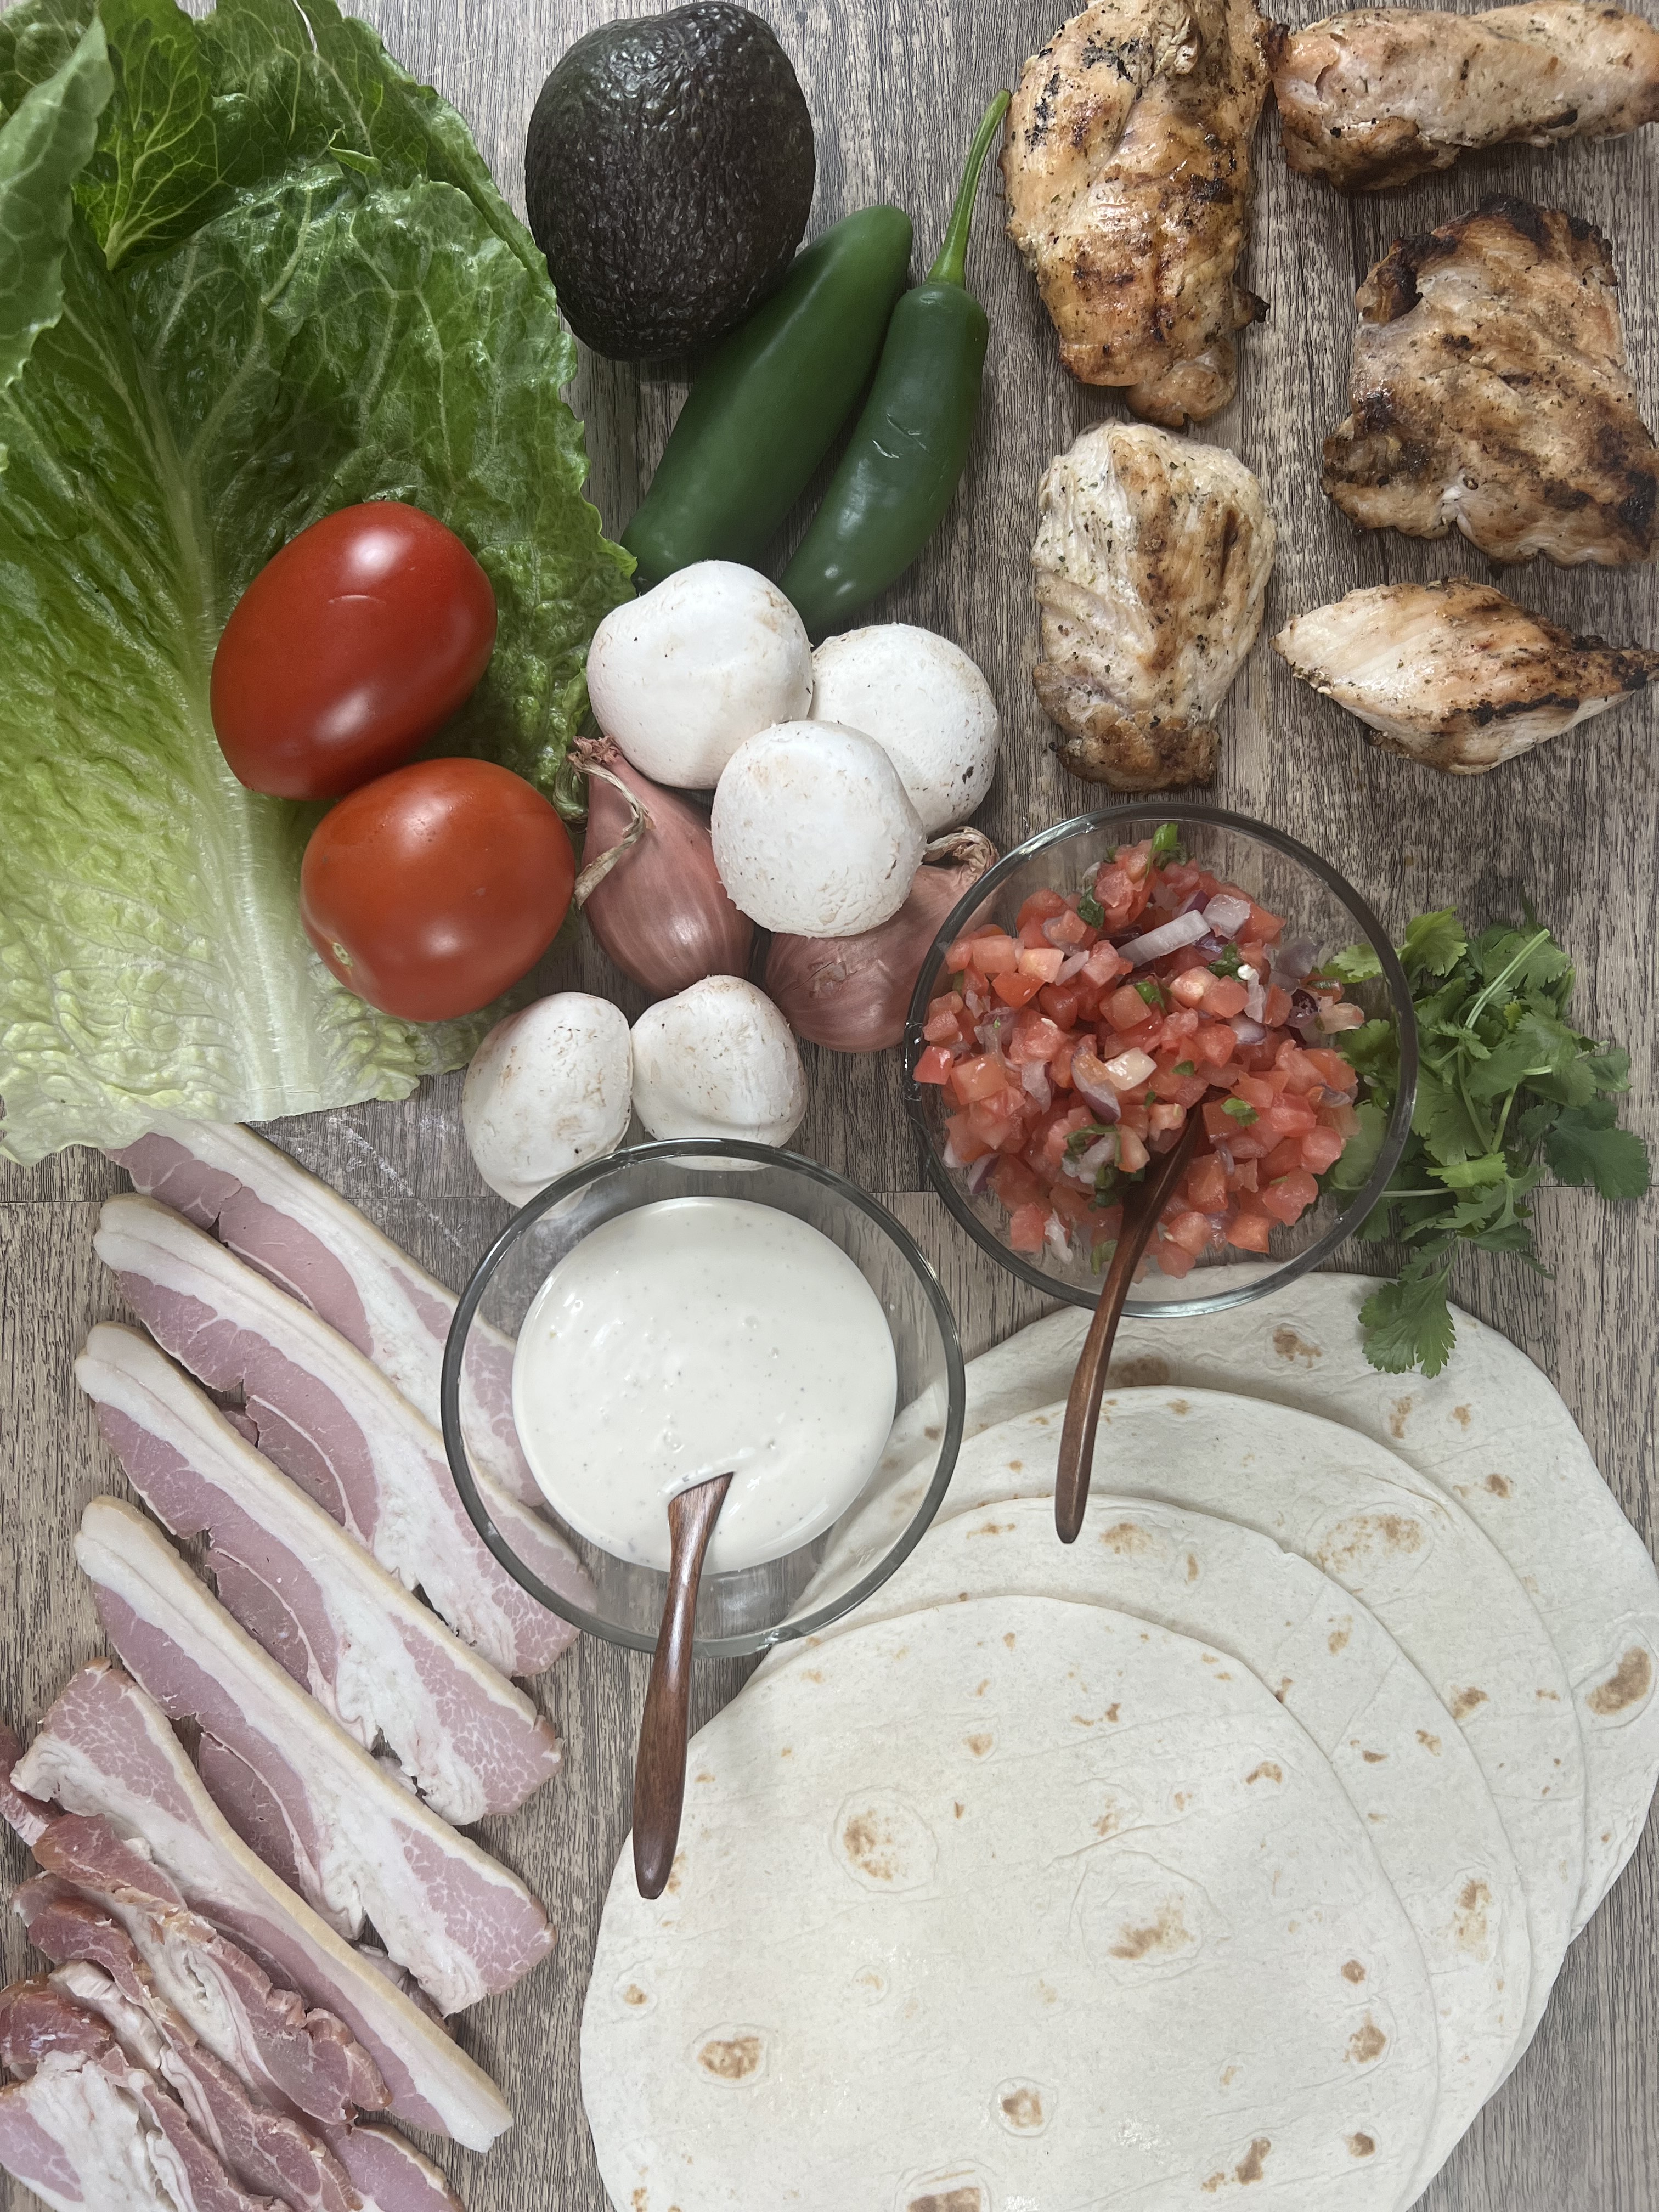
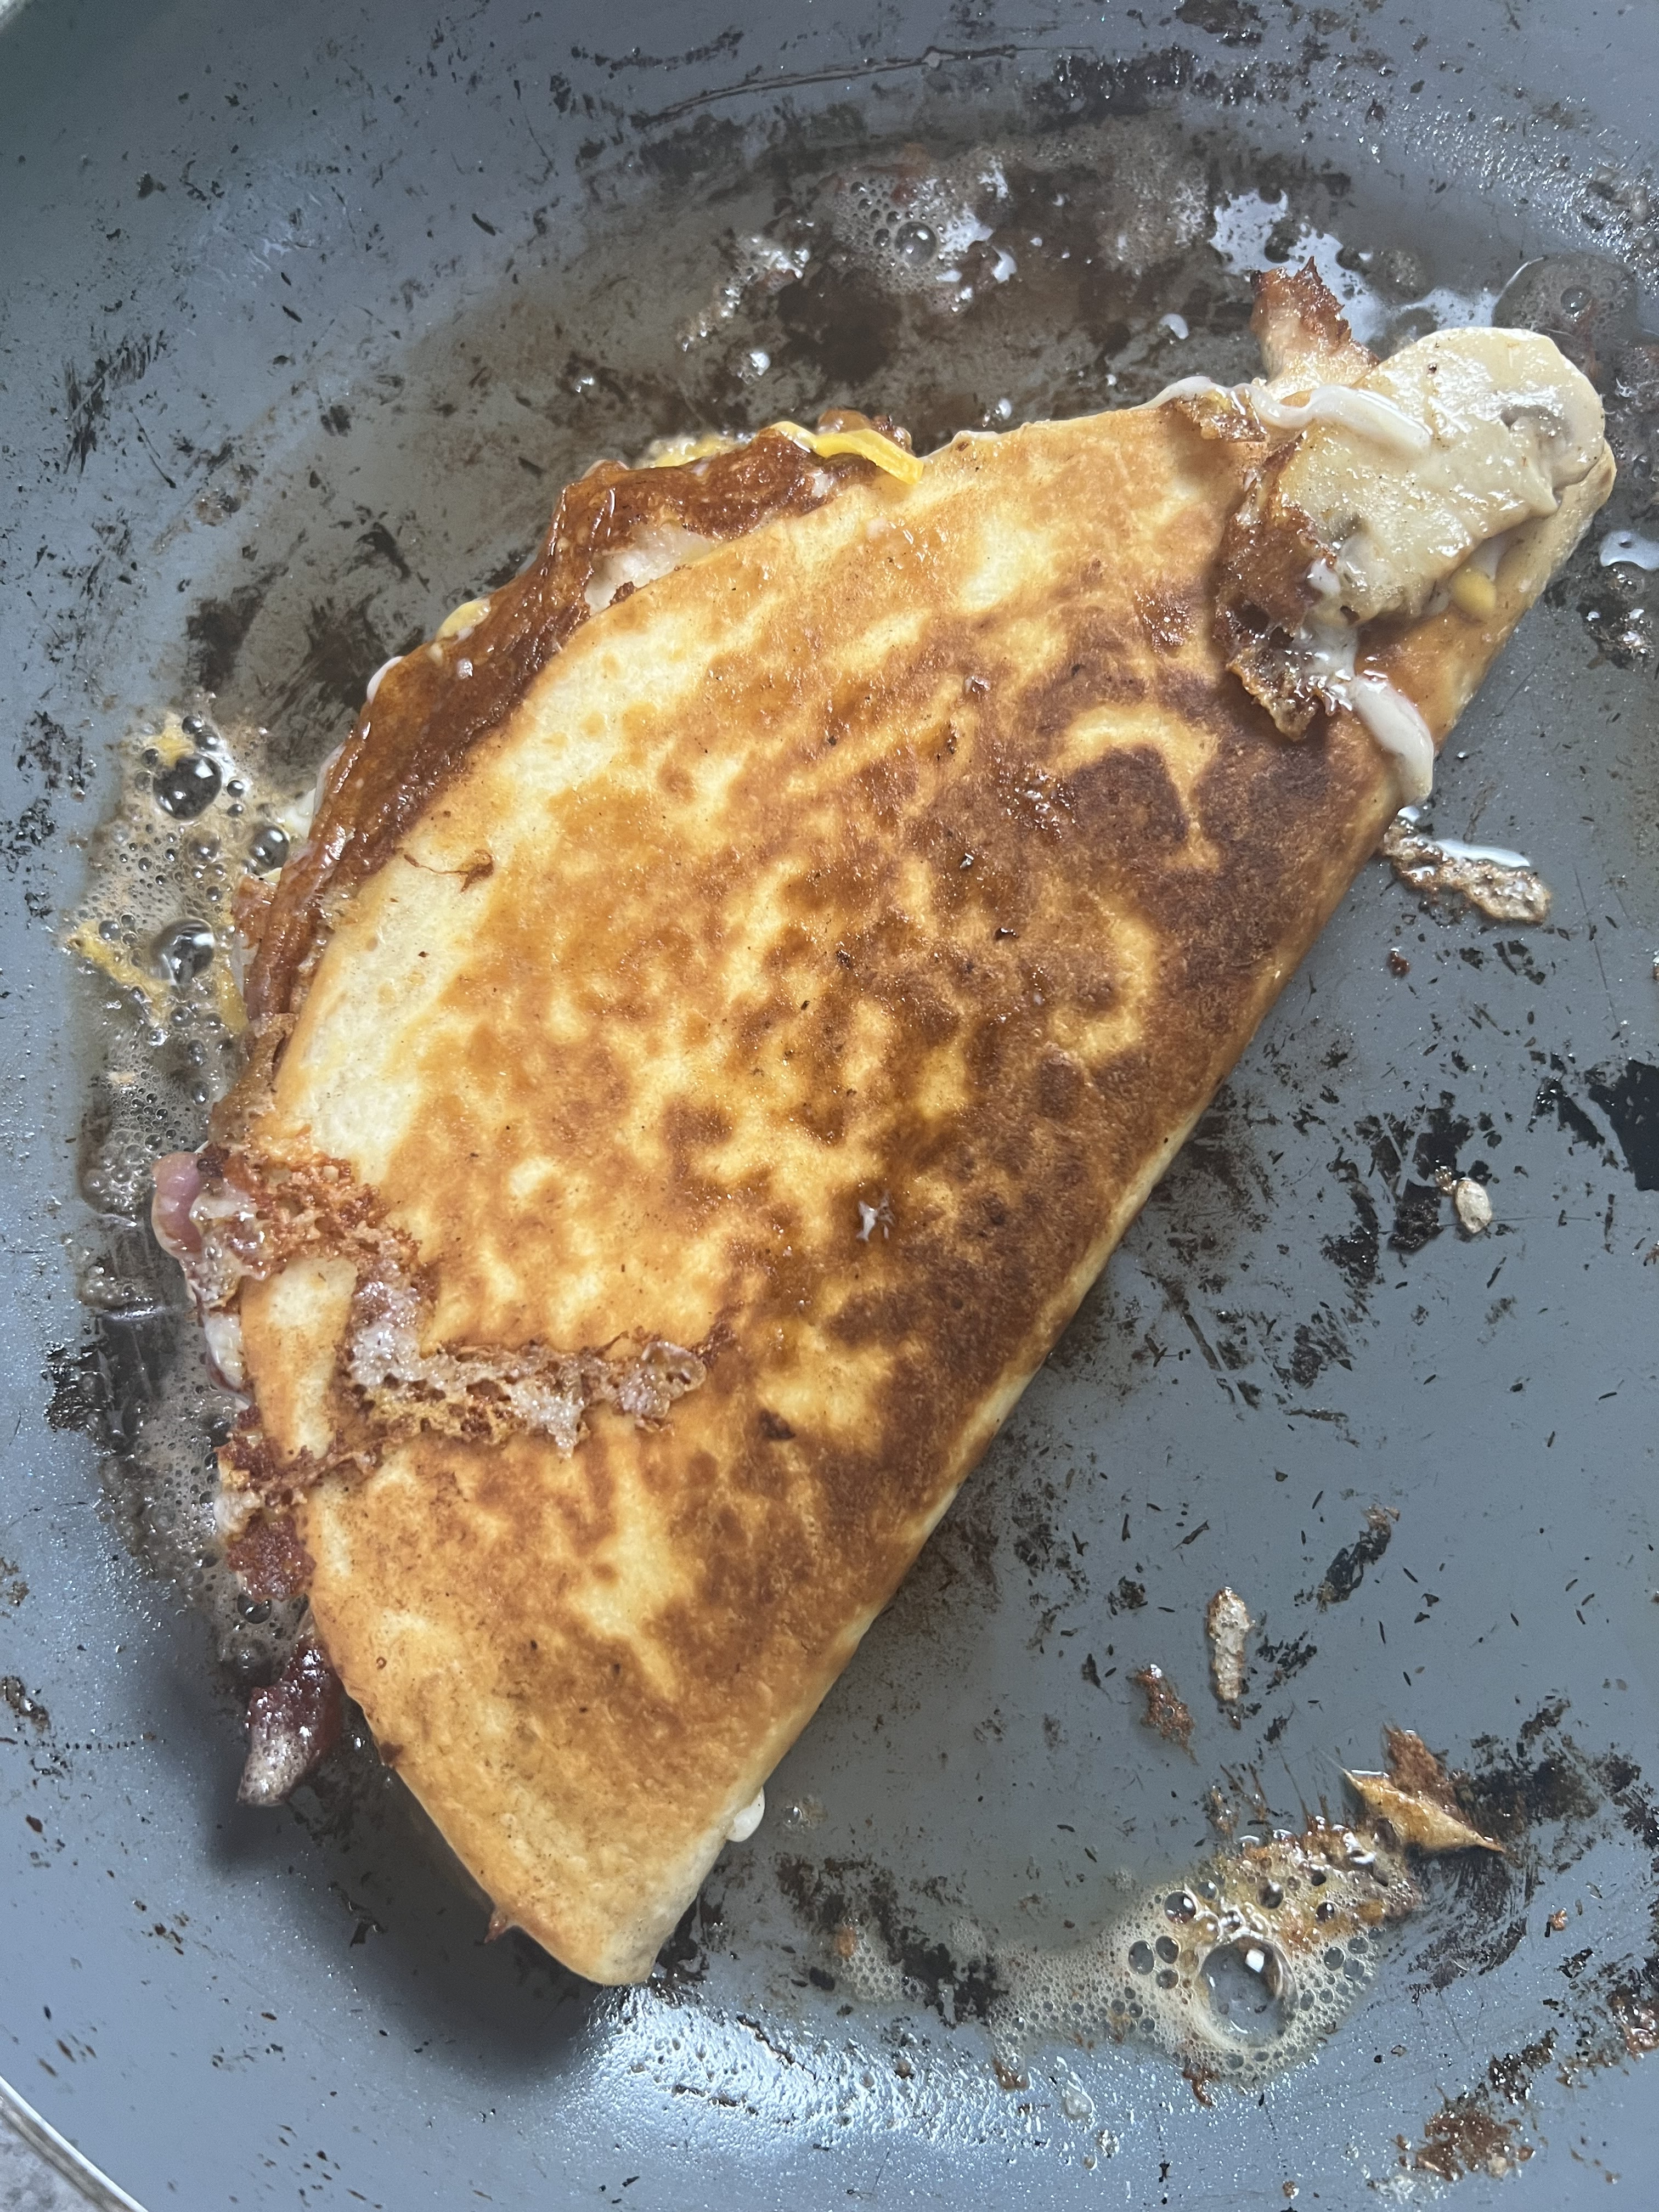
This super easy and very versatile quesadilla is incredibly delicious! With the complex flavors of both the grilled chicken & bacon combined with avocado and ranch dressing… it is sooo yum! You can mix and match whatever toppings suit your fancy! Enjoy friends!

To watch me make this super yummy recipe, click below for my YouTube Video!
Ingredients: Yields~ It depends on how many quesadillas you are making. Determine first how many people you are feeding, and how many each person will eat! Warning~ this is a very filling sandwich!
1 soft tortilla wrap per person
1 boneless, skinless chicken breast for every 2 quesadillas~ seasoned & grilled beforehand
2 pieces of bacon fried per quesadilla
1 TBSP salted butter per flour tortilla
Fiesta or Taco blend flavored shredded cheese~ about ½ per quesadilla or more if you like
1 ripe avocado, peeled, pitted, & sliced
1~ 8 ounce container of white whole button mushrooms~ I use about 3 to 5 per quesadilla depending on size
2 to 3 shallots, sliced lengthwise
1 to 2 jalapenos, seeded and sliced into lengthwise strips
Romaine lettuce
2 to 3 Roma tomatoes
Pico De Guio
Ranch dressing
If you enjoyed this quesadilla recipe, check out my 3 Cheese Quesadilla recipe! So you!

1. Grill chicken breasts beforehand. I seasoned mine with a seasoned garlic salt.
2. In a large skillet fry bacon until golden brown; remove bacon onto a paper towel to drain off excess grease; pour out all of the bacon grease into a bowl leaving about 1 TBSP in the frying pan.
3. To bacon grease, add 1 TBSP butter and melt on medium heat; add sliced mushrooms & shallots; sauté until golden; remove to a bowl.
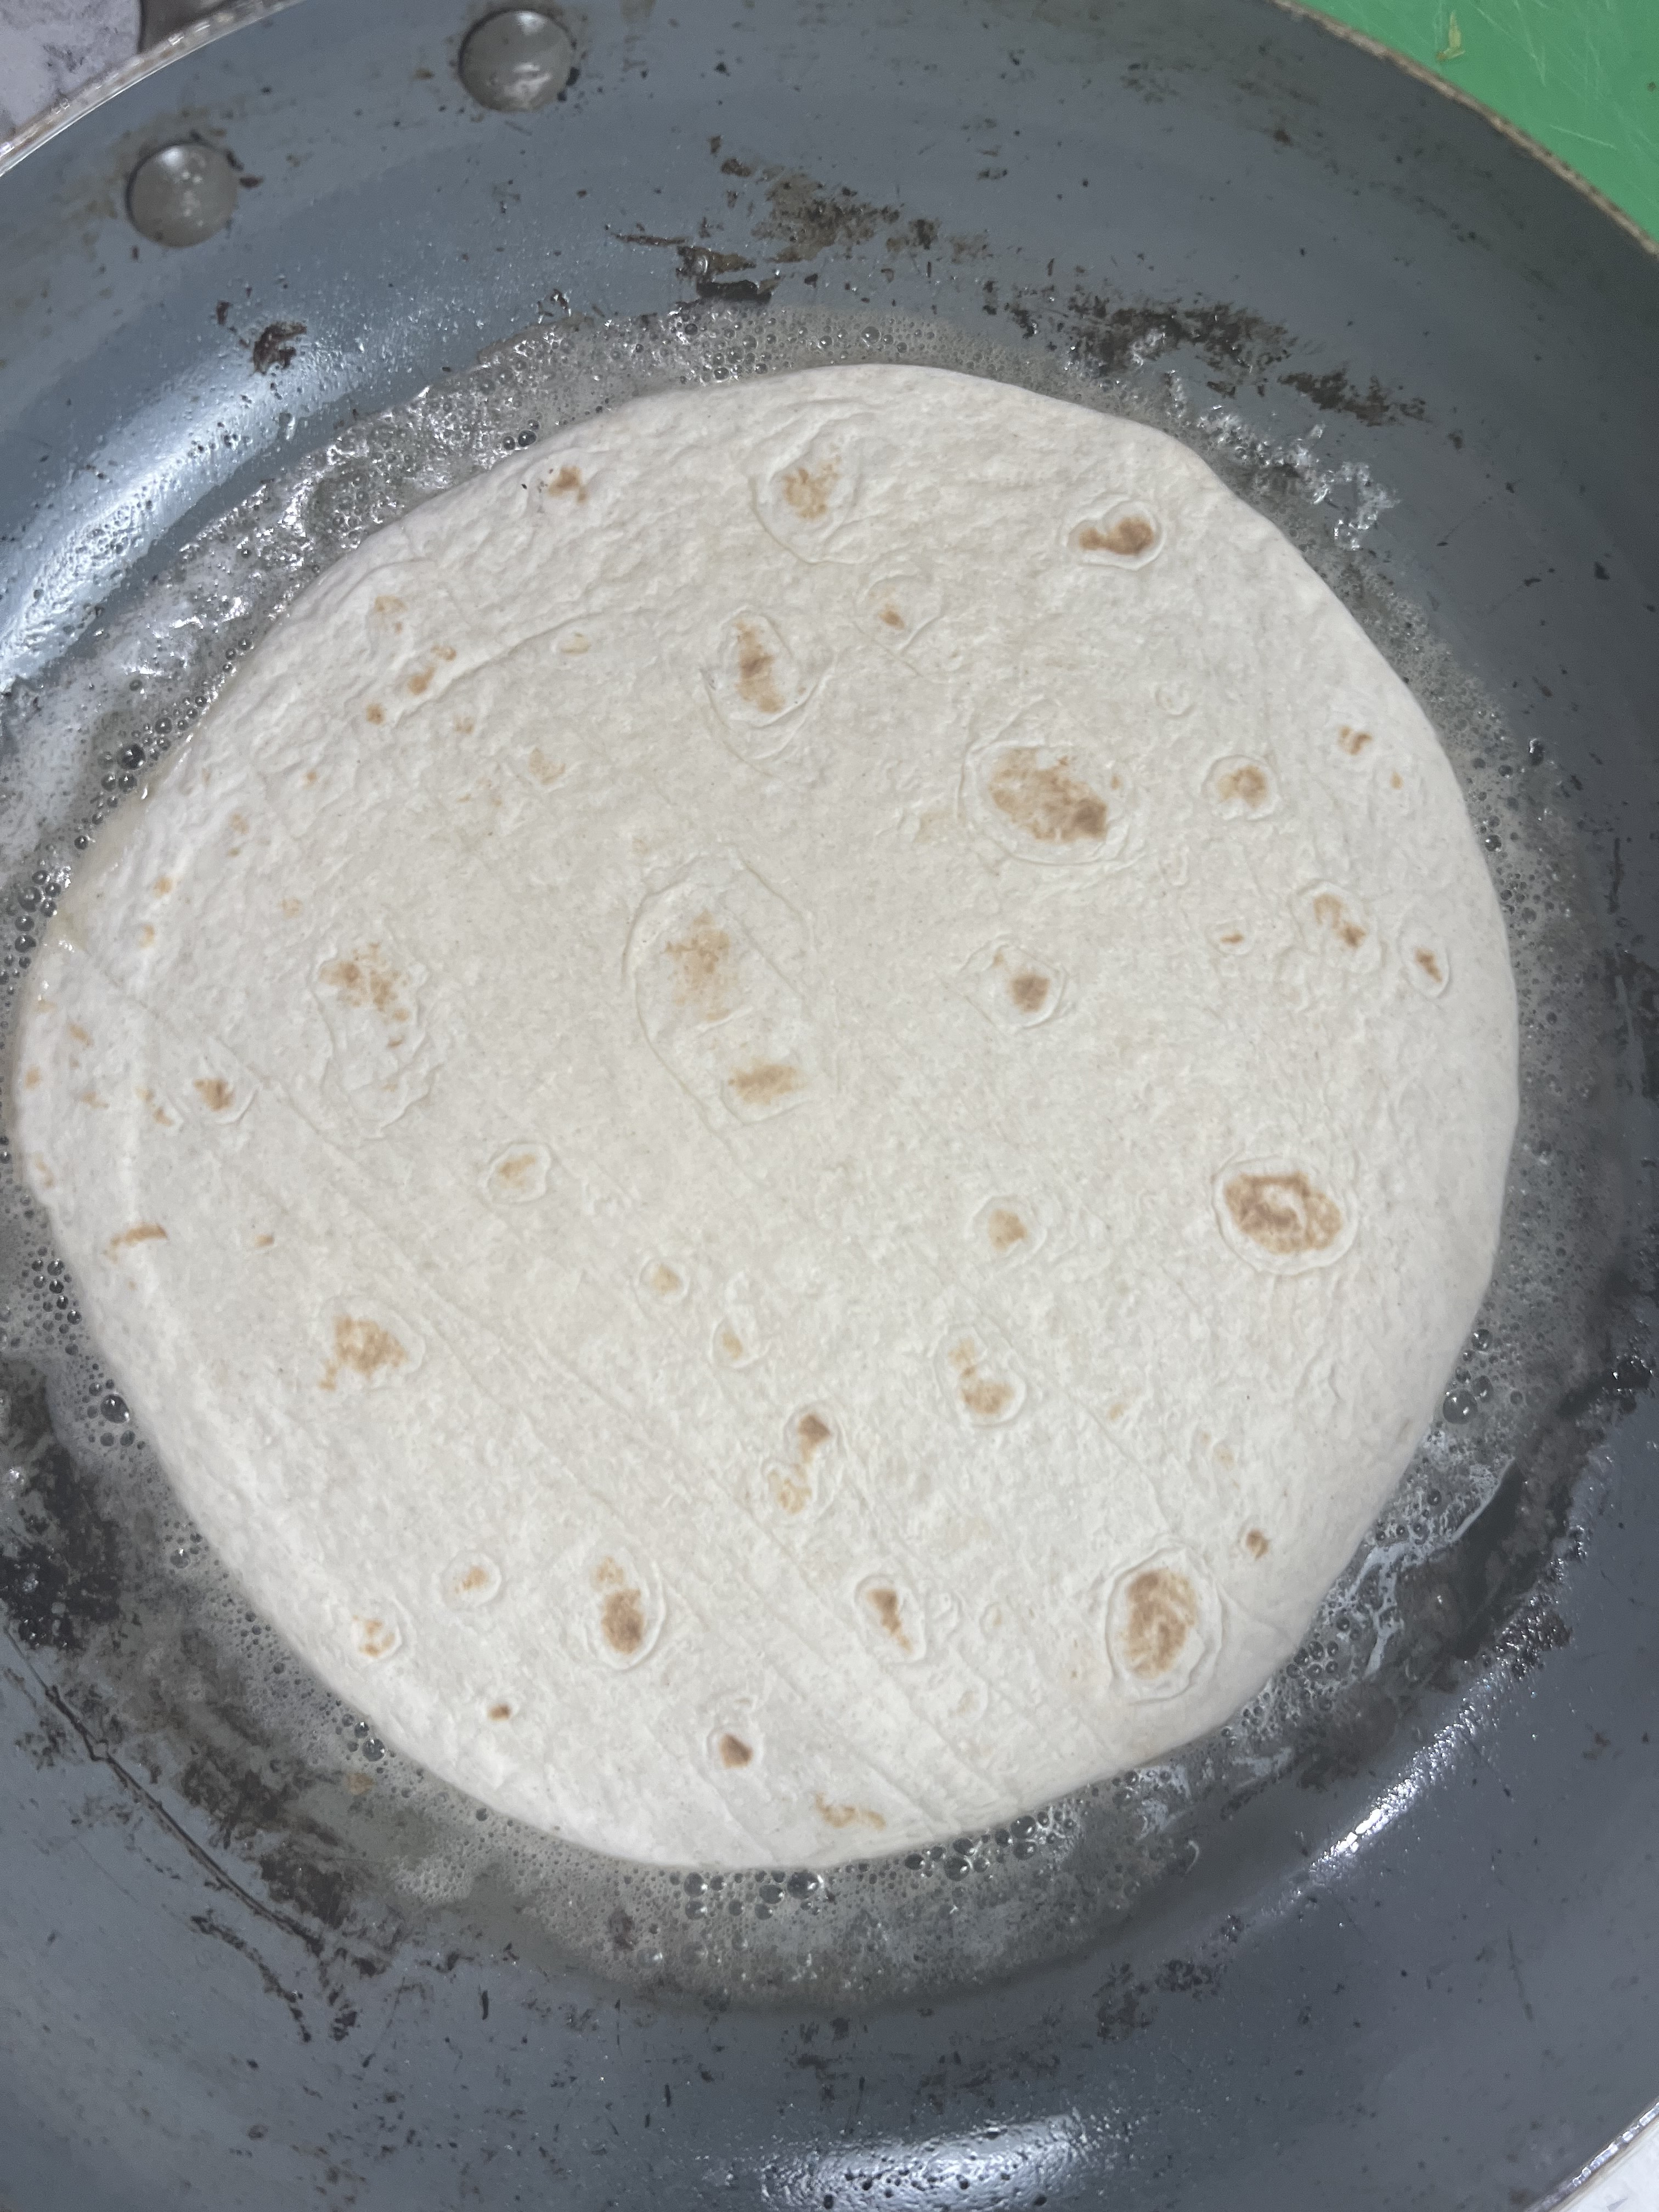

4. In the same skillet, place flour tortilla in the butter/grease and layer your toppings on one half of the tortilla~ You need to be able to fold it in half.
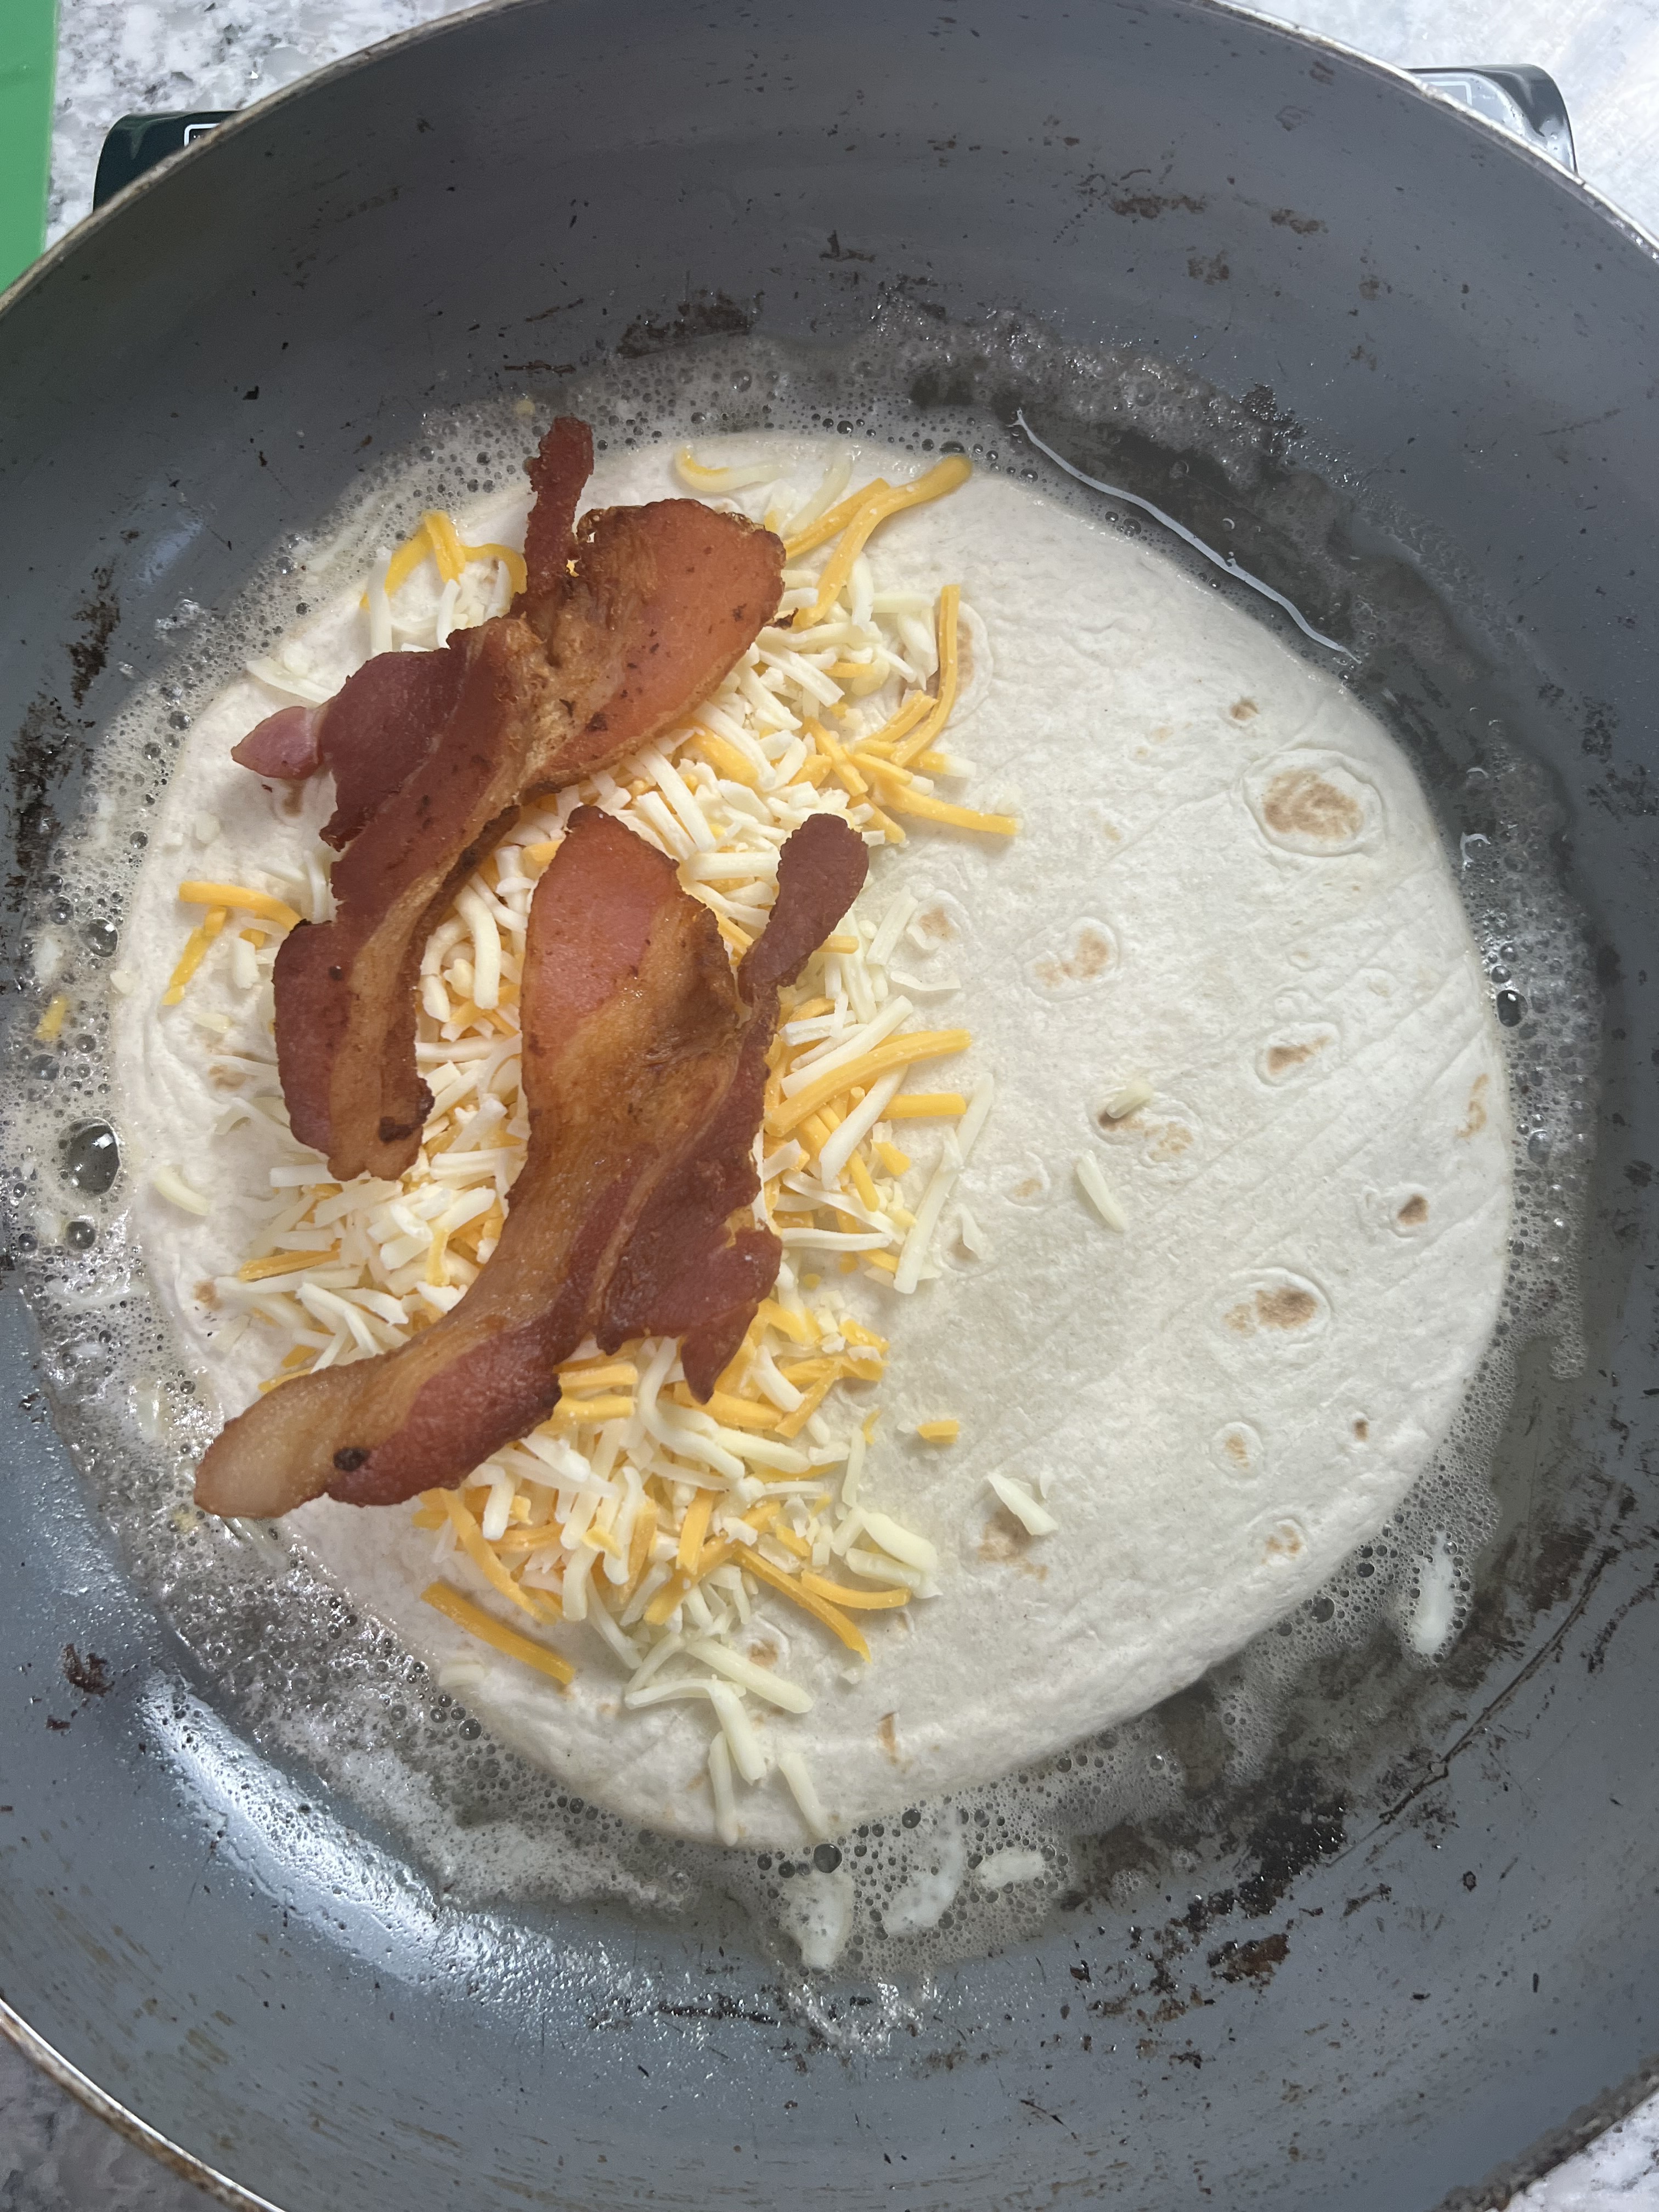

5. Once you have all your fillings, carefully using a spatula and fork, bring the empty side of the tortilla over the filling to make a half moon; fry for about another minute and flip.

6. Fry on the other side for about 1 to 2 minutes, or until golden.

7. Remove onto a plate and carefully open your quesadilla and add avocado and ranch dressing.
Serve with Pico De Guio and sour cream if you like.
If you enjoyed this blog, please LIKE, Follow, Share & leave me a comment! I love your feedback!
If you aren’t following me on Facebook & Instagram go on over & give a LIKE & Follow me for daily tips & tricks for your home & garden!
Added bonus: You can go to my blog at http://www.fordragonfliesandme.com to purchase my original cookbook, Lovingly Seasoned Eats and Treats in either a spiral bound soft cover OR NEW, a Downloadable PDF version. The cookbook has almost 1000 recipes on almost 500 pages! Check out the Cookbook Testimonials while you’re there!
Until next time remember to,
Eat fresh, shop local & have a happy day,
Jean
Copyright Policy
All text and images on this site are copyright of For Dragonflies And Me. Unless otherwise noted, you may not use this content.

“Cooking is an art, but you eat it too.” – Marcella Hazan

Many of you know I worked in Dearborn, Michigan for almost eight years. Dearborn is known for its incredible culinary delights ranging from incredible Thai & BBQ, burgers galore, and of course several Mediterranean spots. I grew to love a few items, and shawarma was definitely one of them.
You may not realize how easy it is to make, so let me show you how you can enjoy this pallet tantalizing sandwich right in your own kitchen!
If you recall, I just showcased my shish-kabab with marinade recipe a couple weeks ago. Well Dave thought that marinade would be perfect for this recipe… so that’s what I did.
Ingredients: Yields 8 Shawarma Wraps
4 large boneless, skinless chicken breasts
8 Pita wraps
Lettuce and tomato to top with
Mediterranean Garlic Dip
Marinade Recipe~ See my shish-kebab with marinade recipe


Mediterranean Garlic Dip:
1 cup canola oil
½ cup peeled garlic cloves
3 TBSP scant lemon juice
½ tsp salt
In a blender or mini food chopper, pulverize garlic with salt until completely mashed.
With the blender on high, drizzle alternately the lemon juice and the oil until completely smooth, about 3-4 minutes.
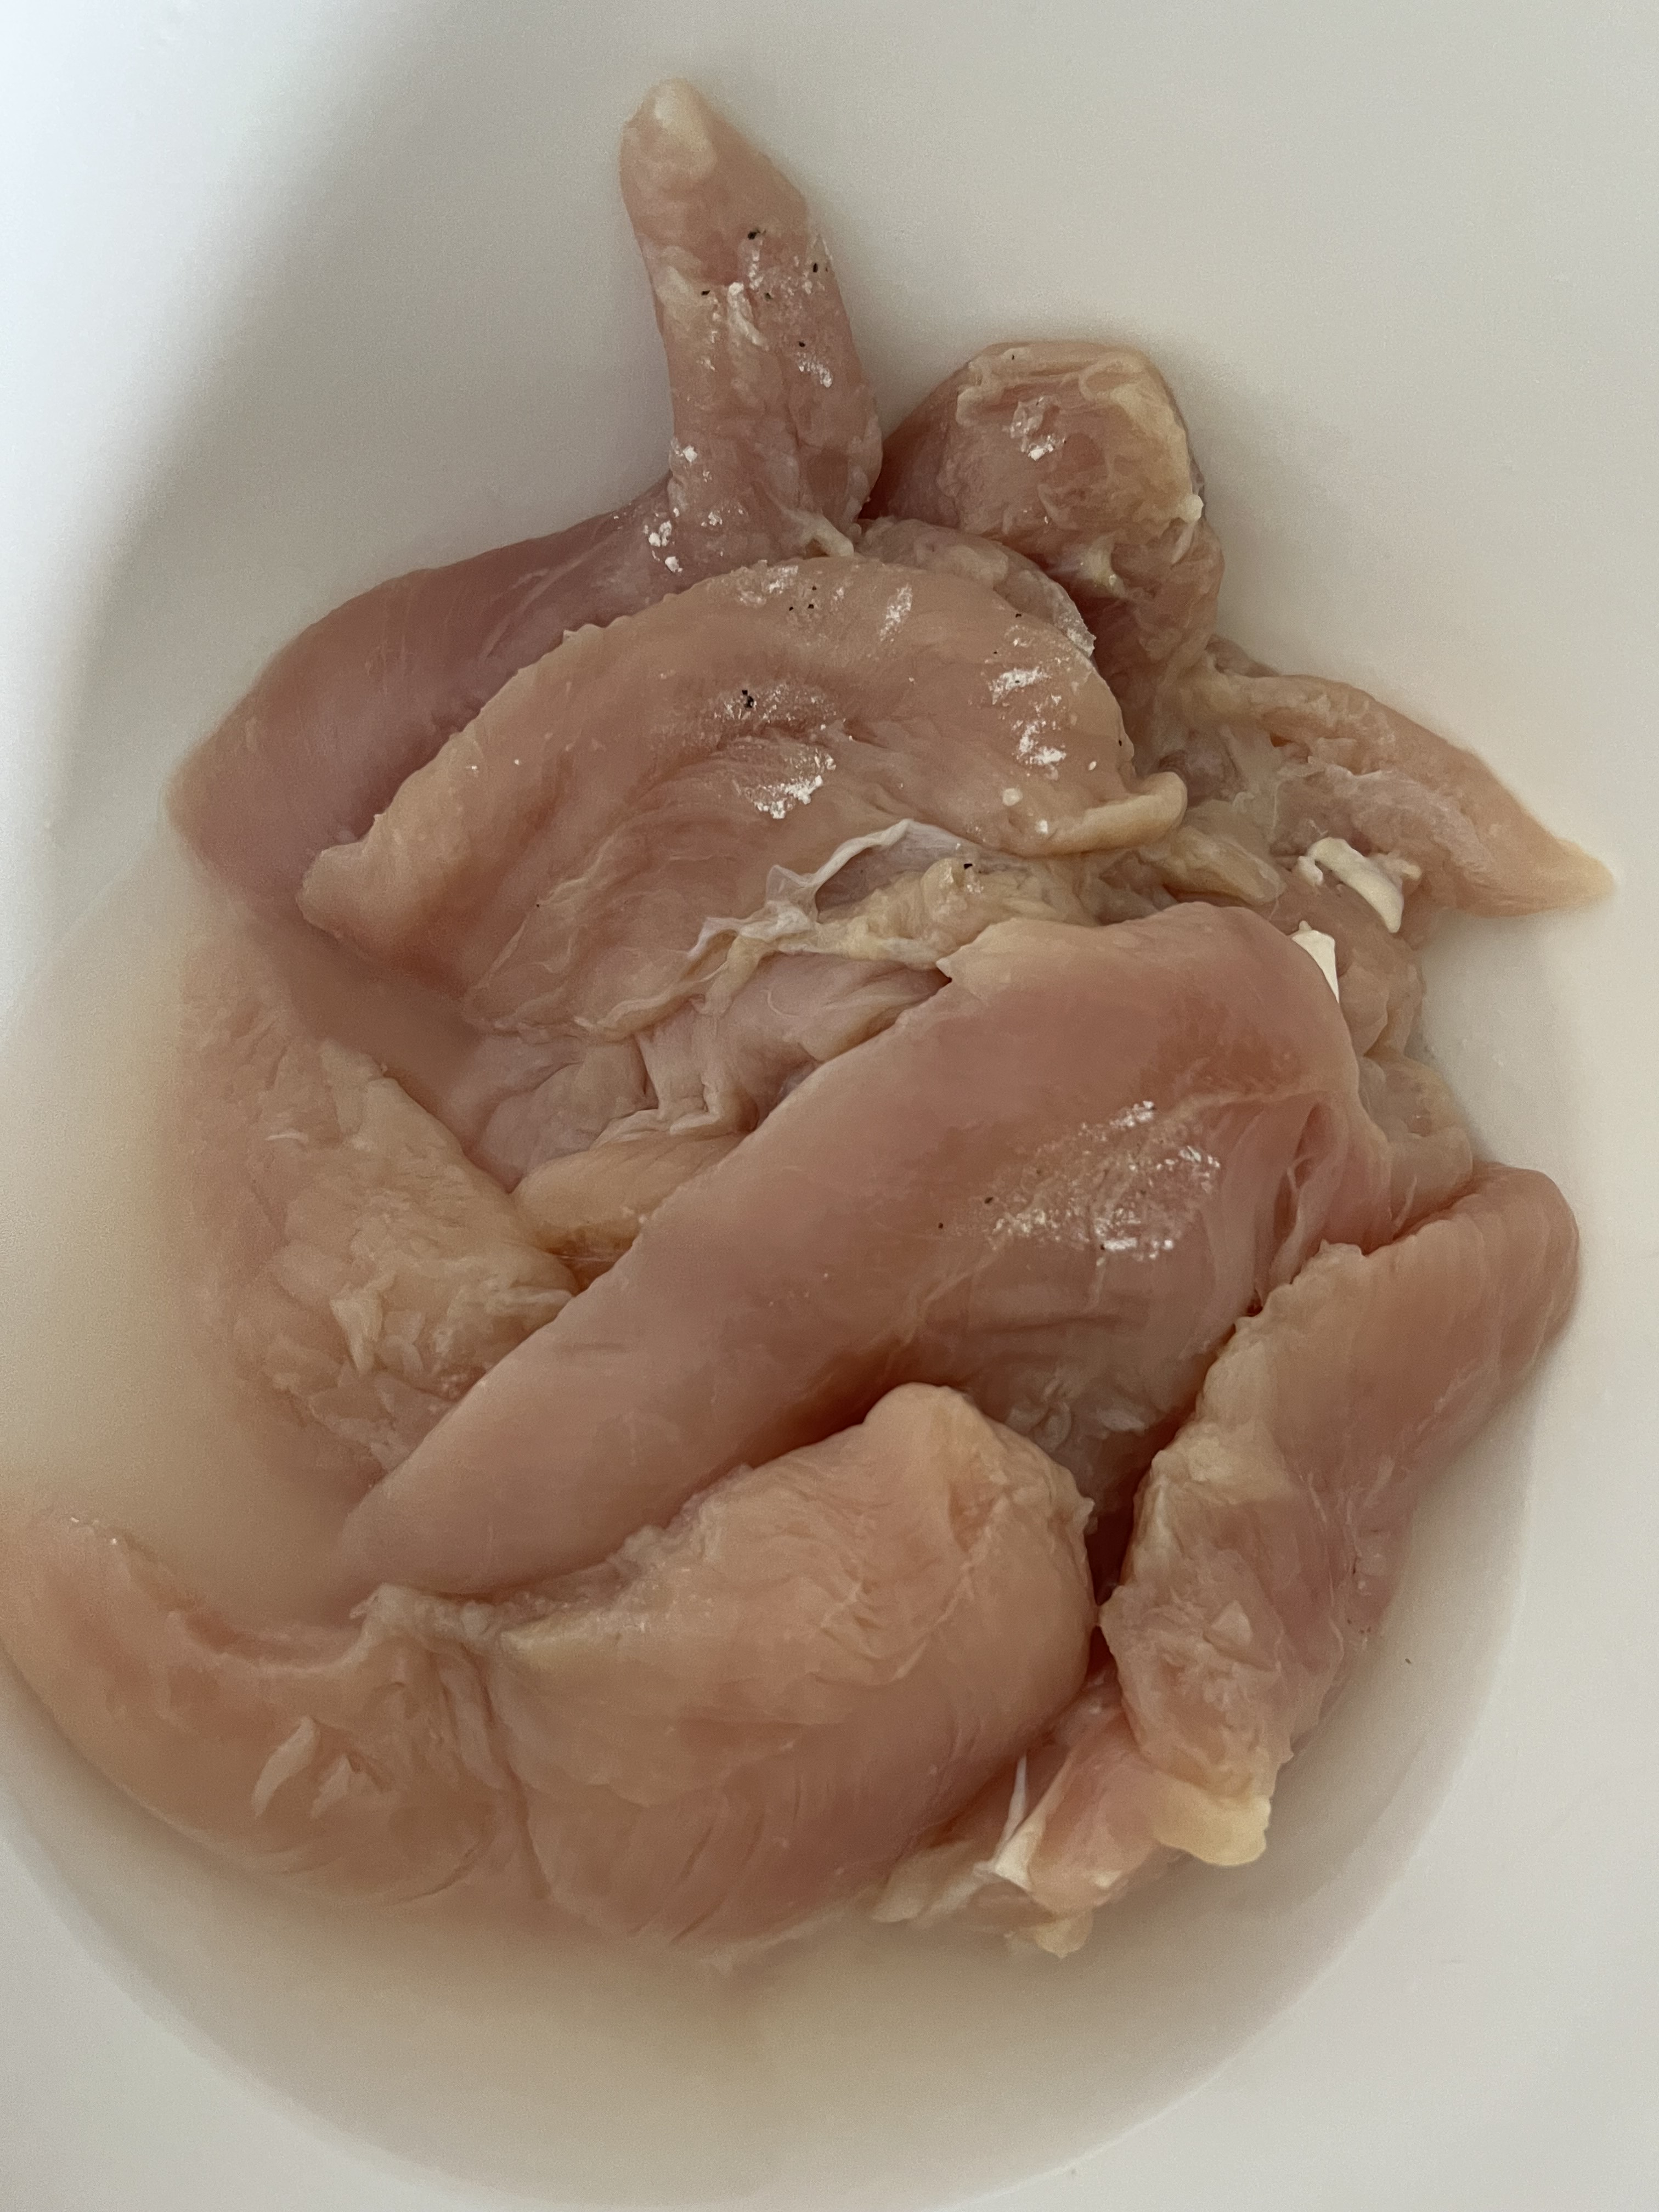
1. Wash and chuck the chicken; set aside

2. In a gallon size zipper style storage bag, make the marinade; add the chicken, seal the bag; blend the marinade with the chicken by gently compressing the bag.
3. Set the bag with chicken and marinade into a bowl and refrigerate for a minimum of 3 hours, but overnight is best.
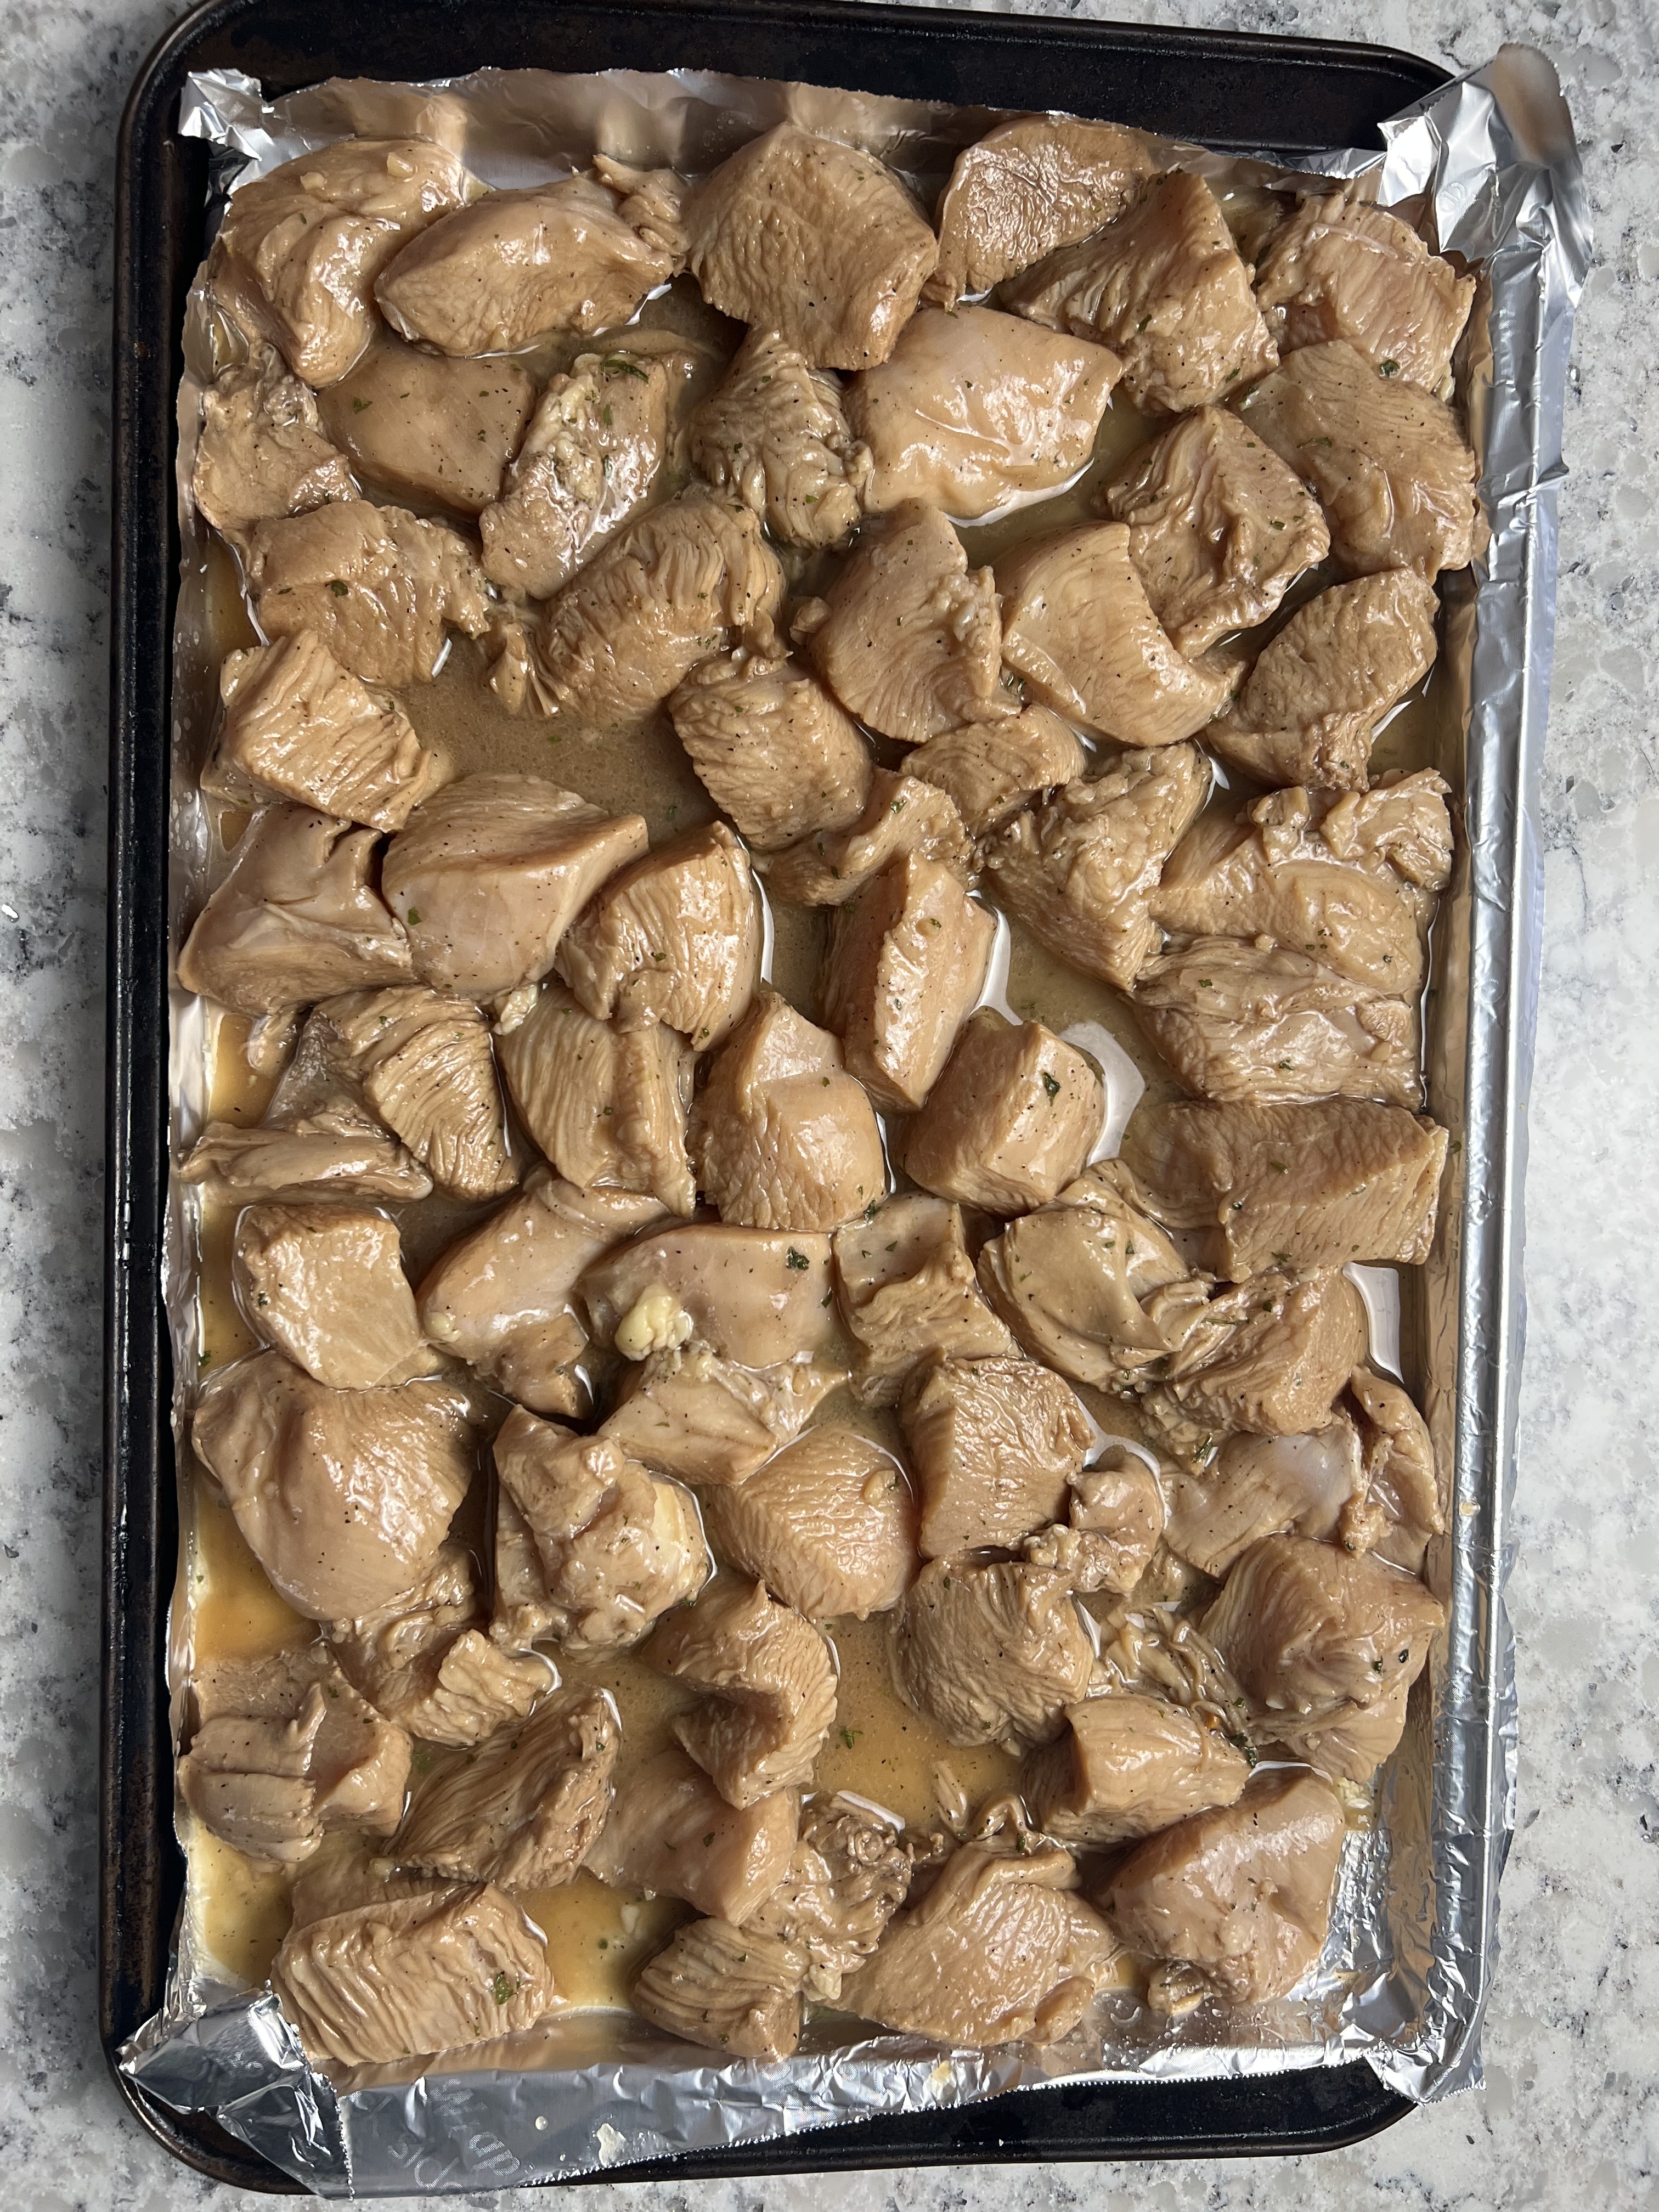
4. Remove chicken from marinade onto a foil lined baking sheet with sides.
5. Bake chicken in a 350 degree oven for 30 to 40 minutes until chicken is cooked. You can cut into a few of the largest pieces to check for doneness.
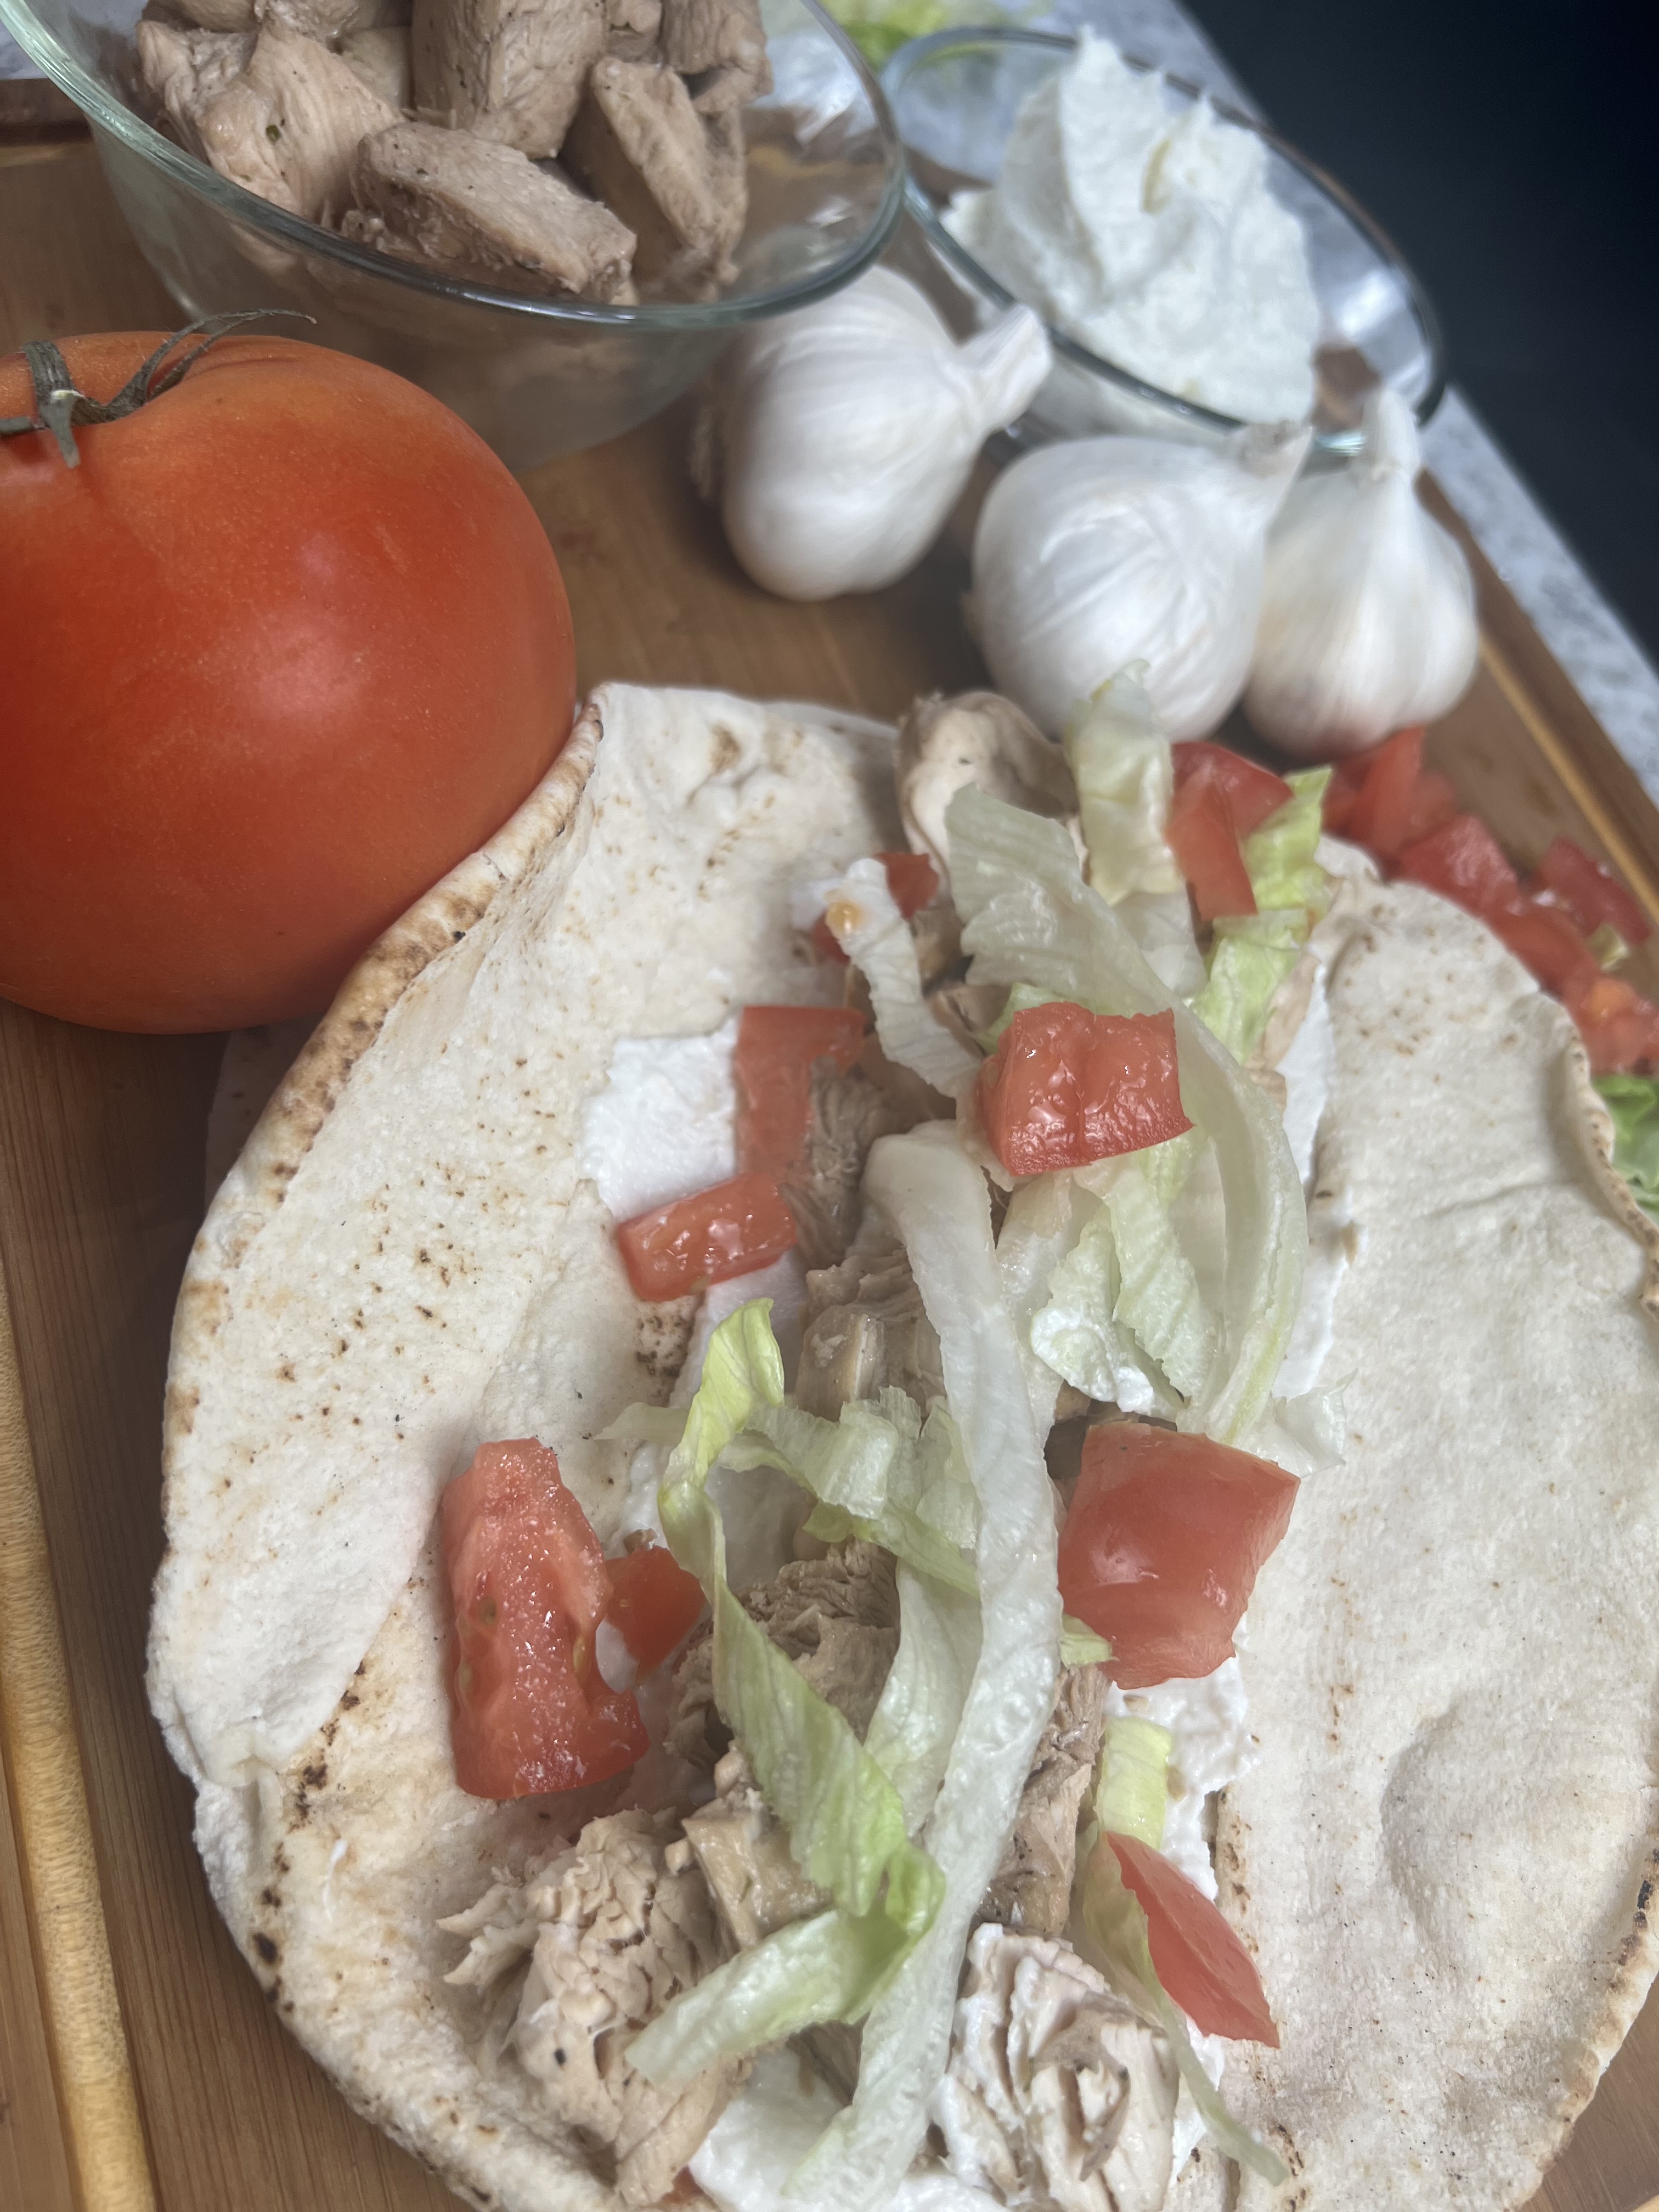
To construct the shawarma:

Serve with rice or a Lemon Rice Soup! Keep posted for that recipe coming soon!
If you enjoyed this blog, please LIKE, Follow, Share & leave me a comment! I love your feedback!
If you aren’t following me on Facebook & Instagram go on over & give a LIKE & Follow me for daily tips & tricks for your home & garden!
Added bonus: You can go to my blog at http://www.fordragonfliesandme.com to purchase my original cookbook, Lovingly Seasoned Eats and Treats in either a spiral bound soft cover OR NEW, a Downloadable PDF version. The cookbook has almost 1000 recipes on almost 500 pages! Check out the Cookbook Testimonials while you’re there!
Until next time remember to,
Eat fresh, shop local & have a happy day,
Jean
All text and images on this site are copyright of For Dragonflies And Me. Unless otherwise noted, you may not use this content.
Everything Organic
Tina Marshall
A blog about my spiritual journey in the Lord Jesus Christ.
Livegood
"If we want to explore deeper oceans, we first have to leave sight of the shore.”
Grow your own veg
Online marketing, tools, services and informations
The Musings of a Writer / Freelance Editor in Training
Past to Future in a Picosecond
Hi, I'm Avisha Rasminda Twenty-Two years old, Introduce Myself As A Author , Painter , A Poet.
