March Gardening Guide: Essential Tasks to Prep Your Garden for a Bountiful Season

Introduction to March gardening

The warmer days of spring are finally arriving and I couldn’t be more elated! This is the time of year where I start to get very antsy to get out into the raised beds… commune with nature… and breath in that fresh, crisp spring air. If you’re a gardener, you know exactly what I’m talking about.

March brings renewal of life. Buds start to pop on the trees and spring blooming plants. There is new life abounding around us!

As the winter frost begins to thaw and the days gradually lengthen, March marks the beginning of an exciting time for us gardeners. It’s a month filled with anticipation and the promise of a bountiful season ahead. In this guide, I’ll explore the essential tasks to prep your garden for a successful and productive year. Let’s get our hands dirty friends!
Essential tasks for March gardening

Preparing the soil for planting

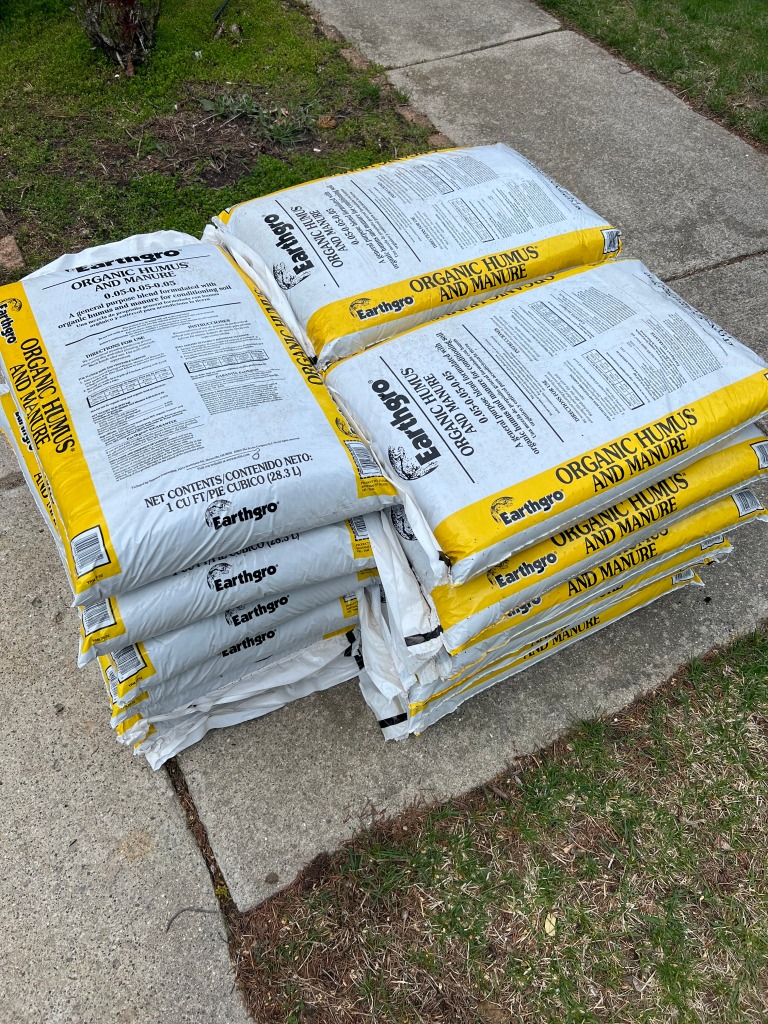
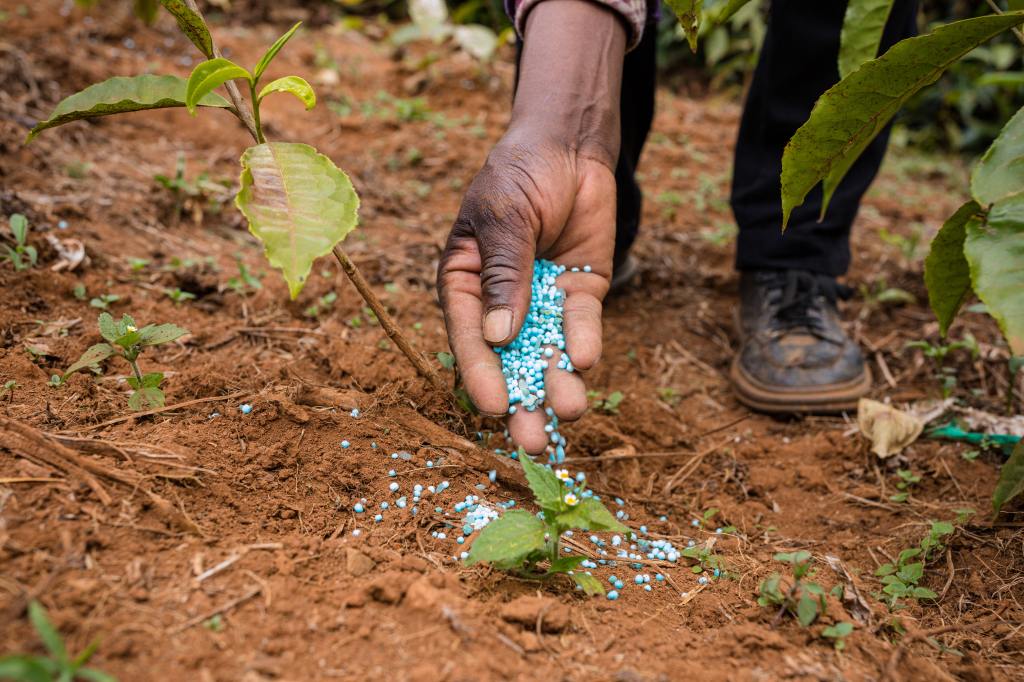
One of the most crucial tasks in March gardening is preparing the soil for planting. Start by removing any debris, such as fallen leaves or weeds, from the garden beds. Clearing the soil allows for better air circulation and prevents the growth of harmful pathogens. Once the area is cleared, it’s time to improve the soil’s fertility. Add compost or well-rotted manure to enrich the soil with essential nutrients. Work the organic matter into the soil using a garden fork or tiller, ensuring it is evenly distributed.

Join the list

Join hundreds of our subscribers and be the first to know about new content and special offers.

Planting and transplanting in March

March presents an excellent opportunity to start sowing seeds and transplanting seedlings into the garden. Begin by identifying the plants suitable for early planting. These include cool-season vegetables like lettuce, spinach, peas, and radishes. Follow the instructions on the seed packets for proper sowing depth and spacing. Additionally, consider starting seeds indoors for warm-season vegetables like tomatoes, peppers, and eggplants. Transplant these seedlings into larger containers once they have developed a few sets of true leaves, and gradually acclimate them to outdoor conditions before planting them in the garden.

March gardening maintenance tips

To ensure a thriving garden throughout the season, it’s important to stay on top of maintenance tasks in March. Regularly water your plants, especially newly sown seeds and transplants, as they require consistent moisture to establish strong roots. Mulching is another essential maintenance practice. Apply a layer of organic mulch, such as straw or wood chips, around your plants to conserve moisture, suppress weed growth, and regulate soil temperature. Regularly inspect your garden for signs of pests or diseases, and take appropriate measures to prevent or control them. Finally, keep an eye on the weather forecast and protect tender plants from unexpected late frosts by covering them with frost blankets or cloths.

Pest and weed control in March

As the garden comes to life in March, so too do the pests and weeds. Vigilance in pest and weed control is essential to maintain a healthy and thriving garden. Start by practicing good garden hygiene. Remove any dead plant material, as it can harbor pests and diseases. Handpick larger pests, such as caterpillars or slugs, and dispose of them. Consider using organic pest control methods, such as insecticidal soaps or neem oil, to target specific pests while minimizing harm to beneficial insects. When it comes to weed control, prevention is key. Apply a layer of mulch to suppress weed growth, and promptly remove any weeds that do emerge to prevent them from competing with your plants for nutrients and water.

March gardening challenges and how to overcome them

While March brings excitement and anticipation for the gardening season, it also comes with its fair share of challenges. Erratic weather conditions, such as late frosts or heavy rains, can pose a threat to young and tender plants. To overcome this challenge, stay informed about the local weather forecast and take proactive measures to protect your plants when necessary. Cover them with frost blankets or cloths during cold nights, and provide temporary shelter during heavy rains to prevent waterlogging. Another challenge in March gardening is the emergence of persistent weeds. Regularly inspect your garden and promptly remove any weeds before they have a chance to establish and spread. Remember, early intervention is key to preventing weed infestations.

Check out the Farmers Almanac for guidance on weather!

March gardening calendar

To help you stay organized and make the most of your time in the garden, here’s a gardening calendar for March:

  1. Clear garden beds and prepare the soil for planting.
  2. Sow cool-season vegetables like lettuce, spinach, peas, and radishes.
  3. Start warm-season vegetable seeds indoors.
  4. Transplant seedlings into larger containers.
  5. Water newly sown seeds and transplants regularly.
  6. Apply organic mulch around plants to conserve moisture and suppress weeds.
  7. Monitor the garden for pests and diseases, and take appropriate measures for control.
  8. Stay informed about the local weather forecast and protect plants from late frosts or heavy rains.
  9. Regularly inspect and remove weeds to prevent infestations.

Harvesting and using March produce

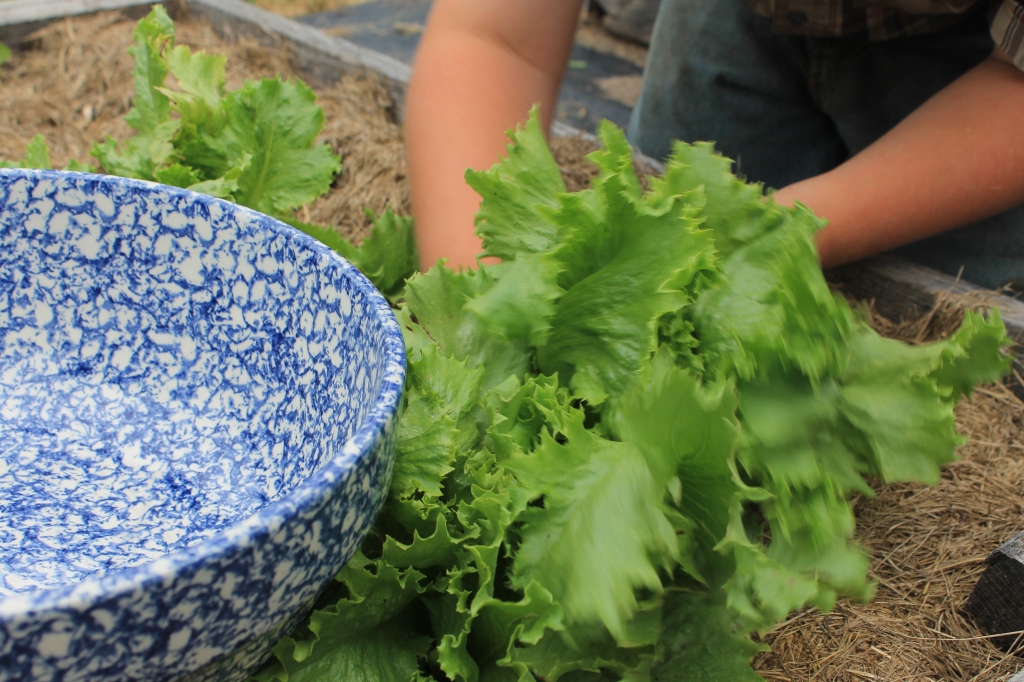
As the gardening season progresses, you’ll soon be rewarded with an abundance of fresh produce. In March, you can start harvesting cool-season vegetables like lettuce, spinach, and radishes. Harvest leafy greens when they reach the desired size, and pick radishes when they are firm and vibrant in color. These fresh vegetables can be used in salads, stir-fries, or as garnishes. Additionally, consider preserving your harvest through methods such as freezing or canning to enjoy the flavors of your garden throughout the year.

Check out my super easy Homemade Ranch Dressing YouTube video below! Be sure to also check out my Homemade Thousand Island Dressing & Creamy Parmesan Dressing videos!

Looking ahead to the next gardening season

As we conclude this March gardening guide, it’s important to reflect on the progress made in preparing your garden for a bountiful season. By following the essential tasks outlined, you have set a solid foundation for a successful year of gardening. As the season progresses, continue to adapt and learn from the challenges and joys that gardening brings. Stay observant, maintain regular care, and celebrate each harvest as a testament to your efforts. With each passing month, your garden will flourish, and you will be rewarded with the fruits of your labor. Happy gardening!
CTA: Share your favorite March gardening tips and experiences in the comments below. Let’s grow together!

Processing…
Success! You're on the list.

If you enjoyed this blog , please LIKE, Follow, Share & leave me a comment! I love your feedback!

If you aren’t following me on Facebook & Instagram, go on over & give a LIKE & Follow me for daily tips & tricks for your home & garden!

Remember to eat fresh, shop local, & have a happy day,

Jean

Copyright Policy

All text and images on this site are copyright of For Dragonflies And Me. Unless otherwise noted, you may not use this content 

This post may contain affiliate links. If you choose to purchase through an affiliate link, I may receive a small commission at no additional cost to you. You can see my full disclaimer here.

Creating Your Own Tropical Paradise: A Guide to Designing a Stunning Tropical Garden in Any Climate Zone

I’ve always loved tropical plants and adding them to the patio or deck. The bonus is I get to bring them into the house once the colder days of Michigan arrive. This is a bright spot for me as I am by no means a winter person.

Continuing this months theme of garden types, lets look at the majestic tropical garden. If you missed the others, just click the links to these interesting and inspiring blog posts on how to create a Fairy GardenMoon Garden, Asian Inspired, traditional English gardenbeautiful water gardenherb garden,  and the quaint rock garden. Enjoy friends.

Introduction to Tropical Gardens

When I first set foot in a tropical garden, I was immediately captivated by its enchanting beauty and serene atmosphere. The lush foliage, vibrant blooms, and soothing sounds of nature create a truly magical experience. I knew right then and there that I wanted to create my own tropical paradise, and with some research and planning, I discovered that it is possible to design a stunning tropical garden in any climate zone.

Benefits of Designing a Tropical Garden

Designing a tropical garden offers numerous benefits that go beyond its aesthetic appeal. Firstly, tropical gardens can serve as a natural sanctuary, providing a peaceful and tranquil environment where you can escape the stresses of everyday life. The abundance of greenery and the calming sounds of water features create a sense of serenity that is unmatched.

Additionally, tropical gardens have the power to attract a wide variety of wildlife, from colorful birds to delicate butterflies. This not only adds another layer of beauty to your garden but also contributes to the overall ecosystem. By creating a haven for wildlife, you are helping to preserve and enhance biodiversity in your area.

Join the list

Join hundreds of our subscribers and be the first to know about new content and special offers.

Understanding Climate Zones and Their Impact on Tropical Garden Design

One of the most important factors to consider when designing a tropical garden is the climate zone you are in. Different plants thrive in different climates, so it is essential to understand the specific requirements of your zone. There are three main climate zones: tropical, subtropical, and temperate.

In tropical climate zones, where temperatures remain consistently warm throughout the year, you have the advantage of being able to grow a wide variety of tropical plants. Palms, orchids, hibiscus, and bromeliads are just a few examples of plants that thrive in tropical climates. With the right selection of plants, you can create a true tropical oasis in your own backyard.

In subtropical climate zones, where temperatures are slightly cooler, you have a broader range of plant options. While you can still incorporate tropical plants, you also have the opportunity to include some plants that are typically found in more temperate regions. This opens up a whole new world of possibilities when it comes to designing your tropical garden.

In temperate climate zones, where temperatures can vary significantly throughout the year, creating a tropical garden requires a bit more planning and creativity. While it may not be possible to grow certain tropical plants outdoors year-round, you can still create a tropical ambiance by using container plants that can be brought indoors during the colder months.

Choosing the Right Plants for Your Tropical Garden

Selecting the right plants is crucial to the success of your tropical garden. When choosing plants, consider their specific requirements, such as sunlight, water, and soil conditions. It is also important to choose plants that complement each other in terms of height, texture, and color.

Palms are a staple in tropical gardens and come in a wide variety of sizes and shapes. They provide vertical interest and add a sense of grandeur to any garden. Other popular tropical plants include elephant ears, bird of paradise, and ginger. These plants not only have beautiful foliage but also produce stunning flowers that add a burst of color to your garden.

In addition to these larger plants, consider incorporating smaller flowering plants and ground covers for added visual interest. Orchids, bromeliads, and heliconias are excellent choices for adding pops of color to your garden. Ground covers such as liriope and mondo grass can be used to fill in empty spaces and create a lush carpet-like effect.

Incorporating Water Features and Ponds in Your Tropical Garden

Water features are an essential element in any tropical garden. The sound of trickling water creates a soothing and calming atmosphere, while ponds provide a habitat for aquatic plants and wildlife. There are several options to consider when incorporating water features in your garden, depending on the available space and your personal preferences.

One popular choice is a small pond with a cascading waterfall. This creates a focal point and adds movement and sound to your garden. Another option is a babbling brook or stream, which can wind its way through your garden, creating a sense of serenity. If space is limited, a simple fountain or water wall can still provide the tranquil ambiance you desire.

When designing your water feature, consider incorporating aquatic plants such as water lilies, lotus, and water hyacinths. These plants not only add beauty but also help to keep the water clean and balanced. Fish, such as koi or goldfish, can also be added to your pond for additional visual interest.

Creating a Lush and Vibrant Color Palette in Your Tropical Garden

One of the most striking features of a tropical garden is its vibrant color palette. To create a lush and vibrant garden, choose plants with a range of colors, including deep greens, vibrant yellows, fiery oranges, and bold reds. By selecting plants that bloom at different times throughout the year, you can ensure that your garden remains colorful and vibrant all year round.

In addition to flowers, foliage plants play a crucial role in creating a lush and vibrant garden. Banana plants, crotons, and caladiums are just a few examples of foliage plants that come in a variety of colors and patterns. By strategically placing these plants throughout your garden, you can create a visually stunning tapestry of colors and textures.

To further enhance the beauty of your garden, consider incorporating colorful containers and garden ornaments. Ceramic pots, mosaic tiles, and sculptures can add a touch of whimsy and personality to your tropical paradise. Just be sure to choose colors and styles that complement the overall theme of your garden.

Designing Pathways and Seating Areas for Relaxation and Enjoyment

A well-designed pathway not only serves a practical purpose but also adds visual interest to your tropical garden. Consider using natural materials such as stone, gravel, or wood to create a pathway that blends seamlessly with the surrounding foliage. Curved pathways can add a sense of mystery and intrigue, while straight pathways provide a clear and direct route through your garden.

Along your pathway, create seating areas where you can relax and enjoy the beauty of your tropical garden. Incorporate comfortable outdoor furniture such as lounge chairs, hammocks, or benches. Place these seating areas strategically, taking advantage of shaded spots or areas with the best views.

To create a sense of enclosure and privacy, consider using trellises or pergolas covered in climbing plants such as bougainvillea or jasmine. These structures not only provide shade but also add vertical interest and create a cozy and intimate atmosphere.

Implementing Proper Irrigation and Drainage Systems in Your Tropical Garden

Proper irrigation and drainage are essential for the health and longevity of your tropical garden. Tropical plants generally require more water than plants in other climates, so it is important to provide them with an adequate water supply. Install a sprinkler or drip irrigation system to ensure that your plants receive the right amount of water at the right time.

In addition to irrigation, proper drainage is crucial to prevent waterlogged soil, which can lead to root rot and other plant diseases. Ensure that your garden has adequate drainage by incorporating slopes or installing drainage systems. This will help to prevent water from pooling in certain areas and ensure that your plants thrive.

Maintaining and Caring for Your Tropical Garden Throughout the Year

Creating a tropical garden is a labor of love, and proper maintenance is essential to keep it looking its best. Regular pruning and trimming will help to keep your plants healthy and promote optimal growth. Remove any dead or damaged leaves and flowers to keep your garden looking tidy and prevent the spread of disease.

Fertilize your plants regularly to provide them with the nutrients they need to thrive. Use a slow-release fertilizer specifically formulated for tropical plants, following the instructions on the package. Mulching is also important to help retain moisture and suppress weed growth. Apply a layer of organic mulch around your plants, taking care not to cover the base of the plants.

Throughout the year, monitor your garden for pests and diseases. Early detection and treatment are key to preventing the spread of pests and minimizing damage to your plants. Use organic pest control methods whenever possible to minimize the impact on the environment.

Conclusion: Enjoying Your Own Tropical Paradise

Designing and creating your own tropical garden is a rewarding endeavor that allows you to escape to a lush and vibrant oasis right in your backyard. By understanding the specific requirements of your climate zone and selecting the right plants, water features, and color palette, you can create a stunning tropical paradise that will bring you joy and relaxation for years to come. So, roll up your sleeves, grab your gardening tools, and get ready to embark on this exciting journey. Your own tropical paradise awaits!

Image

Processing…
Success! You're on the list.

If you enjoyed this blog , please LIKE, Follow, Share & leave me a comment! I love your feedback!

If you aren’t following me on Facebook & Instagram, go on over & give a LIKE & Follow me for daily tips & tricks for your home & garden!

Remember to eat fresh, shop local, & have a happy day,

Jean

Copyright Policy

All text and images on this site are copyright of For Dragonflies And Me. Unless otherwise noted, you may not use this content 

The Sustainable Solution: Beginner’s Guide to Vermicomposting for a Greener Future

Welcome to the beginner’s guide to vermicomposting, the sustainable solution for a greener future. If you’re passionate about reducing waste, improving soil health, and minimizing your carbon footprint, then vermicomposting is the answer you’ve been looking for. In this guide, we’ll walk you through everything you need to know to get started with this eco-friendly practice.

Vermicomposting harnesses the power of worms to break down organic waste and turn it into nutrient-rich compost. By recycling kitchen scraps, yard waste, and paper products with the help of these little creatures, you can create a natural fertilizer that will enrich your gardens, houseplants, and even potted herbs.

Not only does vermicomposting divert waste from landfills, but it also reduces greenhouse gas emissions and conserves water and energy. Plus, it’s easy to set up and maintain, even for beginners. With a few essential tools and a small space, you can create your own vermicomposting system and reap the benefits of this sustainable practice.

Join the list

Join hundreds of our subscribers and be the first to know about new content and special offers.

Discover the steps, tips, and tricks to start vermicomposting today and join the movement towards a greener future. Let’s dig in and make a positive impact on our planet, one compost bin at a time.

What is vermicomposting?

Vermicomposting is a method of composting that employs worms to break down organic waste materials. The worms, specifically red wigglers (Eisenia fetida), are highly efficient in consuming and digesting organic matter, converting it into nutrient-rich vermicompost. Unlike traditional composting, which relies on microorganisms to decompose organic waste, vermicomposting utilizes the digestive system of worms to speed up the process and produce a superior quality compost.

The worms consume the organic waste, breaking it down into simpler compounds that are easier for plants to absorb. The process of vermicomposting produces a dark, crumbly substance known as vermicompost, which is rich in essential nutrients like nitrogen, phosphorus, and potassium. This nutrient-rich compost can be used to improve soil structure, promote plant growth, and enhance overall soil health.

Benefits of vermicomposting

Vermicomposting offers numerous benefits for both the environment and gardeners. Firstly, it reduces the amount of organic waste that ends up in landfills. By diverting kitchen scraps, yard waste, and paper products to your vermicomposting system, you are significantly reducing the volume of waste that would otherwise contribute to greenhouse gas emissions and take up valuable landfill space.

Additionally, vermicomposting helps to conserve water and energy. By using vermicompost in your gardens, you enhance the water-holding capacity of the soil, reducing the need for frequent watering. This not only saves water but also reduces the energy required to pump and distribute water throughout your garden.

Furthermore, vermicomposting enriches the soil with essential nutrients, promoting healthy plant growth and reducing the need for synthetic fertilizers. Unlike chemical fertilizers, vermicomposting releases nutrients slowly, ensuring a sustained supply of nutrients to plants over time. This not only benefits your plants but also reduces the risk of nutrient runoff, which can harm aquatic ecosystems.

How to start vermicomposting at home

Starting your own vermicomposting system at home is easier than you might think. Here are the steps to get you started:

  1. Choose the right location: Find a suitable spot for your vermicomposting bin. It should be a shaded area with a relatively stable temperature, ideally between 55°F and 77°F (13°C and 25°C).
  2. Select a container: You can use various containers for your vermicomposting system, such as plastic bins, wooden crates, or even repurposed containers. Ensure the container has drainage holes to prevent excess moisture buildup, and it should be large enough to accommodate your organic waste and worms.
  3. Prepare bedding material: Bedding material provides a comfortable environment for the worms and helps maintain moisture levels. Shredded newspaper, cardboard, coconut coir, or a combination of these materials can be used as bedding. Moisten the bedding material until it feels like a damp sponge.
  4. Introduce the worms: Purchase red wigglers from a reputable source or ask fellow vermicomposters for some starter worms. Add the worms to the bedding material and allow them to settle in for a day or two before feeding them.
  5. Feed your worms: Worms thrive on a diet of fruit and vegetable scraps, coffee grounds, tea bags, crushed eggshells, and other organic kitchen waste. Avoid feeding them meat, dairy, oily foods, and citrus fruits. Start with small amounts of food and gradually increase as the worms reproduce and consume more.
  6. Maintain moisture and temperature: Proper moisture and temperature are crucial for the worms’ well-being. Ensure the bedding remains moist but not soaking wet. If it becomes too dry, mist it with water. If it’s too wet, add dry bedding material. Monitor the temperature to ensure it stays within the ideal range mentioned earlier.

Choosing the right worms for vermicomposting

Not all worms are suitable for vermicomposting. The best worms for this purpose are red wigglers, scientifically known as Eisenia fetida. These worms are voracious eaters and reproduce quickly, making them ideal for processing organic waste efficiently. They can consume their body weight in organic matter every day, breaking it down into nutrient-rich vermicomposting.

Red wigglers thrive in the warm and moist conditions found in vermicomposting systems. Unlike earthworms, which primarily live in soil, red wigglers prefer decomposing organic matter and are well-adapted for life in confined spaces like a vermicomposting bin. They are also less likely to burrow deep into the soil, making them easier to manage in a controlled environment.

When sourcing red wigglers for your vermicomposting system, ensure they come from a reputable supplier. Look for healthy, active worms with a reddish-purple color. Avoid using earthworms or other worm species, as they are not as efficient at vermicomposting and may not survive in the conditions of your bin.

Check out my Composting blog!

Setting up a vermicomposting bin

Setting up a vermicomposting bin is a relatively simple process. Here is a step-by-step guide to help you get started:

  1. Choose a container: Select a suitable container for your vermicomposting system. It should have a lid to keep pests out and provide good ventilation. Plastic bins with tight-fitting lids are commonly used for vermicomposting.
  2. Drill holes: To ensure proper airflow and drainage, drill several small holes in the bottom and sides of the container. These holes will allow excess moisture to drain out and prevent the compost from becoming waterlogged.
  3. Create a bedding layer: Add a layer of moist bedding material to the bottom of the container. This will provide a comfortable habitat for the worms and help retain moisture. Shredded newspaper, cardboard, or a mixture of both can be used as bedding material.
  4. Add worms and organic waste: Once the bedding layer is in place, introduce the worms to the bin. Spread them evenly over the bedding material. Start by adding a small amount of organic waste, such as fruit and vegetable scraps or coffee grounds. Avoid overfeeding initially to give the worms time to adjust.
  5. Cover the bin: Place a damp burlap sack or a sheet of damp newspaper over the bedding and organic waste. This helps maintain moisture levels and creates a dark, cozy environment for the worms.
  6. Monitor and maintain: Regularly check the moisture levels in the bin. The bedding should feel damp but not waterlogged. Adjust the moisture content by adding dry bedding or misting with water as necessary. Keep the bin in a shaded area to maintain a stable temperature.
  7. Feed and harvest: As the worms settle in and start consuming the organic waste, gradually increase the amount of food you provide. Avoid adding large quantities of food at once to prevent odor and pest problems. Once the vermicompost is ready, it can be harvested by separating the worms from the compost.

What to feed your worms

Feeding your worms a balanced diet is essential for their health and the success of your vermicomposting system. Here are some suitable foods for worms:

  1. Fruit and vegetable scraps: Worms love a variety of fruit and vegetable scraps, including apple cores, carrot peels, lettuce leaves, and melon rinds. Chop or blend the scraps into small pieces to make them easier for the worms to consume.
  2. Coffee grounds and tea bags: Used coffee grounds and tea bags are excellent sources of nitrogen-rich organic matter. They provide essential nutrients and help create a favorable pH balance in the vermicomposting bin.
  3. Crushed eggshells: Rinse and crush eggshells before adding them to the bin. They provide calcium, which helps regulate the worms’ pH levels and aids in their reproduction.
  4. Shredded paper and cardboard: Paper products, such as newspaper, office paper, and cardboard, can be shredded and used as bedding material. They also provide carbon-rich material for the worms to consume.

It’s important to avoid certain foods that can be harmful to the worms or cause odor and pest problems. Do not feed your worms meat, dairy products, oily foods, or citrus fruits. These foods can attract pests, create foul odors, and disrupt the delicate balance of the vermicomposting system.

Maintaining and troubleshooting your vermicomposting system

Maintaining a healthy vermicomposting system requires regular monitoring and troubleshooting. Here are some tips to help you keep your system running smoothly:

  1. Monitor moisture levels: Check the moisture content of the bedding regularly. It should feel damp, like a wrung-out sponge. If it becomes too dry, mist it with water. If it’s too wet, add dry bedding material to absorb the excess moisture.
  2. Adjust feeding: Pay attention to the rate at which your worms consume the organic waste. If the waste is accumulating faster than the worms can process, reduce the amount of food you’re adding. On the other hand, if the worms are processing the waste quickly, gradually increase the feeding to match their appetite.
  3. Prevent pests: To deter pests, avoid adding oily or meat-based foods to the bin. Cover the food scraps with a layer of bedding material after each feeding. If you notice an infestation of fruit flies or other pests, bury the food scraps deeper into the bedding material and reduce the amount of food you’re adding.
  4. Harvesting vermicompost: When the vermicompost is fully matured, it will resemble dark, crumbly soil. To harvest the compost, stop feeding the worms for a week or two. The worms will migrate to the fresh food, allowing you to scoop out the vermicompost without disturbing them. Use the vermicompost to enrich your gardens, potted plants, or houseplants.

Harvesting and using vermicompost

Harvesting vermicompost is an exciting milestone in your vermicomposting journey. Here’s how to harvest and use your nutrient-rich vermicompost:

  1. Stop feeding the worms: About a week before you plan to harvest the vermicompost, stop adding food to the bin. This encourages the worms to migrate to fresh food, making it easier to separate them from the compost.
  2. Collect the vermicompost: Once most of the worms have moved to one side of the bin, carefully scoop out the vermicompost from the other side. Start from the top and work your way down, taking care not to harm the worms as you collect the compost.
  3. Separate worms from compost: To separate the remaining worms from the vermicompost, you can use various methods. One popular method is to create cone-shaped piles of vermicompost under bright light. The worms will move away from the light, allowing you to collect them from the top of the pile. Repeat this process until you have separated the majority of the worms.
  4. Use vermicompost in your garden: The harvested vermicompost is now ready to be used as a natural fertilizer. Mix it into your gardens, flower beds, or potted plants to improve soil structure, retain moisture, and provide essential nutrients to your plants. Vermicompost can also be used as a top dressing for existing plants or as a component in potting mixes.

Vermicomposting FAQs

  1. How long does vermicomposting take?

The time it takes for vermicomposting to complete depends on various factors, including the temperature, the quantity and quality of organic waste, and the number of worms in the system. On average, it can take anywhere from two to six months for the vermicompost to fully mature.

  1. Can I vermicompost in an apartment?

Yes, vermicomposting can be done in an apartment as long as you have a suitable container and a small space to accommodate it. Apartment dwellers can use indoor vermicomposting bins that are compact, odorless, and easy to maintain.

  1. Can I use vermicompost on all plants?

Vermicompost is suitable for a wide range of plants, including vegetables, fruits, flowers, and houseplants. However, some plants may have specific nutrient requirements or pH preferences, so it’s essential to research the needs of your specific plants before applying vermicompost.

  1. How do I prevent odors in my vermicomposting system?

Odors in a vermicomposting system are usually a sign of overfeeding or improper moisture levels. To prevent odors, ensure you are not overfeeding the worms and maintain proper moisture levels by monitoring the bedding’s dampness.

Embracing a greener future through vermicomposting

Vermicomposting is a simple yet powerful way to reduce waste, improve soil health, and create a greener future. By harnessing the power of worms, we can transform our organic waste into nutrient-rich vermicompost that nourishes our plants and enriches our gardens.

With the information provided in this beginner’s guide, you now have the knowledge and tools to start your own vermicomposting system at home. By diverting organic waste from landfills, conserving water and energy, and promoting sustainable gardening practices, you can make a positive impact on our planet, one compost bin

Processing…
Success! You're on the list.

If you enjoyed this blog , please LIKE, Follow, Share & leave me a comment! I love your feedback!

If you aren’t following me on Facebook & Instagram, go on over & give a LIKE & Follow me for daily tips & tricks for your home & garden!

Remember to eat fresh, shop local, & have a happy day,

Jean

Copyright Policy

All text and images on this site are copyright of For Dragonflies And Me. Unless otherwise noted, you may not use this content 

This post may contain affiliate links. If you choose to purchase through an affiliate link, I may receive a small commission at no additional cost to you. You can see my full disclaimer here.

The Green Thumb’s Guide to Successful Seed Starting:

5 Essential Tips for Growing a Thriving Garden

Introduction to seed starting

Spring is quickly approaching and I am getting super excited to get my hands in the dirt and starting my tiny little seeds. Seeds are such a miracle… so much power in such a tiny little package.

As a passionate gardener, there is nothing more rewarding than watching your plants grow from tiny seeds into flourishing greenery. Seed starting is a crucial step in the gardening process, allowing you to have full control over the quality and variety of your plants. In this guide, I will share with you five essential tips for successful seed starting, helping you grow a thriving garden that will make any green thumb proud.

The benefits of starting your own seeds

Starting your own seeds offers numerous benefits that go beyond the satisfaction of nurturing a plant from its earliest stages. Firstly, it allows you to choose from a wider variety of plant species and cultivars, ensuring a diverse and unique garden. Additionally, starting seeds indoors extends the growing season, giving your plants a head start and increasing the chances of a bountiful harvest. Moreover, it is a cost-effective approach, as purchasing seeds is generally more affordable than buying mature plants from a nursery. By starting your own seeds, you gain greater control over the entire gardening process, from seed selection to transplanting, resulting in a more fulfilling and rewarding experience.

Join the list

Join hundreds of our subscribers and be the first to know about new content and special offers.

Understanding the different types of seeds

Before you embark on your seed starting journey, it is crucial to understand the different types of seeds available. You all know I am 100% an heirloom gardener, however I want to provide information on all options.

Open-pollinated seeds, also known as heirloom seeds, are non-hybrid varieties that produce plants with consistent traits. These seeds can be saved and replanted year after year, preserving their unique characteristics. On the other hand, hybrid seeds are the result of cross-pollination between different plant varieties, resulting in offspring with specific desirable traits. While hybrid seeds may offer improved disease resistance or higher yields, they do not reproduce true to their parent plants. Lastly, genetically modified (GM) seeds have been genetically altered in a laboratory to introduce specific characteristics, such as pest resistance. It is important to note that GM seeds may raise ethical and environmental concerns, and their use is a subject of debate among gardeners.

Essential equipment for successful seed starting

To ensure successful seed starting, it is essential to have the right equipment at hand. First and foremost, you will need seed trays or containers to sow your seeds. These should have drainage holes to prevent waterlogging and promote healthy root development. Additionally, investing in a heat mat can provide consistent warmth to stimulate germination, especially for heat-loving plants. A grow light is necessary to provide adequate artificial light for your seedlings, especially in areas with limited natural light. A humidity dome or plastic wrap can create a greenhouse-like environment, trapping moisture and increasing humidity for optimal seedling growth. Lastly, a spray bottle or misting system will help you keep your seedlings properly hydrated without overwatering.

Choosing the right growing medium

Selecting the right growing medium is crucial for seed starting success. Avoid using garden soil, as it can contain pathogens and may not provide the right balance of nutrients and drainage. Instead, opt for a sterile seed starting mix or a blend of peat moss, vermiculite, and perlite. These mediums provide good aeration and moisture retention, promoting healthy root development. Consider adding organic matter, such as compost or worm castings, to enrich the growing medium with essential nutrients. Fill your seed trays or containers with the growing medium, ensuring it is moist but not soggy before sowing your seeds. Gently press the seeds into the soil, following the recommended sowing depth indicated on the seed packet.

Proper watering techniques for seedlings

Watering seedlings can be a delicate process, as overwatering or underwatering can lead to poor germination and weak plants. The key is to keep the growing medium consistently moist but not waterlogged. A good practice is to water from the bottom by placing your seed tray in a shallow tray filled with water. This allows the soil to absorb moisture from the bottom up, preventing excessive moisture on the surface. Alternatively, you can use a spray bottle or misting system to provide a fine mist of water directly to the soil surface. Monitor the moisture level regularly and adjust your watering frequency accordingly. As your seedlings grow, they will require more water, but be mindful not to saturate the soil. Remember, consistency is key in maintaining proper hydration for healthy seedling growth.

Providing adequate light for optimal growth

Light is essential for seedling growth and development. If you are starting seeds indoors, natural light may not always be sufficient, especially during the winter months. In such cases, using artificial grow lights is crucial to provide the necessary light intensity and duration. LED grow lights are the most energy-efficient and versatile option, emitting the ideal spectrum for plant growth. Position the lights a few inches above the seedlings and adjust the height as they grow taller. Keep the lights on for 12-16 hours a day, mimicking the natural daylight cycle. Regularly check the distance between the lights and the seedlings to prevent them from getting too close and causing heat stress. Remember, proper lighting is vital for strong, healthy seedlings.

Maintaining the right temperature and humidity levels

Temperature and humidity play a significant role in seed germination and seedling growth. Most seeds require a warm and consistent temperature to sprout. Using a heat mat or placing your seed trays in a warm area of your house can provide the necessary warmth for successful germination. Once the seedlings emerge, maintaining a slightly lower temperature can prevent weak, leggy growth. Aim for a temperature range of 60-75°F (15-24°C) during the day and slightly lower at night. Humidity is equally important, as it prevents the seedlings from drying out. A humidity dome or plastic wrap can help create a humid environment. Once the seedlings have developed their first true leaves, gradually remove the dome or plastic wrap to acclimate them to lower humidity levels. Proper temperature and humidity control will foster healthy growth and vibrant seedlings.

Transplanting seedlings into the garden

As your seedlings grow stronger and the weather warms, it is time to transplant them into your garden. Before moving them outdoors, it is essential to harden them off gradually. This process involves exposing the seedlings to outdoor conditions for a few hours each day, gradually increasing the time over the course of a week. This helps the seedlings to acclimate to the intensity of the sun, wind, and fluctuating temperatures. When selecting the transplant location, consider factors such as sunlight exposure, soil quality, and spacing requirements for each plant. Dig a hole slightly larger than the root ball of the seedling and gently place it in the hole. Backfill the hole with soil, firming it gently around the base of the plant. Water the transplanted seedlings thoroughly to settle the soil and remove any air pockets. With proper care and attention, your seedlings will establish themselves in their new home and continue to thrive.

Troubleshooting common seed starting problems

While seed starting can be a rewarding experience, it can also come with challenges. Here are some common problems you may encounter and how to address them:

  1. Damping-off: This fungal disease causes seedlings to collapse and die. To prevent damping-off, ensure good air circulation and avoid overwatering. Sterilize your containers and tools before use, and use a sterile growing medium.
  2. Leggy seedlings: Leggy seedlings are tall and weak, with elongated stems. This is often caused by insufficient light. Adjust the height and duration of your grow lights to provide adequate light intensity.
  3. Mold or fungus: Mold or fungus can develop on the soil surface or seedlings, indicating excessive moisture. Improve air circulation, reduce watering frequency, and use a fan to prevent mold growth.
  4. Lack of germination: If your seeds fail to germinate, it could be due to old or poor-quality seeds, incorrect sowing depth, or inadequate moisture and warmth. Ensure you are using fresh, high-quality seeds and follow the sowing instructions carefully.

Conclusion and final tips for a thriving garden

Starting your own seeds is a rewarding and cost-effective way to create a thriving garden. By understanding the different types of seeds, providing the right equipment, choosing the appropriate growing medium, and maintaining optimal conditions, you can ensure successful seed starting. Remember to water your seedlings carefully, provide adequate light, and acclimate them before transplanting. Troubleshoot common seed starting problems and adapt your approach as needed.

With these essential tips, your green thumb will lead you to a garden filled with healthy, vibrant plants. Enjoy the journey of seed starting and relish in the joy of nurturing your plants from tiny seeds to bountiful harvests.

CTA:

If you found this guide helpful, share it with fellow gardening enthusiasts. Happy seed starting and may your garden thrive!

Processing…
Success! You're on the list.

If you enjoyed this blog , please LIKE, Follow, Share & leave me a comment! I love your feedback!

If you aren’t following me on Facebook & Instagram, go on over & give a LIKE & Follow me for daily tips & tricks for your home & garden!

Remember to eat fresh, shop local, & have a happy day,

Jean

Copyright Policy

All text and images on this site are copyright of For Dragonflies And Me. Unless otherwise noted, you may not use this content 

This post may contain affiliate links. If you choose to purchase through an affiliate link, I may receive a small commission at no additional cost to you. You can see my full disclaimer here.

From Seed to Soil: 10 Persuasive Arguments for Adopting Organic Gardening Practices

What is organic gardening?

With gardening season quickly approaching, I wanted to continue with this months theme on organic gardening. We’ve already discussed the importance of micronutrients in soil and how it assists in plant growth & development. We’ve also looked at the benefits of living soil and how to create it.

Today I want to dive into what organic gardening really is. To me, it’s a life style. A way to embrace growing my own food. I believe there are some misconceptions on this topic, so I want to open the door to discussion with this post as well. Let me know in the comments below if you garden organically or not, and why. I don’t want to ever make anyone feel ashamed if they don’t. My personal philosophy is simple: I would rather you garden then not garden at all. Let’s learn from each other!

Organic gardening is a method of growing plants without the use of synthetic fertilizers, pesticides, or genetically modified organisms (GMOs). Instead, it relies on natural techniques and materials to maintain the health and fertility of the soil. Organic gardening emphasizes the importance of working with nature to create a sustainable and harmonious ecosystem in your garden.

One of the key principles of organic gardening is soil health. Organic gardeners focus on building and maintaining healthy soil by adding organic matter, such as compost and mulch, to improve its structure and fertility. By nurturing the soil, organic gardeners ensure that their plants have access to the nutrients they need to thrive.

Another core aspect of organic gardening is the avoidance of synthetic chemicals. Instead of relying on chemical fertilizers and pesticides, organic gardeners use natural alternatives to control pests and diseases and promote plant growth. This approach not only reduces the risk of harmful chemicals entering the food chain but also helps to protect beneficial insects and other wildlife.

Benefits of organic gardening

There are numerous benefits to adopting organic gardening practices. One of the most compelling reasons is the potential to grow healthier and more nutritious food. Organic produce is often richer in essential nutrients, such as vitamins and minerals, compared to conventionally grown counterparts. Furthermore, organic gardening allows you to have full control over what goes into the food you eat, ensuring that you and your family are consuming wholesome, chemical-free produce.

Join the list

Join hundreds of our subscribers and be the first to know about new content and special offers.

In addition to the health benefits, organic gardening also supports biodiversity and helps to preserve the environment. By avoiding the use of synthetic chemicals, organic gardeners create a safe haven for beneficial insects, birds, and other wildlife. This, in turn, helps to maintain a balanced ecosystem and promotes natural pest control. Organic gardening also reduces soil erosion and water pollution, as organic practices encourage the retention of water and the prevention of runoff.

Another advantage of organic gardening is the potential cost savings. While the initial investment in organic fertilizers and pest control methods may be higher, organic gardeners can save money in the long run. By creating healthy soil and promoting natural pest control, organic gardeners reduce the need for expensive synthetic inputs. Additionally, organic gardening often encourages the use of compost and other recycled materials, which further reduces costs.

Organic gardening statistics

The popularity of organic gardening has been steadily growing in recent years. According to a survey conducted by the National Gardening Association, approximately 8 out of 10 gardeners in the United States have either tried or are interested in organic gardening methods. This indicates a significant shift towards more sustainable and environmentally friendly gardening practices.

Furthermore, the organic food market has also experienced substantial growth. In 2019, the global organic food and beverage market was valued at $95.2 billion and is projected to reach $135.3 billion by 2025. This upward trend highlights the increasing consumer demand for organic products and the growing recognition of the health and environmental benefits associated with organic farming and gardening.

The environmental impact of organic gardening

Organic gardening has a positive impact on the environment in various ways. Firstly, organic practices promote soil health and fertility. By adding organic matter to the soil, such as compost and cover crops, organic gardeners improve its structure and water-holding capacity. This helps to reduce soil erosion and runoff, preventing the contamination of water bodies with harmful chemicals.

Secondly, organic gardening promotes biodiversity. By avoiding the use of synthetic pesticides and herbicides, organic gardeners create a safe habitat for beneficial insects, birds, and other wildlife. These creatures play a crucial role in maintaining a balanced ecosystem and naturally controlling pests. By supporting biodiversity, organic gardening contributes to the overall health and resilience of our environment.

Lastly, organic gardening reduces the carbon footprint associated with conventional agriculture. Organic practices encourage the use of renewable resources and minimize the reliance on fossil fuels. By avoiding synthetic fertilizers and pesticides, organic gardeners decrease the amount of energy required for production and transportation. This, in turn, helps to mitigate climate change and reduce greenhouse gas emissions.

Health benefits of organic gardening

Organic gardening offers numerous health benefits, both for the individuals practicing it and for the wider community. One of the primary advantages is the reduced exposure to harmful chemicals. By avoiding synthetic pesticides and fertilizers, organic gardeners minimize the risk of ingesting toxic residues that can be present on conventionally grown produce. This is particularly important for children, pregnant women, and individuals with compromised immune systems.

Furthermore, organic gardening promotes a healthier diet. Organic produce is often richer in essential nutrients, such as vitamins and minerals, compared to conventionally grown counterparts. Studies have shown that organic fruits and vegetables contain higher levels of vitamin C, iron, magnesium, and other beneficial compounds. By growing your own organic food, you can ensure that you and your family are consuming the most nutritious and chemical-free produce possible.

Additionally, organic gardening offers the opportunity for physical activity and stress reduction. Tending to a garden, whether it’s a small vegetable patch or a larger plot, involves regular physical activity, such as digging, planting, and weeding. Engaging in these activities not only provides exercise but also promotes relaxation and mental well-being. Being in nature and connecting with the earth has been shown to reduce stress levels and improve overall mood.

Organic gardening practices for beginners

If you’re new to organic gardening, getting started can seem daunting. However, with a few basic practices, you can embark on your organic gardening journey with confidence. Firstly, focus on building healthy soil. Add organic matter, such as compost, to improve soil structure and fertility. Consider using cover crops to protect the soil from erosion and add nutrients.

Secondly, choose organic seeds and plants. Look for varieties that are specifically bred for organic gardening and are resistant to common pests and diseases. This will reduce the need for chemical interventions later on. Additionally, practice crop rotation to prevent the buildup of pests and diseases in the soil.

Thirdly, embrace natural pest control methods. Use companion planting to attract beneficial insects that prey on garden pests. Introduce predator insects, such as ladybugs and lacewings, to keep pest populations in check. Consider using physical barriers, like row covers and netting, to protect your plants from pests.

Lastly, conserve water and promote water efficiency. Mulch your garden beds to retain moisture and prevent weed growth. Water deeply and infrequently, rather than surface watering, to encourage deep root growth. Consider installing a rainwater harvesting system to collect and reuse rainwater for irrigation purposes.

Organic pest control methods

Organic gardening relies on natural pest control methods to manage insect pests, diseases, and weeds. By avoiding the use of synthetic pesticides and herbicides, organic gardeners can protect beneficial insects and maintain a healthy ecosystem. Here are some effective organic pest control methods that you can implement in your garden.

One of the most popular organic pest control methods is companion planting. Certain plants, when grown together, can repel or deter pests. For example, marigolds are known to repel nematodes, while basil can deter aphids. By strategically planting these companion plants among your vegetable crops, you can reduce pest pressure naturally.

Another organic pest control technique is the use of beneficial insects. Ladybugs, lacewings, and parasitic wasps are examples of beneficial insects that prey on common garden pests. You can attract these beneficial insects to your garden by planting flowers that provide nectar and pollen, such as daisies and yarrow. Additionally, you can purchase and release beneficial insects to help control pest populations.

Physical barriers can also be effective in organic pest control. Row covers, netting, and screens can be used to physically exclude pests from reaching your plants. This method is particularly useful for protecting young seedlings or susceptible crops from insect damage.

Lastly, practicing good garden hygiene and sanitation is essential for preventing the spread of diseases. Remove and destroy any infected plant material to minimize the risk of disease transmission. Clean your gardening tools regularly to prevent the transfer of pathogens from one plant to another.

Organic fertilizer options

Organic gardening relies on natural sources of nutrients to nourish plants. Here are some organic fertilizer options that can help you maintain healthy soil and promote plant growth.

Compost is one of the most valuable organic fertilizers. It is made from decomposed organic matter, such as kitchen scraps, yard waste, and livestock manure. Compost enriches the soil with essential nutrients, improves soil structure, and enhances water-holding capacity. You can create your own compost pile or purchase compost from a local supplier.

Another organic fertilizer option is animal manure. Cow, horse, chicken, and rabbit manure are commonly used in organic gardening. However, it’s important to compost or age the manure before applying it to your garden to avoid burning or damaging your plants.

Cover crops also serve as natural fertilizers. They are grown specifically to improve soil fertility and structure. Legume cover crops, such as clover and vetch, fix nitrogen from the atmosphere and make it available to other plants. When the cover crop is turned into the soil, it releases nutrients and organic matter, enriching the soil for future plantings.

Lastly, organic liquid fertilizers, such as fish emulsion and seaweed extract, can be used to provide a quick boost of nutrients to your plants. These fertilizers are derived from natural sources and are rich in essential plant nutrients.

Organic gardening tools and equipment

When practicing organic gardening, it’s important to choose tools and equipment that align with the principles of sustainability and environmental stewardship. Here are some essential organic gardening tools and equipment for your garden.

Hand tools: Invest in high-quality hand tools, such as a garden fork, trowel, and hand cultivator. These tools are essential for planting, weeding, and maintaining your garden beds. Look for tools with wooden or bamboo handles and stainless steel heads for durability.

Mulching materials: Mulching is an important practice in organic gardening. Organic mulching materials, such as straw, leaves, and grass clippings, help to conserve moisture, suppress weeds, and enrich the soil. Keep a good supply of mulching materials on hand for your garden.

Compost bin: If you’re planning to make your own compost, a compost bin is a must-have. Choose a bin that is large enough to accommodate your composting needs and has good ventilation. Look for bins made from recycled materials for an eco-friendly option.

Watering cans or rain barrels: Conserving water is crucial in organic gardening. Invest in watering cans or set up rain barrels to collect and store rainwater for irrigation purposes. This helps to reduce water consumption and reliance on municipal water sources.

Garden gloves: Protect your hands and minimize contact with potentially harmful substances by wearing gardening gloves. Look for gloves made from natural materials, such as cotton or bamboo, for a sustainable option.

Conclusion

Organic gardening offers a multitude of benefits, from growing healthier and more nutritious food to preserving the environment and supporting biodiversity. By adopting organic gardening practices, you can create a sustainable and harmonious garden that nourishes both your body and the planet. Whether you’re a beginner or an experienced gardener, organic gardening is a rewarding and fulfilling journey that allows you to connect with nature and cultivate a greener future.

CTA: Start your organic gardening journey today and experience the joy of growing your own chemical-free, nutritious food. Embrace sustainable practices, support biodiversity, and contribute to a healthier planet. From seed to soil, let organic gardening be your path to a greener future.

Processing…
Success! You're on the list.

If you enjoyed this blog , please LIKE, Follow, Share & leave me a comment! I love your feedback!

If you aren’t following me on Facebook & Instagram, go on over & give a LIKE & Follow me for daily tips & tricks for your home & garden!

Remember to eat fresh, shop local, & have a happy day,

Jean

Copyright Policy

All text and images on this site are copyright of For Dragonflies And Me. Unless otherwise noted, you may not use this content 

This post may contain affiliate links. If you choose to purchase through an affiliate link, I may receive a small commission at no additional cost to you. You can see my full disclaimer here.

Discover the Hidden Benefits of Organic Living Soil: A Step-by-Step Guide to Enhancing Soil Health for Optimal Plant Growth

Introduction to Organic Living Soil

The other day I discussed The Essential Guide To Micronutrient Management in Soil: Boosting Plant Growth & Yield! I want to continue the conversation today discussing the plethora of benefits a living soil has to offer.

Organic living soil is a term that refers to soil that is teeming with life, rich in essential nutrients, and free from harmful chemicals. Unlike traditional gardening practices that rely on synthetic fertilizers and pesticides, organic living soil takes a holistic and sustainable approach to soil health. By understanding the benefits of organic living soil and learning how to build and maintain it, you can create the ideal environment for your plants to thrive.

Understanding the Benefits of Organic Living Soil

The benefits of organic living soil are numerous and far-reaching. First and foremost, organic living soil is teeming with beneficial microorganisms such as bacteria, fungi, and earthworms. These microorganisms play a crucial role in breaking down organic matter and releasing nutrients that are essential for plant growth. Additionally, organic living soil has a higher water-holding capacity compared to conventional soil, allowing plants to access moisture more effectively, even during dry periods. Furthermore, organic living soil is more resistant to erosion and compaction, preserving soil structure and preventing nutrient runoff.

Check out my blog post on the Importance of Composting and Essential How-to Guide!
You may also enjoy The Synergy of Permaculture!

The Importance of Soil Health for Optimal Plant Growth

Healthy soil is the foundation of a successful garden. Without proper soil health, plants struggle to absorb nutrients, develop strong root systems, and resist pests and diseases. Organic living soil provides the optimal conditions for plants to reach their full potential. By creating a balanced and nutrient-rich environment, organic living soil promotes vigorous growth, improves plant resilience, and enhances overall yield. Moreover, healthy soil acts as a carbon sink, helping to mitigate climate change by sequestering carbon dioxide from the atmosphere.

The Components of Organic Living Soil

Organic living soil is composed of various components that work together to create a thriving ecosystem. The primary component is organic matter, which can include compost, leaf litter, and other decaying plant material. Organic matter provides a food source for beneficial microorganisms and helps improve soil structure. Another essential component is minerals, which are naturally present in the soil and provide the necessary nutrients for plant growth. Additionally, organic living soil contains water, air, and a diverse range of microorganisms, all of which contribute to its overall health and fertility.

Join the list

Join hundreds of our subscribers and be the first to know about new content and special offers.

Step-by-Step Guide to Building Healthy Organic Soil

Building healthy organic soil is a gradual process that requires patience and dedication. Here is a step-by-step guide to help you get started:

1. Enhancing Soil Fertility through Composting and Mulching

Composting is an excellent way to recycle kitchen scraps, yard waste, and other organic materials into nutrient-rich soil amendments. To start composting, collect a mix of green materials (such as fruit and vegetable scraps) and brown materials (such as dried leaves and twigs). Layer these materials in a compost bin or heap, ensuring a balance of carbon and nitrogen. Regularly turn the compost to aerate it and speed up the decomposition process. Once the compost is dark, crumbly, and earthy-smelling, it is ready to be incorporated into your garden beds.

Mulching is another effective technique for improving soil fertility. Apply a layer of organic mulch, such as wood chips or straw, around your plants to suppress weeds, retain moisture, and regulate soil temperature. As the mulch breaks down, it adds organic matter to the soil, enriching its nutrient content.

2. Using Cover Crops to Promote Soil Health

Cover crops are plants that are grown specifically to improve soil health. They help prevent soil erosion, suppress weeds, and add organic matter and nutrients to the soil. Some common cover crops include legumes like clover and vetch, which fix nitrogen from the air and make it available to other plants. Others, like rye and buckwheat, have deep root systems that help break up compacted soil and improve drainage. Plant cover crops during fallow periods or in between cash crops to maximize their benefits.

3. The Role of Beneficial Microorganisms in Organic Living Soil

Beneficial microorganisms are the unsung heroes of organic living soil. They break down organic matter, release nutrients, and protect plants from pathogens. To encourage the growth of beneficial microorganisms, avoid using synthetic fertilizers and pesticides, as these can harm or kill them. Instead, focus on building healthy soil through organic practices like composting, mulching, and using organic soil amendments. Additionally, consider inoculating your soil with beneficial microbes by using products like compost tea or microbial inoculants.

4. Organic Soil Amendments for Improved Nutrient Availability

Organic soil amendments are a key component of organic living soil. They provide essential nutrients to plants in a slow-release form, ensuring a steady supply of nutrition throughout the growing season. Some commonly used organic soil amendments include compost, aged manure, bone meal, and seaweed extract. Before applying any amendments, it is recommended to conduct a soil test to determine the specific nutrient needs of your plants. This will help you choose the appropriate amendments and avoid over-fertilization.

Maintaining and Managing Organic Living Soil

Once you have established healthy organic living soil, it is essential to maintain and manage it properly. Here are some tips to ensure the long-term health and fertility of your soil:

  • Avoid over-tilling or compacting the soil, as this can disrupt its structure and harm beneficial microorganisms.
  • Rotate your crops regularly to prevent the buildup of pests and diseases and promote nutrient cycling.
  • Practice proper watering techniques to avoid waterlogging or drying out the soil.
  • Regularly monitor soil pH and nutrient levels to ensure they are within the optimal range for your plants.
  • Limit the use of synthetic fertilizers and pesticides, as they can harm beneficial microorganisms and disrupt the balance of the soil ecosystem.

Common Challenges and Solutions in Organic Soil Management

While organic soil management offers numerous benefits, it can also present challenges. Common issues include nutrient deficiencies, weed competition, and pest and disease pressure. However, there are several solutions available to address these challenges in an organic and sustainable manner. For nutrient deficiencies, apply appropriate organic soil amendments or use foliar sprays to provide a quick nutrient boost. To manage weeds, use mulch, hand-pulling, or organic weed control methods like vinegar sprays or flame weeding. For pest and disease control I highly recommend companion planting. This method encourages natural predators, introduce beneficial insects, or use organic pest control products.

Embracing Organic Living Soil for Sustainable and Thriving Gardens

Organic living soil is the backbone of sustainable and thriving gardens. By understanding its benefits, components, and management techniques, you can create an environment that fosters optimal plant growth, enhances soil health, and supports the overall well-being of your garden ecosystem. Embrace the power of organic living soil and embark on a journey towards a more sustainable and eco-friendly approach to gardening. Start small, experiment, and observe the transformative effects of organic living soil on your plants and the environment.

CTA: Start building your own organic living soil today and experience the hidden benefits it brings to your garden. Embrace sustainability, promote biodiversity, and grow healthy, nutrient-dense plants. Your garden and the planet will thank you!

Processing…
Success! You're on the list.

If you enjoyed this blog , please LIKE, Follow, Share & leave me a comment! I love your feedback!

If you aren’t following me on Facebook & Instagram, go on over & give a LIKE & Follow me for daily tips & tricks for your home & garden!

Remember to eat fresh, shop local, & have a happy day,

Jean

Copyright Policy

All text and images on this site are copyright of For Dragonflies And Me. Unless otherwise noted, you may not use this content 

This post may contain affiliate links. If you choose to purchase through an affiliate link, I may receive a small commission at no additional cost to you. You can see my full disclaimer here.

Are You Interested in Gardening & Cooking?

If you’d like to see more great information on cooking & gardening, along with a slew of terrific podcast guests discussing entrepreneurship and more, then head on over to my YouTube Channel.

Be sure to SUBSCRIBE so you don’t miss a beat! Here’s a video teaser friends!

Join the list

Join hundreds of our subscribers and be the first to know about new content and special offers.

If you enjoyed this blog , please LIKE, Follow, Share & leave me a comment! I love your feedback!

If you aren’t following me on Facebook & Instagram, go on over & give a LIKE & Follow me for daily tips & tricks for your home & garden!

Remember to eat fresh, shop local, & have a happy day,

Jean

Copyright Policy

All text and images on this site are copyright of For Dragonflies And Me. Unless otherwise noted, you may not use this content 

This post may contain affiliate links. If you choose to purchase through an affiliate link, I may receive a small commission at no additional cost to you. You can see my full disclaimer here.

Processing…
Success! You're on the list.

The Essential Guide to Micronutrient Management in Soil: Boosting Plant Growth and Yield

Understanding Micronutrients and Their Role in Plant Growth

Gardening season is right around the corner so I thought this would be a great time to discuss the benefits of organic gardening. As most of you know I am a die hard organic gardener and have been for over 20 years. We grew organically on our farm, and I’ve continued the practice in all of my home gardens since. I truly believe we are what we eat.

So where does gardening begin? In the soil.

How do I get healthy soil? That’s the question I’ll discuss today.

Micronutrients are essential elements required by plants in small quantities for their growth and development. While macronutrients like nitrogen, phosphorus, and potassium are needed in larger amounts, micronutrients such as iron, manganese, zinc, copper, boron, molybdenum, and chlorine are equally crucial for optimal plant growth.

Micronutrients play vital roles in various physiological and metabolic processes within plants. For example, iron is essential for chlorophyll production, zinc is involved in enzyme activation, and manganese aids in photosynthesis. Without these micronutrients, plants can exhibit deficiencies, leading to stunted growth, decreased yield, and susceptibility to diseases.

Signs of Micronutrient Deficiencies in Plants

Identifying micronutrient deficiencies in plants is crucial for effective management. Each micronutrient deficiency exhibits distinct symptoms that can help growers address the issue promptly. Common signs include yellowing or chlorosis of leaves, necrotic spots, poor root development, and reduced fruit production.

Iron deficiency, for instance, is characterized by interveinal chlorosis, with leaves displaying green veins and yellow areas in between. Manganese deficiency, on the other hand, leads to yellow spots on leaves and decreased photosynthesis. By recognizing these symptoms, farmers can implement the necessary interventions to correct the deficiencies and optimize plant health.

The Importance of Soil Testing for Micronutrient Management

Soil testing is a critical step in effective micronutrient management. It provides valuable insights into the nutrient composition of the soil and helps farmers determine the specific micronutrients lacking in their fields. By understanding the soil nutrient status, growers can make informed decisions regarding fertilizer application and avoid overuse or wastage.

Check out my blog post on the Importance of Composting and Essential How-to Guide!
You may also enjoy The Synergy of Permaculture!

Join the list

Join hundreds of our subscribers and be the first to know about new content and special offers.

Soil samples should be collected from various areas within the field to account for any variations in nutrient levels. These samples are then analyzed in a laboratory using specialized techniques to quantify the presence of different micronutrients. Based on the results, farmers can develop customized fertilization plans to rectify any deficiencies and ensure optimal plant nutrition.

Different Types of Micronutrient Fertilizers

Micronutrient fertilizers come in various forms, each with its own advantages and applications. These include chelated micronutrients, micronutrient granules, and liquid micronutrient solutions.

Chelated micronutrients are compounds where the micronutrient is bound to an organic molecule, enhancing its stability and availability to plants. They are typically applied to the soil or as foliar sprays. Micronutrient granules, on the other hand, are solid formulations that can be directly incorporated into the soil or applied as a top dressing. Liquid micronutrient solutions are easily soluble and can be applied through fertigation systems, ensuring efficient nutrient uptake by plants.

Choosing the appropriate type of micronutrient fertilizer depends on factors such as soil conditions, crop type, and nutrient deficiencies identified through soil testing. Consulting with agronomists or agricultural extension services can help farmers make informed decisions regarding the most suitable fertilizer for their specific needs.

Applying Micronutrient Fertilizers Effectively

Applying micronutrient fertilizers effectively is crucial to ensure maximum nutrient uptake by plants. There are various methods to consider, including broadcasting, banding, and foliar application.

Broadcasting involves spreading the fertilizer uniformly across the field, either by hand or using mechanical spreaders. This method is suitable for crops with extensive root systems and helps distribute the nutrients evenly throughout the soil. Banding, on the other hand, involves applying the fertilizer in concentrated bands near the plant roots. This method is advantageous when targeting specific areas or when soil conditions limit nutrient movement.

Foliar application involves spraying the micronutrient fertilizer directly onto the leaves. This method is effective in correcting deficiencies quickly and providing immediate nutrient uptake. However, it is important to ensure proper dilution and avoid excessive application, as this can cause leaf burn or other adverse effects.

The Impact of pH on Micronutrient Availability

Soil pH greatly influences the availability and uptake of micronutrients by plants. Different micronutrients have varying solubility and availability at different pH levels. For example, iron and manganese are more available in acidic soils, while zinc is more available in alkaline soils.

It is crucial to maintain the optimal pH range for the specific crop being grown to ensure adequate micronutrient availability. Soil pH can be adjusted through the addition of organic matter, lime, or sulfur, depending on whether the soil needs to be more acidic or alkaline. Regular soil testing and monitoring of pH levels are essential to avoid deficiencies or toxicities caused by imbalanced soil pH.

Organic Options for Micronutrient Management

Organic micronutrient management offers sustainable alternatives for growers looking to minimize synthetic inputs and promote soil health. Various organic sources can provide micronutrients to plants while improving soil fertility.

Compost and manure are rich sources of micronutrients and organic matter. They can be incorporated into the soil before planting or applied as mulch to gradually release nutrients over time. Additionally, rock powders such as basalt or granite can be used to supply micronutrients while also enhancing soil structure and mineral content.

Crop rotation and cover cropping are also beneficial practices for organic micronutrient management. These approaches help break pest and disease cycles, improve soil structure, and increase overall nutrient availability.

Common Mistakes to Avoid in Micronutrient Management

While micronutrient management is crucial for plant growth and yield, there are common mistakes that should be avoided to ensure optimal results.

One common mistake is applying micronutrient fertilizers without proper soil testing and identification of deficiencies. Without knowing the specific nutrient requirements of the soil, excessive or inadequate application can occur, leading to imbalances or wastage.

Another mistake is neglecting the impact of other nutrient interactions on micronutrient availability. Imbalances in macronutrients like nitrogen, phosphorus, and potassium can affect the uptake and utilization of micronutrients. It is essential to maintain a balanced nutrient profile to ensure optimal plant health.

Over-reliance on synthetic fertilizers is another pitfall to avoid. While synthetic fertilizers can provide immediate nutrient availability, they do not contribute to overall soil health and can lead to long-term degradation. Incorporating organic sources and sustainable practices is crucial for long-term micronutrient management.

The Key to Maximizing Plant Growth and Yield through Micronutrient Management

Micronutrient management is a crucial aspect of optimizing plant growth and maximizing yield. Understanding the role of micronutrients, recognizing deficiency symptoms, and conducting regular soil testing are essential steps in effective management.

By selecting the appropriate type of micronutrient fertilizers and applying them through suitable methods, growers can ensure maximum nutrient uptake by plants. Considering the impact of soil pH and exploring organic options for micronutrient management further enhances sustainable practices and soil health.

Avoiding common mistakes and implementing targeted interventions based on soil testing results can lead to significant improvements in plant health and productivity. The case studies provided demonstrate the positive outcomes that can be achieved through proper micronutrient management.

In conclusion, by prioritizing micronutrient management, farmers can unlock the full potential of their crops, resulting in healthier plants, increased yield, and sustainable agricultural practices.

CTA: To learn more about micronutrient management and how it can benefit your crops, contact our team of agronomists today.

Processing…
Success! You're on the list.

If you enjoyed this blog , please LIKE, Follow, Share & leave me a comment! I love your feedback!

If you aren’t following me on Facebook & Instagram, go on over & give a LIKE & Follow me for daily tips & tricks for your home & garden!

Remember to eat fresh, shop local, & have a happy day,

Jean

Copyright Policy

All text and images on this site are copyright of For Dragonflies And Me. Unless otherwise noted, you may not use this content 

This post may contain affiliate links. If you choose to purchase through an affiliate link, I may receive a small commission at no additional cost to you. You can see my full disclaimer here.

From Seed to Plate: Creating an Educational and Fun-filled Field Trip to the Local Farmers Market for Elementary School Children

The importance of educational field trips for elementary school children

Anyone who has followed me for any amount of time here or on my Facebook & Instagram pages knows I am an advocate for local food & farmers markets. I spent nearly 15 years behind the table as a vendor, and almost that long in front on the table as a market manager. I love the atmosphere. I love the vibe. I love supporting local. I recently started selling again at a local farmers market and I couldn’t be happier!
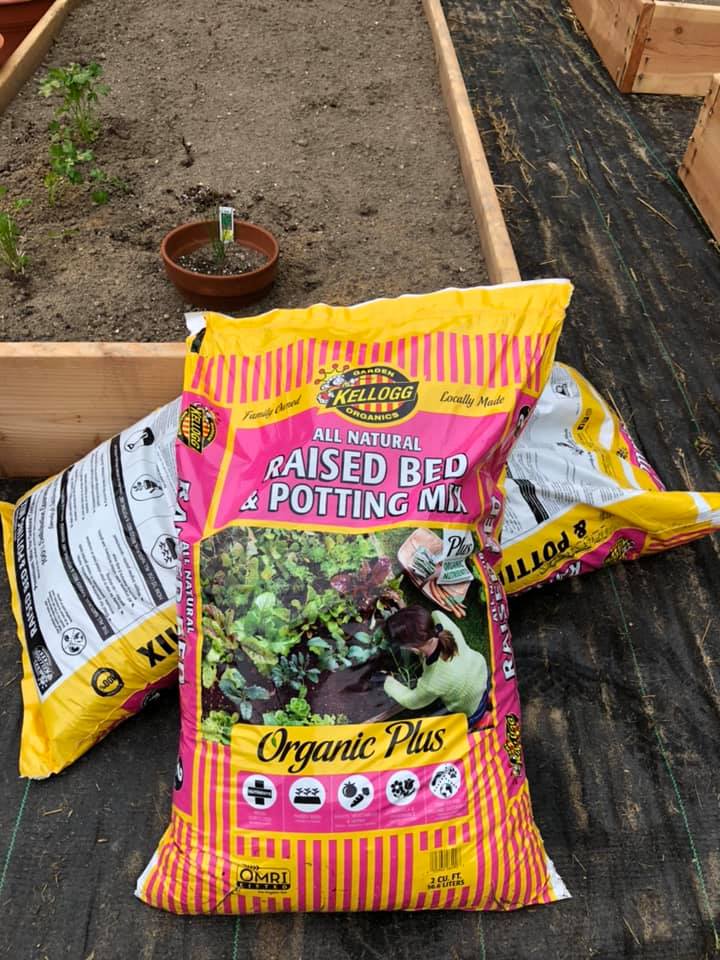
As a farmer and home gardener, I have always believed in the power of experiential learning. I was fortunate enough to have managed a farmers market where annual school field trips took place. It is so rewarding to see all these little future market goers learn where food really comes from.. or at least where it should come from.

Taking children out of the classroom and into the real world can have a profound impact on their understanding and retention of knowledge. One type of educational field trip that I highly recommend for elementary school children is a visit to the local farmers market. Not only does this outing provide a fun-filled day of exploration, but it also teaches children about the concept of farm-to-table and the importance of supporting local food producers.

Introducing the concept of farm-to-table and local food

Before embarking on the field trip, it is crucial to introduce the concept of farm-to-table to the children. This can be done through classroom discussions, videos, and interactive activities. Explain to them that the food they eat doesn’t magically appear on their plates, but rather comes from farms where farmers work hard to grow and harvest it. Emphasize the benefits of eating locally sourced food, including its freshness, nutritional value, and positive impact on the environment. Encourage the children to think about where their food comes from and how it reaches their table.

The benefits of visiting a local farmers market

A trip to the local farmers market offers numerous benefits for elementary school children. Firstly, it provides a hands-on experience that allows children to see and touch the fruits, vegetables, and other produce they have learned about in the classroom. This sensory experience helps to solidify their understanding of different types of food and their nutritional value. Additionally, visiting a farmers market exposes children to a wide variety of fresh and seasonal produce that they may not be familiar with. This can expand their palate and encourage them to try new foods, promoting healthy eating habits. Furthermore, a visit to the farmers market supports the local community and economy by directly purchasing from local farmers and vendors.

Where do you find a local farmers market? Here are two wonderful resources: MIFMA (Michigan Farmers Market Association) and Local Harvest!

To learn more about local farmers markets, check out my YouTube video where I interview Amanda Shreve, Executive Director for MIFMA below! Be sure to SUBSCRIBE

Planning and organizing a field trip to the local farmers market

Organizing a successful field trip to the local farmers market requires careful planning and coordination. Start by reaching out to the farmers market manager or organizer to discuss the possibility of a school visit. Most farmers markets are happy to accommodate educational field trips and may even offer special activities or tours for children. Once you have confirmed the date and time, communicate with parents to obtain permission slips and any necessary medical information. Arrange transportation to and from the farmers market, ensuring the safety and comfort of the children.

Preparing the children for the field trip

Before the field trip, it is essential to prepare the children for what they will experience at the farmers market. Discuss the purpose of the trip, review the concept of farm-to-table, and explain the various activities they will engage in. Encourage the children to come up with questions they would like to ask the farmers or vendors. Provide them with notebooks or worksheets to record their observations and findings during the trip. This pre-field trip preparation will enhance their engagement and make the experience more meaningful.

Activities and interactive learning opportunities at the farmers market

A well-planned field trip to the local farmers market should include a range of activities and interactive learning opportunities. Upon arrival, divide the children into smaller groups and assign each group a specific task or scavenger hunt. For example, one group could be responsible for identifying different types of fruits, while another group could focus on vegetables. Encourage the children to interact with the farmers and vendors, asking questions about the produce, its cultivation, and any other related topics. Some farmers markets may offer additional activities, such as seed planting or vegetable harvesting, which provide hands-on experiences for the children.

Teaching children about different types of produce and their nutritional value

One of the primary goals of the field trip is to educate children about different types of produce and their nutritional value. As the children explore the farmers market, guide them in identifying various fruits, vegetables, herbs, and other products. Explain the nutritional benefits of each item and discuss how they contribute to a healthy diet. Encourage the children to ask questions about the origins, growing conditions, and preparation methods of the produce. This interactive learning experience will broaden their knowledge of food and nutrition, empowering them to make healthier choices.

Engaging the children in hands-on experiences, such as planting seeds or harvesting vegetables

To foster a deeper connection between the children and the food they consume, incorporate hands-on experiences into the field trip. Depending on the activities offered at the farmers market, the children can engage in planting seeds, caring for plants, or even harvesting vegetables. These experiences allow the children to witness the process of food production firsthand, from seed to plate. They will gain a greater appreciation for the effort and care that goes into growing the food they enjoy. Additionally, hands-on activities promote critical thinking, problem-solving, and teamwork skills.

Join the list

Join hundreds of our subscribers and be the first to know about new content and special offers.

Incorporating fun-filled games and challenges into the field trip

To make the field trip to the local farmers market even more enjoyable for the children, incorporate fun-filled games and challenges throughout the day. For example, you could organize a scavenger hunt where the children have to find specific fruits, vegetables, or other products. Alternatively, you could create a taste-testing station where the children can sample different foods and guess their names or nutritional benefits. These games not only entertain the children but also encourage active participation and reinforce the knowledge they acquire during the trip.

Reflection and follow-up activities after the field trip

After returning from the field trip, it is crucial to provide time for reflection and follow-up activities. Encourage the children to share their experiences, thoughts, and observations with the class. Have them write or draw about their favorite moments or the most interesting thing they learned. This reflection helps solidify their understanding and allows them to process the information they absorbed during the trip. Additionally, consider organizing a cooking or recipe-sharing activity where the children can use the knowledge gained from the farmers market to create healthy and delicious dishes.

Partnering with local farmers and vendors for future educational opportunities

Building a strong relationship with local farmers and vendors opens the door for future educational opportunities. Consider inviting them to the school to give guest lectures or demonstrations on topics related to farming, sustainable agriculture, or food production. Arrange for the children to visit a local farm, allowing them to witness the entire farm-to-table process from start to finish. These ongoing partnerships provide valuable learning experiences and reinforce the lessons taught during the field trip to the farmers market.

Evaluating the success of the field trip and making improvements for future trips

To ensure the success of future field trips to the local farmers market, it is essential to evaluate the effectiveness of the current trip and make any necessary improvements. Gather feedback from the children, parents, and teachers involved in the excursion. Consider their opinions on the activities, organization, and overall experience. Use this feedback to refine the itinerary, enhance the learning opportunities, and address any concerns or suggestions raised. By continuously evaluating and improving the field trip, you can provide the best possible educational experience for elementary school children.

A field trip to the local farmers market offers elementary school children a unique and enriching educational experience. It introduces them to the concept of farm-to-table and teaches them about the importance of supporting local food producers. By planning and organizing the trip effectively, preparing the children beforehand, and incorporating various activities, the field trip becomes a fun-filled adventure that promotes hands-on learning and healthy eating habits. Through partnerships with local farmers and vendors, the educational opportunities extend beyond the day of the trip. By evaluating and improving the experience, we can create a lasting impact on the children’s understanding of food and their connection to the local community.

CTA: If you are an educator or parent, I encourage you to consider organizing a field trip to your local farmers market for elementary school children. The educational benefits and fun-filled experiences are invaluable in fostering a deeper understanding of food, nutrition, and the importance of supporting local farmers. Take the first step and start planning your own farm-to-table adventure today!

Processing…
Success! You're on the list.

Who doesn’t love a good idea?

Be sure to check out my Pinterest page for loads of great ideas!