
“The glory of gardening: hands in the dirt, head in the sun, heart with nature. To nurture a garden is to feed not just on the body, but the soul.”
Alfred Austin

I can still remember my grandmother’s cannas towering up against the back of our house. I can still see the tall, red blossoms amongst the elegant tropical leaves. Every year she planted the rhizomes she’d saved from the year before. She just loved those tall, blazing red blooms.
As an adult I also have grown to love them and have saved my own for years. And believe me, there is always plenty to share! Today I want to share my technique for harvesting & storing my canna’s, along with another that you may prefer.

1. Once your canna’s leaves have died back- generally after the first light frost, cut back the leaves leaving about 4-6 inches of the stem.
NOTE: Do not allow your cannas to suffer a hard frost otherwise they will more than likely parish.

2. Carefully begin to dig up the rhizomes with your shovel.
NOTE: Use a large pointed spade or garden fork and cut into the soil straight down rather than angling in. This will help prevent cutting any of the rhizomes.

3. Carefully lift the thick mound of roots from the soil. You may need to work the soil from all sides with the shovel to lift them without damaging them.

4. Next, carefully pull the rhizomes apart trying not to snap them. Don’t worry if any of them do snap, you can still store them.
Once they are separated, lightly rinse off the dirt with a misting spray of water without rubbing them.


Did you know: Cannas are commonly referred to as a bulb although they are not a true bulb.
Cannas multiply beneath the soil from a fattened extension of the stalk called a rhizome.
Fun Fact: Although canna’s are a tropical plant, they can be overwintered in zones north of zone 8 if brought in, or by digging up the rhizomes and storing.

NOTE: Rhizomes that may have been cut by your shovel are still salvageable.
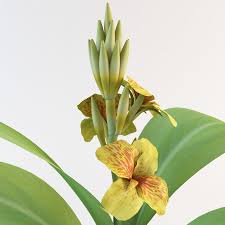


There are many types of canna’s varying in height, blossom & leaf color. Blossoms range from all shades of reds, corals, oranges, & yellows. Heights can range from 2 feet up to 12 feet tall… which are simply magnificent!
However, the most intriguing element these beauties offer are their wide range of leaf color. My personal favorites are the green variegated. Other colors include purplish-red, bright red or green, as well as a variegated red. The varieties offered are sure to please any gardener.
Now lets talk storage!

Digging up & storing over winter
Once you’ve dug up your cannas according to my instructions above, you must cure them before storage begins.
To do this simply air-dry them in a dry, warm location for seven to ten days. This can be done in your garage or in an outdoor shed. The key is to keep them dry. Curing toughens the outer skins in order to help the rhizomes resist rot during storage.
Once they are cured, you will take the rhizomes and wrap them individually in newspaper or in paper lunch bags. You can then place them in a cardboard box for winter storage. Keeping them in a dry basement, in a garage as long as it doesn’t freeze, or even a closet will work. Temperatures should remain above 40 degrees, but not get over 60.

Keeping your potted cannas indoors over winter
If you planted cannas in your summer garden pots, you can bring them in to over-winter! This is a great way to save them if you have the room. Depending on how many you have, it may be easier to do the first method, or split them up if you have several.
Simply cut the stems back to the soil. Keep them in the same conditions as the digging up method.

Monitoring your rhizomes throughout the winter!
Over the winter months, periodically inspect the bulbs to make sure they are not rotting. Inspecting does take a bit of time, but you won’t be disappointed if you do this just once a month.
Marking it on your calendar helps to remember.
Once spring arrives, carefully inspect all your rhizomes discarding any bad ones… & then happy gardening planting the rest!
Losing a few over the winter is normal as bad spots can easily be missed. If 70 to 80 percent of them make it, you did a great job!
If you enjoyed this blog, please LIKE, Follow & of course Share! Let me know what you think ! I love your feedback!
If you aren’t following me on Facebook go on over & give it a like & follow me for daily tips & tricks for the home and garden! https://www.facebook.com/profile.php?id=100049613212778
Happy Day,Jean
